

For this encounter, we recommend 2 tanks, 4 healers, and 14 DPS. We also recommend using Bloodlust on pull.
We’re going to be completely up front about this – you will wipe a lot on this boss. Almost every single person in the raid WILL be the singular reason for a wipe, multiple times. There’s no two ways about that. Keep your heads cool, don’t flame your guildies, and get through it together. The boss itself is not difficult, but you will wipe a LOT to the mythic soccer mechanics.
Here are two public Weakauras that may aid you. The first is a kick guider, the second is an interrupt rotation WA for the adds. These worked decently well at the time of writing.
Weakaura – Kick Guider
Weakaura – Interrupt Rotation
Firstly, the non-soccer related mechanics have minimal changes, essentially just increased damage. The entirety of the difficulty and wipes to this fight is related to soccer. As such, that’s what the guide will focus on.
When it comes to handling the soccer mechanics, there’s two portions to focus on – the actual 5 assigned teams of 3 playing soccer, and the assigned 3 teams of 3-4 people for interrupts. For your kicking teams, make sure you assign which one of the Void Ritual soak orbs each person is supposed to soak.
For the interrupts – every single time a kick occurs on the ball, an Awakened Terror add spawns. As we’ll talk about below, we recommend ensuring you only ever do 3 kicks per soccer round, so there’ll always be 3 adds. YOU WILL NEED AN INTERRUPT ROTATION, as they chaincast a raid-wide fear. A missed interrupt likely results in a raid wipe. Each of these needs an assigned interrupt rotation with 4 people in the rotation for each add. Use an interrupt WA, either the one linked above or a different one, to assign and track who should be doing which interrupts. This is a primary mechanic and will require attention to detail.
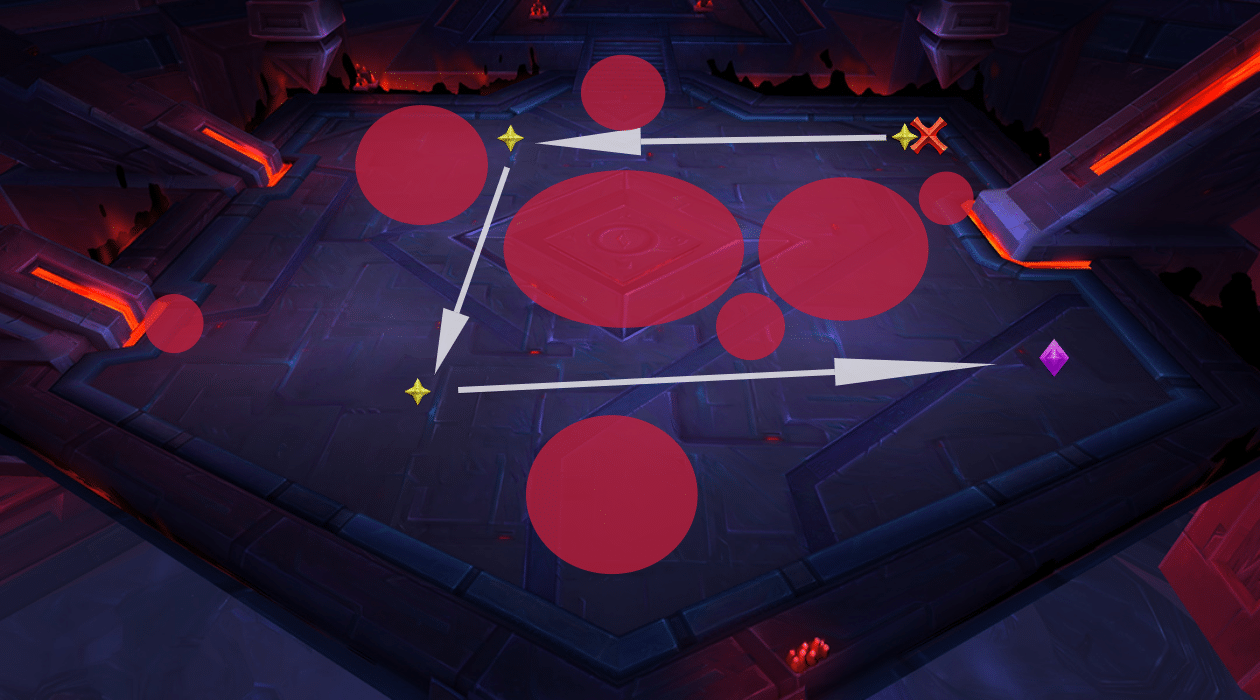
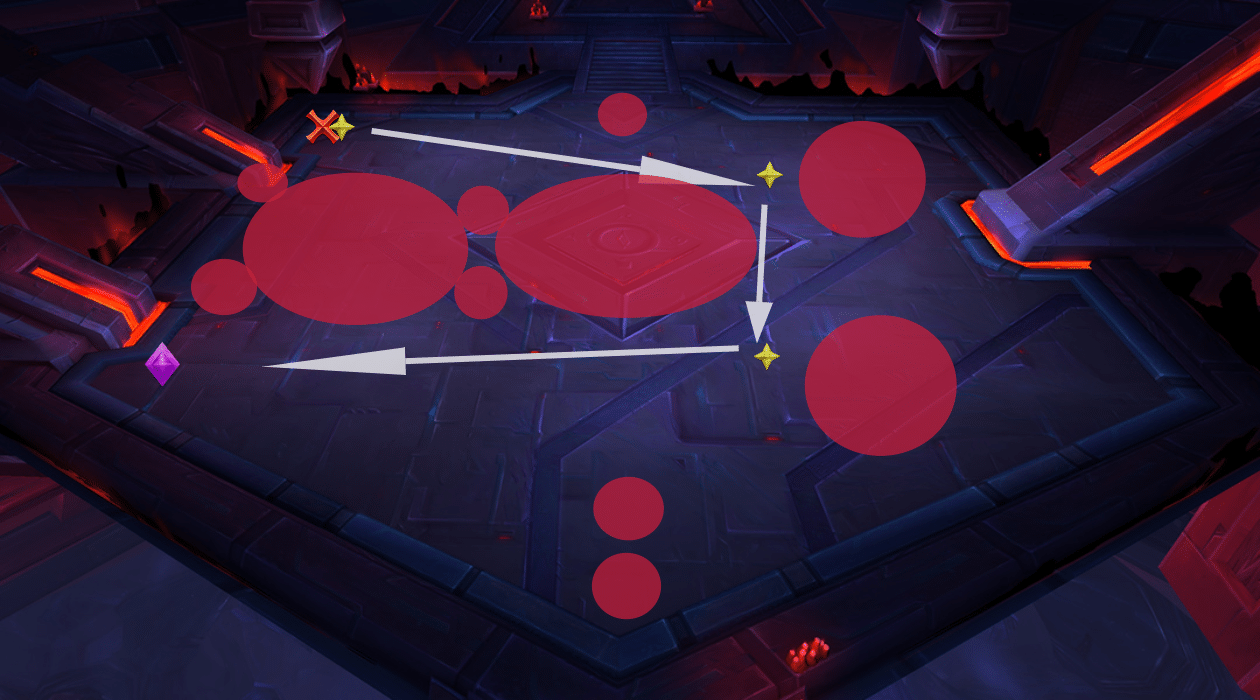
For soccer: the idea is straightforward. Each soccer phase, you need to kick the ball exactly 3 times. No more, no less. The execution is difficult. There are 3 map layouts of Obelisks, and they will be in exactly the same order every pull. These then repeat. Set 1 = Map 1, Set 2 = Map 2, Set 3 = Map 3, Set 4 = Map 1, Set 5 = Map #2. The only thing that can change is which portal the ball itself will spawn at. We’ve included diagrams of the maps below. PLEASE NOTE – WE ARE NOT SKILLED ARTISTS. THESE ARE ESTIMATIONS, AND MAY NOT BE COMPLETELY EXACT. THE LOCATIONS ARE MEANT TO SHOW YOU WHERE YOU NEED TO BE, BUT THE ACTUAL EXACT LOCATIONS MAY BE SLIGHTLY OFF. The X and Diamond represent where the portals are. For illustration purposes, we’ll show Diamond as being the starting point for the ball. You WILL experience the X location being the ball sometimes.
Map 1:
Map 2:

Map 3:
As far as the rest of the raid is concerned, in general you want to have the boss near where the ball starts every time. The tanks should be moving the boss to follow the ball, stopping where the adds are. When the add you’re on top of dies, move to the next one. Continue moving throughout the room to follow these adds until the 3 of them are dead. While that’s going on, obviously the assigned interrupt teams need to ensure they never miss an interrupt on an add.
Don’t die to torment, blow up the boss. Once teams 1 and 2 have gotten their kicks down solidly, swap them with teams 4 and 5. These teams will share the same maps, so moving teams 4 and 5 up lets them practice earlier on. This will make your wipe progression seem odd, going from sub 40% wipes to 75% wipes, but it’s absolutely worth doing. Other than that, there isn’t much to say. As a side note, if one of your tanks has a viably geared Protection Paladin, you should consider bringing it in for this fight. Avenger’s Shield may be the single best ability in the game for dealing with add interrupts.
Again, this will be a tedious progression. Keep your raid calm, don’t flame each other. Every kicker will need to try and practice several times.