Hungering Destroyer
Big ol’ blue dude who tries to pummel you into the ground. Single phase fight, but the boss has a special 100 energy ability as well.
Abilities
- Gluttonous Miasma
- Debuff applied to a few raid members, lasts 24 seconds
- Affected players take 4300 Shadow every 1.5s
- These players also can not be healed
- However, they leech health from nearby players.
- Leech 2500 health every 1s from all allies within 5 yards
- Expunge
- Boss puts a debuff on every player in the raid. Applies a circle to everyone
- Circle size is based on the player’s missing health. Lower HP, bigger circle.
- Circle then explodes, dealing 11k Shadow to anyone within the circle
- Leaves behind an Obliterating Rift
- Little blue orb on the ground
- If you touch an orb it’ll pop, and you’ll take 9300 Shadow damage
- Volatile Ejection
- Boss marks a few target players
- After about 5s, he shoots blue missiles at the marked players
- Deals 9300 Shadow to the marked players, and anyone else hit
- Also causes players to take 500% increased damage from subsequent Volatile Ejections for 35s
- Desolate
- Simple AoE ability. Deals 12k Shadow to the raid
- Overwhelm
- Tank smash, deals 37k Physical to the active tank
- This appears as a cast, so make sure you have Active Mitigation up
- Hungering Strikes
- Each melee swing, the boss leeches 3900 health from the target
- This effect is increased in power by 8% with each subsequent melee, stacking
- Resets on a tank swap
- Consume
- Cast when the boss hits 100 Energy
- Big AoE suck ability. Sucks you towards the boss
- Leeches 26k HP from all players every 2s for 6s
- Power of this is reduced based on distance from the boss
Strategy
- This boss is relatively straightforward honestly, as long as you handle Gluttonous Miasma properly and have good positioning
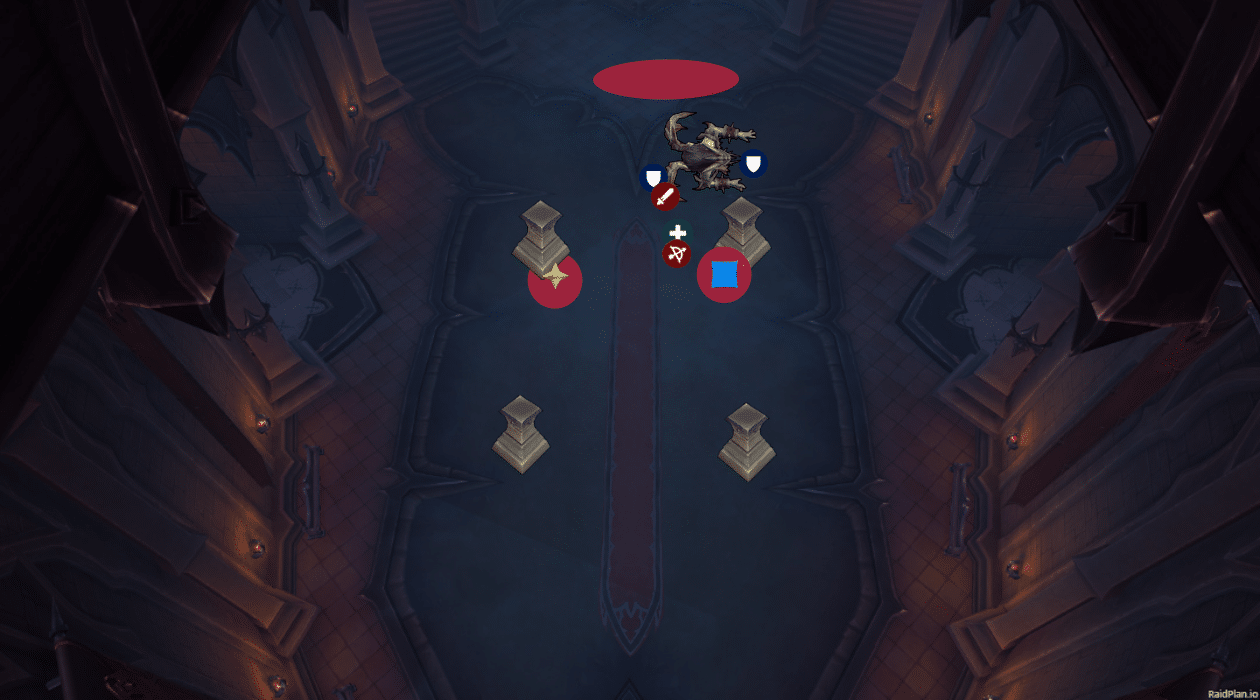
- Have the boss slightly off-center, a bit towards the southern end of the room
- Put 3 markers down between where you’ll hold the boss, and the southern wall
- These markers will be for the Volatile Ejections
- You only have about 5s from the time the marks go out, until the missiles fire. If a player can’t reach a marker, that’s OK, just call it out and make sure nobody extra gets hit
- Everyone should be relatively close to the boss. There isn’t really a reason to spread out significantly for most of the encounter
- This’ll also help make handling the Volatile Ejections easier
- When Expunge goes out, everyone should spread about 8 yards from each other. Healers need to get everyone as close to full as possible, to minimize the size of the explosions
- Move away from your orbs. If you are high health, you can run back over your orb to clear it, but certainly don’t have to
- Gluttonous Miasma players should move a bit out of the group so they aren’t leeching from everyone
- With the current tuning, one player can “feed” someone affected with Gluttonous Miasma by themselves
- You should pre-assign 3 people as the “feeders,” and 2 backups in case a feeder gets the debuff
- You can put markers down to have set locations for the Miasmas as well, so they don’t get overlapped
- It is also possible to have 2 or more Miasma targets leeching off the same person. To do this, you’ll need to Venn Diagram the circles
- Risky, but certainly doable
- Tanks should taunt every 5-8 stacks of Hungering Strikes. It won’t really be dangerous by that point, but it’ll keep the Leech amount the boss is gaining fairly low
- The current offtank should be running around the room clearing as many of the orbs from Expunge as possible
- They only deal 9k damage each, so it shouldn’t be too terribly difficult for the offtank to clear most, if not all, of them
- When the boss is at 90% energy, the tanks should move him closer to the wall
- At 100%, he’ll cast Consume. Everyone should run to the opposite side of the room during this
- Use movement cooldowns here to get as far away as possible
- Remember, the further away you are, the less he’ll leech. As such, prioritize everyone in the raid being as far as possible
- Once Consume ends, just go back to the boss. Rinse and repeat until there’s purples to loot!
Positioning
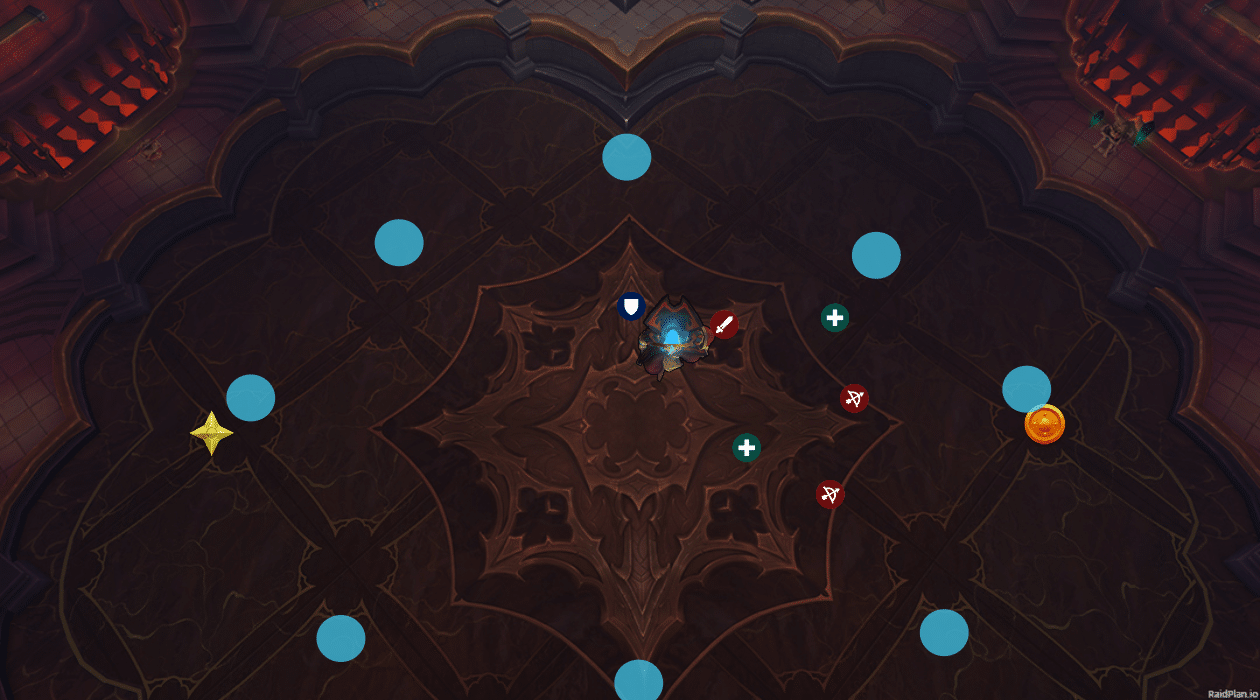
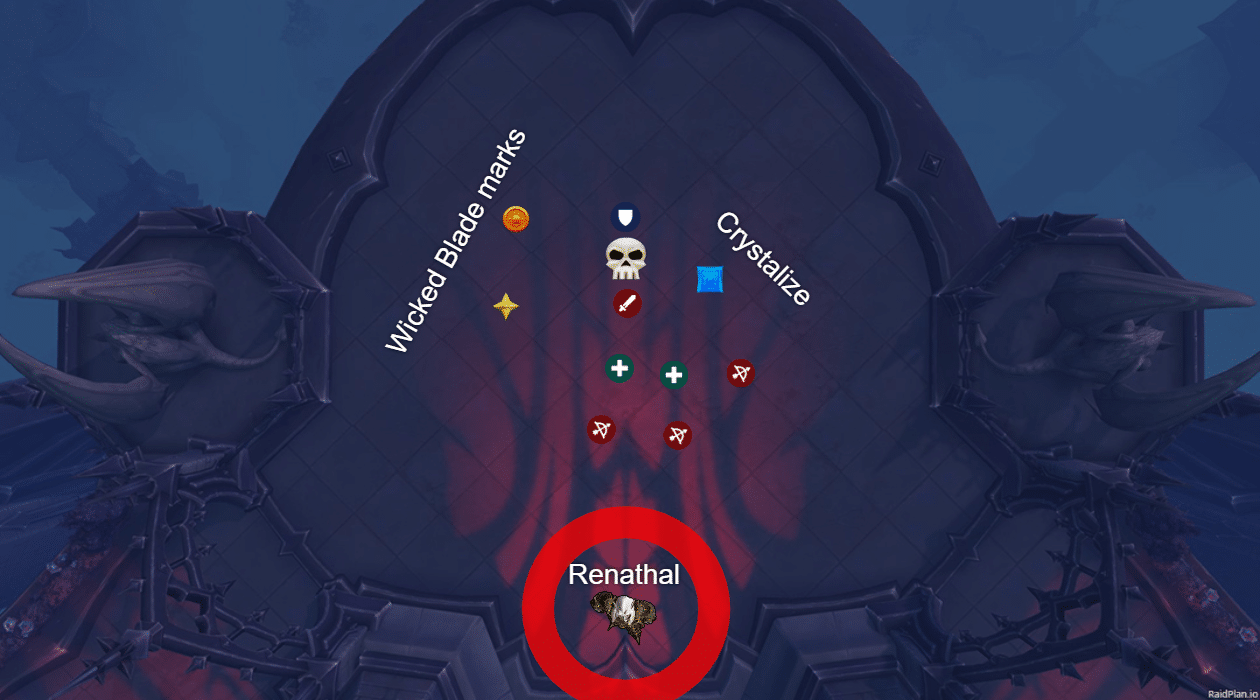
Standard
In general, keep the boss near-ish the edge of the room. In the picture below, X, Star, and Circle are for the Volatile Ejections. The raid is positioned on the other side of the boss. Triangle and Diamond are locations for Gluttonous Miasma. Those are just an example, you don’t need pre-set spots for Miasmas, just wanted to provide an example location. Nobody should be too far from the boss. DO NOT FORGET to spread out heavily for the Expunge

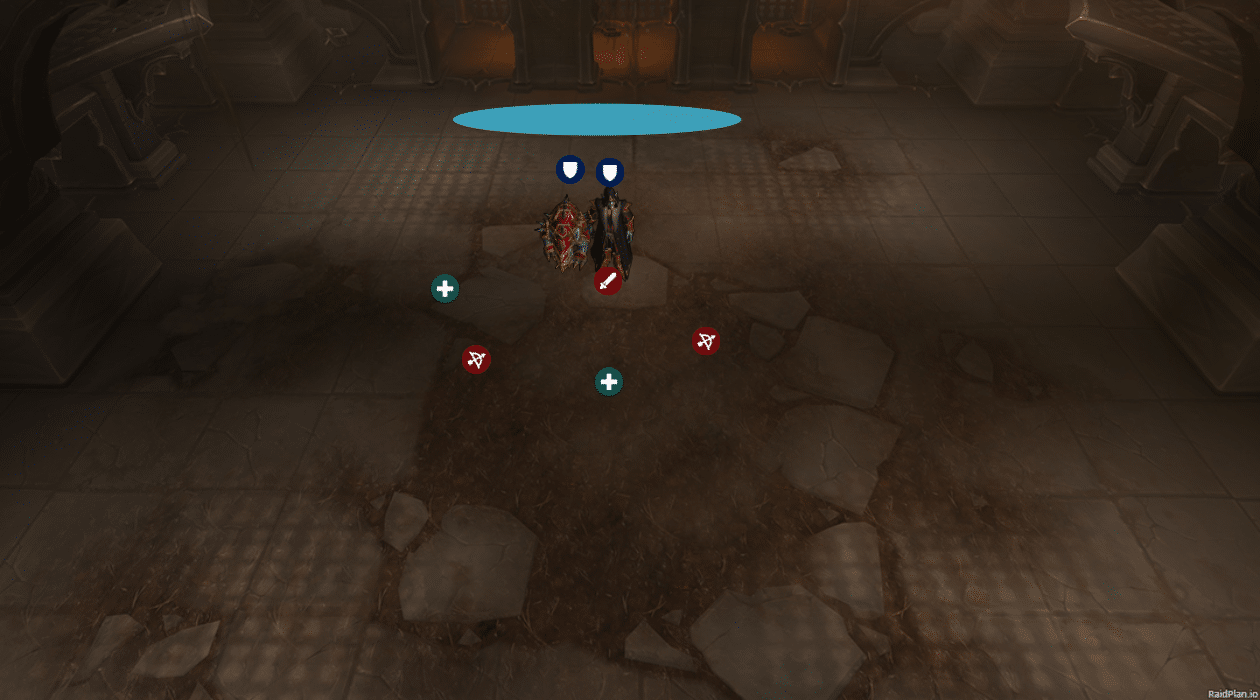
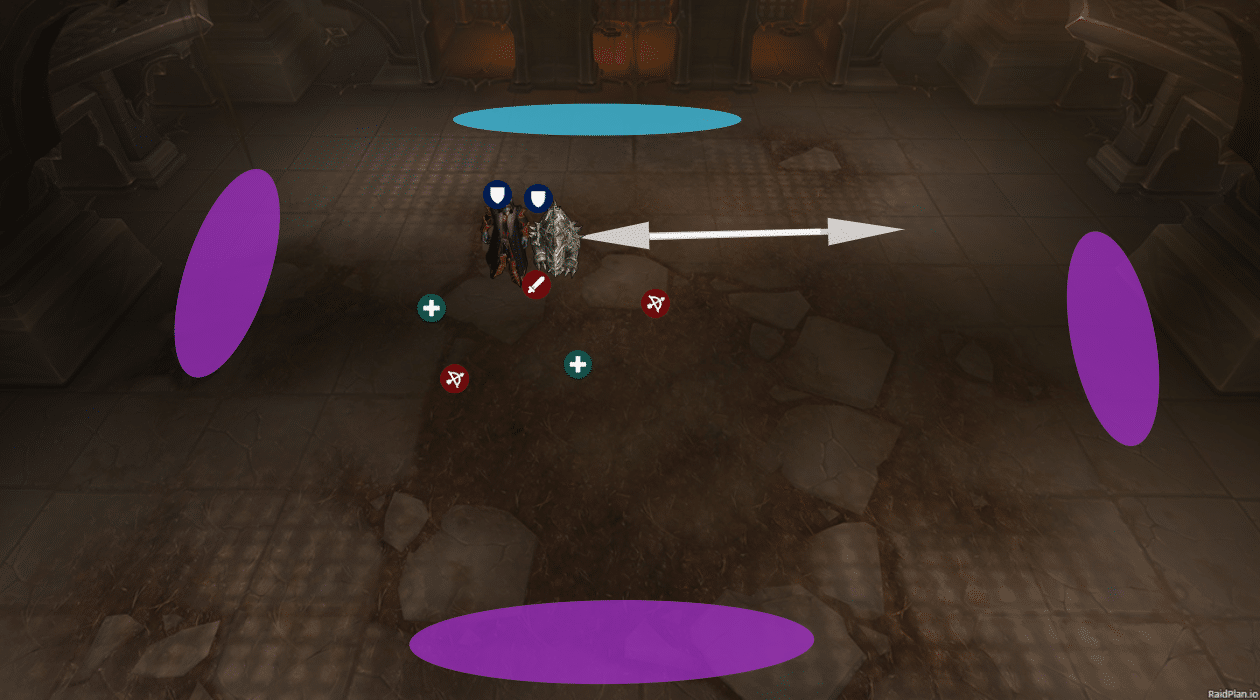
Consume
This one’s pretty straight forward. Boss does giant suck AoE then kills anyone within a circle. Run away.