July 9th, 2021

Written and produced by Crzypck
Special thanks to our consultant: Tagzz
← Back to Guides
Sylvanas Windrunner
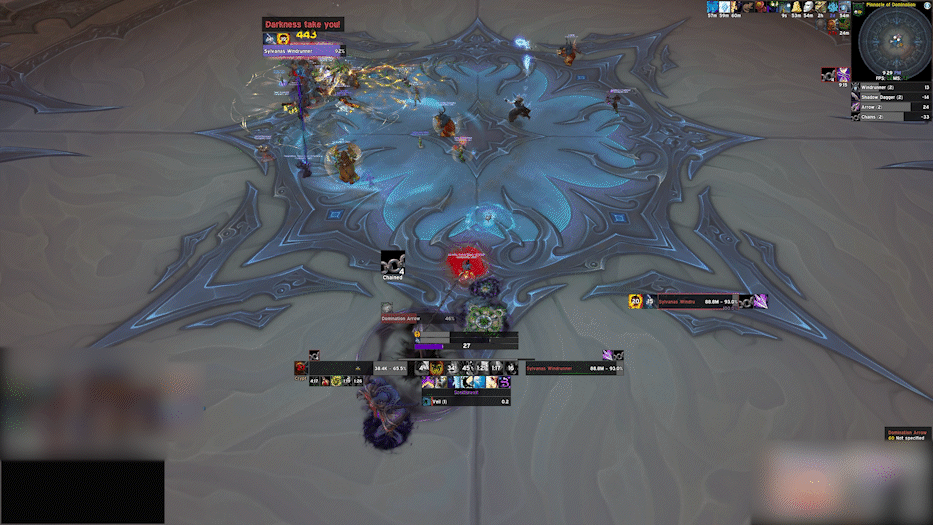
This is a multi-stage encounter. Think the Jaina encounter, but on steroids. You’ll start at the top of Torghast, then running along giant chains, then in Oribos. There’s a whole hell of a lot going on in this fight.
Phase 1 Abilities
- Windrunner
- Ability description written by a Sylvanas simp
- Sylvanas basically bounces all over the platform, shooting the raid with several abilities
- Melee, don’t fret! Her hit box stays wherever she started, regardless of where on the platform she appears
- Withering Fire
- Shoots a volley of arrows, hits several random people for 6k Shadow damage
- Leaves a permanent DoT on the affected players, deals 3k Physical every 3 seconds
- Bleed effect, can be removed by anything that removes Bleeds
- Desecrating Shot
- Puts down large lines of small swirlies
- It’s an absolute shitton of swirlies to dodge
- Anyone in a swirlie when it explodes takes 25k Shadow damage
- Shadow Dagger
- Throws blades in a random direction, applying a DoT to anyone hit
- Deals 5k Shadow per second for 9 seconds

- Domination Chains
- Puts down a bunch of purple swirlies
- Standing in a swirlie when it explodes deals 31k Shadow damage
- Several swirlies leave behind giant Domination Arrows in the ground
- Each of these targets a random player, and attaches a chain to them
- Chain pulls them towards the arrow, and deals 2k Shadow damage per second
- Pull increases in strength by 30% per second
- If you get pulled within 4 yards of the arrow, it explodes and deals lethal damage to you
- These have a health pool, and need to be killed before the affected players are pulled to their deaths
- The one benefit, though, is that being chained removes all stacks of Barbed Arrow

- Veil of Darkness
- Puts a big fog puddle on the ground, deals 18k shadow damage when it explodes
- Also absorbs 29k healing every half second
- Has 5 “stacks” it’ll try to apply to players
- Just run out of this
- Wailing Arrow
- Launches arrow at the current tank, deals 20k Shadow damage
- Also deals 58k shadow damage to anyone within the purple swirl, and dropoff damage to everyone else
- Puts animation on the targeted player before she actually starts to cast it, giving you time to get out and get away from the group
- Ranger’s Heartseeker
- Gains 1 stack every 5 seconds
- At 3 stacks, she shoots a Ranger Shot at the tank instead of a normal shot
- This is 3 arrows fired rapidly
- Deals 25k Physical AND 12k Shadow per arrow
- Also applies Banshee’s Mark debuff
- Deals 2k Shadow per second for 18s per stack
- You’ll obviously get 3 stacks of this, since it’s 3 shots in succession
- Blow a tank CD when this happens
- At 84% HP, the boss starts an intermission
Intermission
- Puts a Domination Arrow on every player
- All these need to be killed
- Rive
- Shoots massive lines of bad
- Being hit by the line deals lethal damage
- Also throws debris along the line of bad, leaves swirlies
- Don’t get bit by swirlies
- Cast 8 times, then she casts Banshee Wail
- Dodge all the lines & swirlies

- Banshee Wail
- Small circles around the entire raid
- Deals damage to anyone within the circle, based on the health of that circle’s target person
- The higher health the targets had, the less damage being hit by this does
- Also interrupts & silences for 6 seconds to anyone hit

Stage 2
- Sylvanas dips, and this is a gauntlet phase. You’ll be chasing after Sylvanas from platform to platform. After you complete a platform, a bridge will be made by either Jaina or Thrall to get to the next platform
- Each platform has several adds, in addition to Sylvanas herself
- You start on Platform 1, nothing happens here, then you follow a bridge to Platform 2
- Here you chase Sylvanas, till she jumps to platform 3.
- New bridge to platform 3, and here you can DPS Sylvanas
- She ports away after a while, goes to platform 4
- Platform 4 is your first set of adds.
- Platform 5 is more adds
- Platform 6 is even more adds
- Platform 7 you DPS Sylvanas again, till she runs away. You take a portal to follow her, and go to Oribos
- There’s a bunch of abilities this phase. Let’s start with Sylvanas
- Ruin
- Casted ability from Sylvanas, 10s cast
- If this completes, it wipes the raid
- Must be interrupted
- She casts this after porting to a new platform. You have to run across the bridge & reach her to interrupt it
- Haunting Wave
- Cast from Sylvanas throughout the stage, shoots small semicircles of death at you from her, radiating out in every direction
- 2 waves per cast
- Being touched by a semicircle of death pushes you back, and applies a 2k per half-second DoT for 10s
- Yes, that’s 40k damage over 10s. Freaking hurts.

-
- Veil of Darkness
- Same as during stage 1, but 3 small circles, need to move out of little circles of bad

-
- Banshee Wail
- Same as during the intermission, need to spread out
- Banshee Form
- Sylvanas periodically turns into a banshee and flies around. Takes 99% reduced damage while flying
- Forces of the Maw
- Several types of adds spawn on several of the platforms.
- 2 categories of adds, Mawsworn and Mawforged
- Killing the Mawforged allows you to proceed
- Mawsworn Adds
- Vanguard
- Stacking aura buff called Accursed Might, increases damage done by 50%, movement speed by 10%, and health by 30%
- Unstoppable Force
- Smacks the ground, dealing 12k Physical to anyone within 5 yards
- Hopebreaker
- Enflame
- Increases it’s own movement speed by 100%, and causes melee swings to deal an extra 10k Fire to the tank and 3k splash to the raid
- Destabilize
- Channeled ability that targets several people
- Deals mild damage per second, reduces movement speed by 5% per stack, and absorbs 10% of the target’s HP in healing
- Stacks per tick of the channel
- Mawforged
- Souljudge
- Lashing Strike
- Charges at tank, dealing 33k Physical + applying DoT
- Crushing Dread
- Debuffs several players, puts a circle around them and an arrow over their head
- These players tick for 10k Shadow every 2s to anyone within the circle
- Increases in power by 10% per tick
- If dispelled, gets swapped onto another random player
- Keeps doing this until the Souljudge is killed
- Summoner
- Creates 4 Decrepit Orbs
- Every 6s these increase their damage dealt by 50%
- Explode when they die, or when their cast completes, dealing 4k Shadow to the entire raid
- This is increased by their stacks that they gain every 6s

-
-
- Curse of Lethargy
- Puts a curse on several people, deals 12k Shadow instantly plus 2k Shadow per second
- Also reduces movement speed by 30%, stacking every 3 seconds
- Each cast by the player increases the duration of this curse by 1 second
- Goliath
- Fury
- Stacking buff, gains 1 stack each consecutive attack against the same target
- Each stack increases damage by 6% and attack speed by 5%
- You get 2 Mawforged per platform, and 3-4 Mawsworn
- Platform 4 = Souljudge + Goliath
- Platform 5 = Summoner + Goliath
- Platform 6 = Summoner + Souljudge
Stage 3
- Stage 3 occurs in the middle of Oribos, where the covenant leaders meet
- There’s 4 platforms around the room you’ll be using, jumping from platform to platform as necessary
- Invigorating Field – bounces you to the next platform over. Doing so also increases your movement speed by 30% for 5 seconds
- Banshee’s Bane
- Puddles that get placed on the floor from several abilities
- Running over a puddle makes you pick it up, giving you a DoT that deal 1k Shadow damage per second
- Dispelling the DoT drops the puddle back on the ground
- Bane Arrows
- Puts swirlies on the ground, shoots arrows at the swirlies, Banshee’s Bane puddles get left where the swirlies were
- Don’t get hit by the swirlies, they deal mild damage

- Banshee’s Heartseeker
- Similar to Ranger’s Heartseeker in Stage 1
- Boss gets a stack every 7 seconds
- At 3 stacks, shoots 3 arrows at the tank. Each deals 33k Physical and 10k Shadow damage. Each also applies a stack of Banshee’s Bane
- Banshee’s Fury
- Boss does an AoE explosion, dealing 7k shadow per second for 4s to the raid
- After 4s, all Banshee’s Bane DoTs on players explode, dealing an additional 11k Shadow to anyone who still has a DoT, per stack
- Wailing Arrow, Veil of Darkness, and Banshee Scream are all carry-overs from Stage 1
- Wailing Arrow now targets 2-3 people back to back
- Veil of Darkness is small circles on 2 people
- Banshee Scream puts circles on everyone
- Shadow Dagger
- Puts thin lines on the floor, with Sylvanas as the center, then she throws the daggers down the lines. Don’t stand on lines

- Withering Fire
- Deals 6k Shadow to everyone. Just extra damage to heal through
- Raze
- Shoots a giant arrow at the center of the platform, dealing 25k Shadow to everyone on the platform, plus covers the area in goop
- Goop deals 8k Shadow damage every 0.5 seconds
- This also destroys the Invigorating Field on that platform, meaning you can no longer jump off it
- Basically, anyone actually hit by this, dies
Strategy
Stage 1
- So let’s preface a bit – there’s a shitload of abilities listed above. The actual fight is NOT as complicated as that makes it seem
- Tank the boss in the middle of the room
- Raid should be loosely spread around the room. Don’t be clumped up
- Tanks will need to swap when the boss targets the active tank with Wailing Arrow
- If you’re the Wailing target, run the hell away. Get to an edge of the room so you don’t blow up the raid
- When the boss casts Windrunner, dodge the swirlies. They come out in several shapes and formations, just don’t stand in the bad
- Withering Fire just needs to be healed through
- Shadow Dagger is a conal ability, so being loosely spread should help lessen the amount of people actually hit by this
- You may want to use a healing CD to keep everyone stable throughout the Windrunner cast
- When the boss casts Domination Chains, dodge the swirlies
- Anyone that gets chained to an arrow needs to run away from said arrow
- All DPS should swap and blow up the arrows, so you don’t have people get killed as the pull gets stronger
- Use a Stampeding Roar here if you have one, to help people keep away from their arrow (make sure to save 1 of these for the intermission)
- For Veil of Darkness, just run out of the giant circle. Don’t get hit by this, it’s bad news
- When she casts Ranger’s Heartseeker at the tank, POP A COOLDOWN. This freaking hurts and can easily blast a tank down, especially prot pallies
- At 83%, she goes immune and starts the intermission, which stays on the same platform
Intermission
- Once the intermission starts, she immediately casts Domination Arrow on every single player
- Since this is on everyone, it’s super damn dangerous
- Stack up near the middle of the room, so the arrows are close to each other for AoE
- As soon as the swirlies go out, run the heck away
- Your raid should do everything they can to blow up the arrows as quickly as possible
- Use any movement abilities here you can
- While you’re working on the Arrows, the boss will just cast Rive back to back
- Do not get hit by the line
- As soon as she shoots down the line, swirlies will spawn next to the line
- Don’t get hit by the swirlies
- After casting Rive 8 times, she’ll port to the middle and cast Banshee Wail
- Everyone just needs to spread here, don’t overlap circles
- When that ends, you’ll go into a 30 second cutscene. Even if you skip the cutscene, you’re still stunned for 30s. Once that ends, you’ll enter Stage 2
Stage 2
- Stage 2 is fairly straightforward – it’s a gauntlet. You’re going from platform to platform, completing each step
- Platforms 1 & 2 you just run through. The bridge to Platform #2, and that platform itself, will have the Haunting Wave semicircles of death. Dodge those.
- On Platform 3, you just run up to the boss and start DPSing. You have 40 seconds of burn time here before she runs away to the next step
- Interrupt Ruin before it completes
- DPS her right where she is – the front of the platform
- About 20 seconds into this burn, she’ll cast Veil of Darkness. These are smaller circles during this point of the fight, so you’ll need to spread out on the platform and make sure you aren’t standing in a circle
- Right before she runs away, she’ll cast Banshee Wail. Make sure you’re spread for this, don’t stand in other people’s circles
- As you cross the bridge towards Platform #4, you’ll have to dodge more Haunting Wave semicircles
- Once you reach Platform #4, you’ll be greeted by adds. A Goliath, a Souljudge, and several small ones
- Just blow these up. There isn’t much counterplay to the Souljudges or Goliaths than killing them
- Once these all die, proceed down the bridge to the next platform
- On Platform #5, you’ll get a Summoner and a Goliath
- Blow up the Summoner orbs ASAP, to minimize the explosion damage
- You may want to stagger these slightly, to make it a bit easier to heal through
- As soon as orbs die, turn and destroy the rest of the adds
- Then, move to Platform #6
- On platform #6, you’ll fight a Summoner and a Souljudge
- Again, blow up the orbs
- You’ll want to use some healer CDs here. The damage is kinda nutty between the Crushing Dread DoTs plus the orbs exploding, so use CDs to stabilize
- Once you finish up the adds, move on to the last platform
- Platform #7 is Sylvanas again, this time you get about 45 seconds of DPS time on her
- Interrupt Ruin again here, before it completes
- She’ll cast Haunting Wave at the beginning of this, so dodge the semicircles of death
- Don’t get hit by Veil of Darkness, spread for Banshee Wail
- Once your time is up, she’ll fly away again
- Shortly after she flies away, you’ll get ported into Oribos, and enter Stage 3
Stage 3
- This is a hectic stage with a lot of things going on, but it points down to two things – handle the puddles, and swap platforms when Raze happens
- When the boss casts Banshee’s Fury, pop a healer CD to keep the raid stable, especially if there’s still people with stands of Banshee’s Bane
- When she casts Bane Arrows, it’ll spawn the puddles on your platform, and every other platform
- Have your tank run over all the puddles and soak um up, then run to a far corner on the platform
- If Banshee’s Heartbreaker is about to happen, the tank picking up puddles should also be the one to take the Heartbreaker. Pop a CD
- Then, the tank should call for, and get, dispelled. This’ll drop all the puddles neatly in the corner where you don’t hafta worry about them
- When Veil of Darkness is cast, spread out around the platform you’re on. Don’t be standing on anyone else
- Targets of Wailing Arrow have to help mitigate the raid’s damage as much as possible
- Since the platforms are small, you don’t have much to work with
- Fortunately, you can jump to a different platform. We always went counterclockwise, but clockwise works just as well
- The 3 Wailing Arrows will actually have Sylvanas shoot them a few seconds apart from each other. Because of this, you can send the first target to jump to a different platform, they get shot with the Wailing Arrow, then they jump back
- As they’re jumping back, person #2 jumps across to the other platform, and repeat this again if you have a third Wailing Arrow target

- Your active tank will ALWAYS be one of the people selected for Wailing Arrow
- While the tank is on the opposite platform, they should run over all Banshee’s Bane puddles over there, get all the debuffs, and bring them back to the platform the raid is fighting on
- Then, move to a corner and call for a dispel
- When Shadow Daggers go out, don’t stand on the lines
- Then finally, when there’s about 5 seconds left on your boss timers before Raze, dispel anyone that has a Banshee’s Bane debuff to drop the puddles
- As soon as she starts the cast, everyone should jump across to whatever platform the Wailing Arrow players had been going to
- Since your tank had already been there and cleared puddles, it should be a totally clear platform to use
- Absolutely do not be late jumping off the platform, or you’re just dead
- You’re going to keep repeating this until either you die, or the boss dies.
- Raze happens every 1:12 during Stage 3. The fourth and final Raze cast completing is essentially the raid wipe, so you have about 4:48 plus/minus maybe 3 seconds, to complete this phase
Posted in Sanctum of Domination - Heroic, Guides | No Comments »
July 9th, 2021
Written and produced by Crzypck
Special thanks to our consultant: Tagzz
← Back to Guides
Kel’Thuzad
KT is a three Stage encounter. You’ll alternate between Stage 1 and Stage 2 three separate times. Once you’ve completed Stage 2 for your third and final time, you’ll transition into Stage 3. Being that this is the penultimate boss of the raid, there’s a whole hell of a lot going on, including two separate planes of existence for Stage 2.
Stage 1 Abilities
- Kel’Thuzad has a mana bar. Several abilities cost Mana
- He only uses Mana in Stages 1 and 3
- Abilities using mana include Oblivion’s Echo, Glacial Wrath, and Frost Blast
- In Stage 1, abilities cost 20% mana. In Stage 3, they cost 40%
- Howling Blizzard
- When KT reaches 0% Mana, he casts Howling Blizzard for 20 seconds that’ll leave ice patches on the ground
- Standing in ice patches deals 13k Frost damage per second
- These patches grow over the 20 second cast, then explode, dealing 50k Frost to anyone inside a puddle.
- This is similar to how Wrathion’s fire patches worked. Start small, grow over time, then explode
- They’ll cover a large portion of the room, so you’ll need to find a safe spot
- When this cast finishes, the boss’s Mana is reset to 100%

- Soul Fracture
- Tank smack, deals mild Shadow damage & knocks the tank back
- Also creates 3 Soul Shards of the tank
- These are adds that spawn around the room, and must be killed
- Each add applies a stack of Soul Exhaustion to the tank who was hit with Soul Fracture
- Each stack increases Physical damage taken by 500%
- Lasts 1 minute
- Killing a Soul Shard removes a stack of the tank’s debuff
- In addition to all this, the adds periodically cast Piercing Wail, dealing 12k Shadow damage to the raid
- If all 3 Soul Shards are not killed within 1 minute, the affected tank dies.

- Oblivion’s Echo
- Puts a green circle debuff on several players for 6 seconds
- Being inside the circle silences and pacifies you, 10 yard range
- When this expires, it’ll leave the same circle just on the ground for 6 seconds
- After 6 more seconds, the ground circle expires, and a Frostbound Devoted add spawns
- These adds fixate a random target, and explode for 33k Shadow damage to anyone within 5 yards if they reach their target

- Dark Evocation
- Kel’Thuzad revives all slain Frostbound Devoted and makes them fixate again, and all slain players are resurrected and Mind Controlled to fight for KT
- Kill your friends. You didn’t need them anyways, damn leeches.
- Glacial Wrath
- Puts a blue arrow above several players’ heads
- After a few seconds, puts a swirlie down next to the targeted players. The swirlie then explodes, dealing 29k Frost damage to anyone hit & knocking them back
- Leaves behind a Glacial Spike
- These have a health bar, and lose 5% HP every 2 seconds
- When they die, they explode and cast Frozen Destruction
- Deals 16k Frost to all players, and applies a DoT to the raid
- DoT deals 2k Frost per second for 10 seconds. Stacks. New stacks refresh duration

- Frost Blast
- Puts a giant soak circle on a random player, explodes after a few seconds
- Deals 165k Frost damage, divided evenly by everyone hit
- Also gives everyone hit a DoT, deals 5k Frost per second for 12 seconds
- Also puts Frozen Binds on everyone hit, rooting them for 12 seconds
- Dispellable, breaks from basically any anti-root ability.

- Ice Shard
- Tank smack, deals a big chunk of Physical damage
- When Kel’Thuzad’s HP reaches 0%, you transition into Stage 2.
Stage 2 Abilities
- In Stage 2, there’s two distinct planes of existence – the main platform and the Phylactery
- In the KT plane, you’ll be fighting some undead-type adds
- In the Phylactery plane, you’ll be killing the Remnant of Kel’Thuzad
- The phase ends either when Vengeful Destruction & Undying Wrath go off, OR when the Remnant has lost 40% of his HP (or died)
- Remnant’s HP persists through the encounter. The first Stage 2 ends when it reaches 60% HP remaining, second Stage 2 ends at 20% HP remaining, third Stage 2 ends when the Remnant dies.
- At the beginning of Stage 2, KT becomes untargetable and starts casting Vengeful Destruction
- Lasts 45 seconds
- If this cast goes off, deals 50k Shadow to the raid
- Interrupted when the Remnant has lost 40% of its HP (or dies)
- Also at the beginning of the phase, KT turns green. Running and standing directly under KT ports you into the Phylactery plane
- Kel’Thuzad’s Plane
- KT summons some undead mods
- Unstoppable Abomination
- Abomination add, smacks your tank for big chunks of Physical damage
- Also casts Demonish, shooting a wave of necrotic energy in a straight line towards a random player, dealing 31k Shadow to anyone hit
- Soul Reaver
- Banshee add. Periodically casts Banshee’s Cry
- Launches a missile at random players every second, dealing 6k Shadow to the targets
- Each set of missiles has their damage increased by 25%
- Interruptible
- Undying
- Any adds killed in the Kel’Thuzad plane while the Phylactery is still open (meaning before the Remnant has lost 40% HP or dies), respawn after being dead 10 seconds and continue fighting you
- Phylactery
- Remnant of Kel’Thuzad stands there and lets you wail on him, but casts several things at the platform
- Sinister Miasma
- Deals 400 Shadow damage every 2 seconds while in the Phylactery
- Stacks, meaning the damage down here ramps up dramatically over time
- Shadow Fissure
- Blue swirlies constantly appearing on the ground, exploding after a few seconds and dealing 31k Shadow to anyone hit by the explosion
- Just move out of swirlies
- Freezing Blast
- Frontal ice thing, exactly like what Jaina did
- Casted at a random player in the Remnant’s plane
- Deals 10k Frost to anyone hit, and roots them
- Glacial Winds
- This ability is only present in your 3rd and final Stage 2
- Creates several tornados that radiate out from the caster, spinning around the room from the center, eventually to the edge
- Deal 1k Frost to anyone who touches them, and roots you for 4 seconds
- Undying Wrath
- When the Remnant reaches either 60% or 20% HP, he starts casting Undying Wrath
- This is a 10s cast, and basically kills anyone who stays in the Phylactery plane
- This is when you run to the portal and leave
- Soul Marked
- If you enter the Phylactery, then leave it, you’re unable to re-enter during that specific occurrence of Stage 2.
- This does NOT prevent you from going into each Stage 2 Phylactery.
- You CAN have the exact same group go down each Stage 2
- Lots of info in this section, so let’s sum it up
- There’s 2 Planes here – KT and Remnant
- KT plane = undead adds that respawn 10s after they die
- Remnant plate = swirlies and frontal, plus tornados the 3rd time
- You have 45s to push the Remnant 40% HP
- When the Remnant casts Undying Wrath, if you’re in his plane, run to the portal and GTFO
- You’ll repeat Stage 2 three separate times.
- Necrotic Surge
- Each time a Stage 2 ends, Kel’Thuzad revives with 100% HP and increases his damage by 5%
- Also causes Oblivion’s Echo and Glacial Wrath to target more people for the remainder of the encounter
- Necrotic Empowerment
- Any adds that aren’t dead on the main platform when Stage 2 ends are buffed, increasing damage by 25% and becoming immune to crowd control
- Once you’ve completed the third Stage 2 and the Remnant is killed, you’ll enter Stage 3
Stage 3 Abilities
- Sinister Miasma
- Same thing as in the Phylactery – 400 Shadow damage every 2 seconds, stacks, damage ramping up over time
- Deep Freeze
- Creates ice patches periodically that last for the remainder of the encounter
- Standing in ice deals 13k Frost damage per second
- Onslaught of the Damned
- Kel’Thuzad calls more of the Stage 2 adds throughout all of Stage 3, which must be tanked and killed
- Additionally, whenever this is cast, any dead players are resurrected & mind controlled to fight for Kel’Thuzad
- Frost Blast & Ice Shard
Strategy
Stage 1
- Tank Kel’Thuzad a bit off-center
- When Soul Fracture goes out, tank swap on boss
- The raid should kill off the Soul Shards as quickly as possible, so you don’t miss the 1 minute timer and have your tank just die, and to minimize how many casts of Piercing Wail go off
- Players affected by the Oblivion’s Echo debuff should move towards the edges of the room to drop their circles
- When the Frostbound Devoted adds spawn, throw some slows up on them and DoT them up
- These aren’t #1 priority, but you don’t want to completely ignore them
- If you’re fixated by one of the adds, just kite it. Don’t let it reach out
- Players affected by Glacial Wrath should make sure they’re not standing on top of each other
- When the Glacial Spikes pop out, you’ll need to stagger killing them because of the DoT stacking
- Your Raid Leader should mark a Skull, and all DPS should hardswap to this and blow it up
- When the DoT has 2 seconds left, the Raid Leader should call the next Spike to kill, and DPS should swap
- Continue this for the remaining Spikes
- When the RL calls for killing a Spike, that becomes absolute #1 kill priority above all else
- Whichever Spikes aren’t actively being focused, should largely be ignored. Don’t DoT or pad on the rest of them – it could actually cause a wipe if you accidentally kill a Spike too early and the raid’s debuffs refresh
- For Frost Blast, you’ll want 5 or 6 people helping soak to split the damage. More than 8 soakers could be an issue due to the DoT effect everyone gets.
- Use whatever you can to break the roots. Dispels, Mass Dispel, Blessing of Freedom, whatever you have
- If possible, use a damage mitigation CD like AMZ or Barrier to help with the initial damage of the explosion
- When the Howling Blizzard is cast, find a safe zone
- There will be several safe zones of varying sizes. Any works, just make sure you don’t stand in a puddle
- After Kel’Thuzad casts Dark Evocation, make sure to slow the adds that respawn and throw DoTs on them. If there’s no Spikes or Soul Shards out, blow up the Devoted dudes
- For the second and third occurrences of Stage 1, keep in mind the buffs KT gets
- The second Stage 1, he’ll do 5% more damage. The third, he’ll be doing 10% more damage
- Additionally, there’ll be more people getting Oblivion’s Echo and Glacial Wrath each time
- This means more Frostbound Devoted adds each time, and more Glacial Spikes
- The Spikes in particular get to be an issue
- By the 3rd Stage 1, you’ll likely need to kill 2 Spikes at the same time early on, using at least 1, if not 2, healing CDs to keep the raid stable. Without doing this, you simply might not have enough time and risk an accidental refresh instead of an intentional one
Stage 2 Strategy
- Since there’s 2 distinct planes you fight on, we’ll discuss each separately
- You should send down about ⅓ of your DPS for each Stage 2
- You’ll want to send down your bursty single-target DPS for this. You can send down the same group each time, so having good ST burst helps speed this phase up
- Tanks do not need to go into the Phylactery
- Kel’Thuzad’s plane
- Tanks need to pick up the adds, make sure they aren’t just smashing your raid
- Interrupt the Soul Reaver casts as much as possible
- In an ideal world, coordinate killing the adds when the Phylactery folks, so the adds die within 10 seconds of the Remnant reaching his health breakpoint
- By doing this, you’ll avoid respawns of the adds completely
- Phylactery plane
- Dodge swirlies, they come pretty much non-stop
- Don’t get hit by the frontal. It’s super obvious, literally the same spell that Jaina did
- In the third Stage 2, avoid the tornados. They start at the boss, spinning outwards. Probably wait a few seconds before going in, or they’ll just blast through you
- Coordinate your push timing if possible, as stated above
Stage 3
- You’ll want to pop lust as soon as Stage 3 begins
- This is a wild, chaotic race
- Sinister Miasma means there’s ticking damage the whole Stage, increasing in power the longer the boss lives
- Deep Freeze will slowly fill up the encounter room, forcing you to move to avoid the puddles and have space to work with
- Adds continue spawning, meaning you have to deal with them. Tank them on the boss for cleave/AoE, but focus damage should be on Kel’Thuzad himself
- Keep soaking Frost Blast as you were in Stage 1
- As you get into the later stages here, it may be worthwhile to just sacrifice the target of Frost Blast
← Back to Guides
Posted in Sanctum of Domination - Heroic, Guides | No Comments »
July 5th, 2021
Written and produced by Crzypck
Special thanks to our consultant: Tagzz
← Back to Guides
Fatescribe Roh-Kalo
Fatescribe Roh’Kalo is a three-stage encounter, but Stage 2 is basically just an intermission.
Stage 1 Abilities
- Invoke Destiny
- Puts a large circle around the current tank, lasts 8 seconds
- When this explores it explodes, dealing 45k Shadow to all players within the circle
- Also deals falloff damage to the rest of the raid
- Shade of Destiny
- A Shade of Destiny add spawns at the location of the explosion
- Fixates the tank who had Invoke Destiny
- This tank takes 75% increased damage as long as the Shade is alive
- If the Shade reaches the tank, it’ll explode, putting a likely lethal DoT on the raid.
- Deals 16k Shadow damage every 2s for 10s, applied to the whole raid
- Fatespawn Anomaly
- When the Shade of Destiny dies, several Fatespawn Anomaly adds spawn
- These cast Anomalous Blast, a targeted cast at random players dealing 13k Shadow damage.
- Diviner’s Probe
- Whenever the tanks swap, the boss gains 3 stacks of Diviner’s Probe
- He’ll use a stack every 2.5s, dealing 22k Shadow damage to the tank each time
- Twist Fate
- Puts a DoT on several players, dealing 7.5k Shadow damage every 2s for 6s
- Fated Conjunction
- Boss triggers lazer beams from the edges of the room that shoot straight across the encounter area
- Deals 39k Shadow to anyone hit, and increases damage taken by subsequent Fated Conjunctions by 50% for 1 minute

- Call of Eternity
- Puts a 20 yard circle around several players, dealing 7k Shadow damage every 2s for 8s
- After 8s, the circles explode, dealing 41k Shadow damage to all players except the person who had the debuff
- Leaves behind an Echo of Eternity
- This is a small orb on the floor
- The orbs don’t do much, but look kinda cool
- However, for the rest of the encounter, whenever a fresh set of Call of Eternity circles explode, all existing Echoes of Eternity also explode, dealing 33k Shadow to anyone standing within 20 yards

Stage 2 – Intermission Abilities
- At 70% and 40%, the boss casts Realign Fate, activating the Loom of Fate
- Takes 99% reduced damage during this
- You have 40 seconds to successfully align the Loom of Fate, or the raid insta-wipes
- Unstable Accretion
- For the duration of Stage 2, the entire raid takes 5800 Shadow damage every 3 seconds
- Fatespawn Monstrosity
- Little add dudes, need to be tanked
- Increase their Physical damage dealt by 10% every 8 seconds
- Cast Despair, dealing 18k Shadow per 2s for 6s to anyone within 40 yards, and reducing their movement speed by 33% for the duration of the DoT
- Fate Fragment
- Little orbs that float around the room. Deals 29k Shadow damage if you hit one, and reduces your movement speed by 33% for 7 seconds
- Loom of Fate
- The boss activates the 6 rings around the platform
- Each ring will have a large blue circle on it, this is your target spot
- Each ring will also have a blue Rune activate
- The left picture below is the target spot, the right picture below is the rune


- The goal is to get each rune into its target spot
- Several players will get empowered, and have the ability to influence how a ring is spinning
- Having an ODD number of empowered players in a ring will make it rotate Clockwise
- Having an EVEN number of empowered players will make a ring rotate Counterclockwise
- You’ll need to rotate each ring until the rune reaches the target spot
- You need to stand ON TOP OF the rune for your ring to spin
- The moment a rune hits the target spot, both despawn
- You have 40 seconds to successfully clear all 6 rings. Failure to do so results in an instant wipe. Successfully clearing the rings will end Stage 2, and push you back into either Stage 1 or Stage 3
- Example of completing a Rune:

Stage 3 Abilities
- You enter Stage 3 after completing the second Stage 2 intermission, with the boss at 40% HP
- The boss retains all his Stage 1 abilities
- In addition to this, he now periodically casts Extemporaneous Fate, re-activating the Loom of Fates
- Only 2 rings activate for this instead of all 6
- However, you only have 30 seconds to clear all the runes, or the raid insta-wipes
- Same number of players get empowered as in Stage 2
- They still spin the same as before, ODD = Clockwise, EVEN = Counterclockwise
Strategy
Stage 1
- You should tank the boss near the middle of the room
- Tanks need to swap when Invoke Destiny goes out
- The tank with the debuff needs to run away from the group, wait for the explosion to go off somewhere safe, then run away from the Shade of Destiny. Remember, you’ll almost certainly cause a raid wipe if the add reaches you. The raid leader will be pissed, the healers will be pissed, that one DPS who was already dead from failing a mechanic will be pissed. Just not good overall
- All ranged DPS should immediately swap to the Shade of Destiny add
- When the Shade dies, finish up the Fatespawn Anomaly adds. Interrupt as many casts of Anomalous Blast as possible
- Mass Grip and Sigil of Chains are amazing here to group up the Fatespawn dudes, then let the raid AoE them down quickly
- Diviner’s Probe isn’t really something with much counterplay, healers just have to make sure the tank doesn’t die
- Same with Twist of Fate, don’t let people with the debuff die
- When Fated Conjunction is cast, find where the lazers are coming from. Remember the picture above, they shoot straight through the whole platform, so you’ll need to move to the sides of where they’ll be
- For the love of Azeroth, do not get hit
- Players targeted with Call of Eternity need to move towards the edges of the room to drop the orbs away from the raid
- Remember, any existing orbs will also explode with a 20 yard radius, so don’t accidentally get yourself nuked while trying to drop down a new orb
- This is the kinda thing that gets you memed for the rest of the tier
- When the boss reaches 70%, and 40%, you’ll enter the Stage 2 intermission.
Stage 2 – Intermission
- Since the fight randomly assigns who gets empowered, you can’t really pre-assign certain people
- Instead, you’ll need to coordinate between the people who do get picked
- We recommend putting a raid marker in each ring, so the raid leader can make effective calls
- A ring will not move at all if there’s no Empowered players standing in it
- You’ll want to rotate each ring based on whichever spin direction is less distance between the Rune and the target location
- Raid leader should call each color marker ring, and which direction
- Probably want a Weakaura that shows all empowered people, so the raid leader can call out specific people for each ring as well
- Having multiple Empowered players on a single ring does not change the spin speed, only the direction based on Odd v Even
- This is the kind of mechanic that will probably just take a few tries to get used to, but once you figure it out, it’s fairly simple
- While the Empowered players deal with the rings, everyone else will be working to kill off the Fatespawn Monstrosities as quickly as possible
- Tanks should try to gather and group them up, so the raid can just AoE them down
- Make sure to interrupt as many casts as possible
- Do not get hit by the Fate Fragment orbs. They’re super obvious, and really easy to dodge. Just remember the 5 D’s of dodgeball – dodge, duck, dip,dive, & dodge
- Clear all 6 rings, and the boss will re-engage. After the 70% HP Stage 2, you’ll reenter Stage 1 and rinse & repeat what you did before
- After the 40% HP Stage 2, you move into Stage 3
Stage 3
- Lust immediately upon entering Stage 3
- You’ll need to handle all of the Stage 1 abilities like you did before
- When Roh’Kalo activates rings on the Loom of Fates, you’ll need to be more careful
- Deal with the rings like you did in Stage 2, having the Raid Leader call which empowered players should go where
- Remember, it’s 1 person if it needs to spin clockwise, 2 if it needs counterclockwise
- That’s pretty much all there is to say.
- Keep running Call of Eternity to the edges, tanks swap for Invoke Destiny and handle that like Stage 1, kill adds when they come out, etc.
- Finish off this pretty cool concept of a fight, and let’s move on to the penultimate boss
← Back to Guides
Posted in Sanctum of Domination - Heroic, Guides | No Comments »
July 5th, 2021
Written and produced by Crzypck
Special thanks to our consultant: Tagzz
← Back to Guides
Guardian of the First Ones
This is a single-phase encounter against the Guardian. He has an energy bar, and when it reaches 0 he’ll chaincast a nasty AoE effect. You can charge his energy back up with the three Pillars, called Energy Cores, around the room. This fight gives off heavy Sludgefist vibes, and could be a heck of a DPS race.
3 Pillars around the boss, “Energy Cores”
- Boss links to Core when close to it, granting boss 5 energy per second to the core
- Unstable Energy
- Cast by a Core the entirety of time the Guardian is linked to it
- Deals 29k Arcane damage per sec to all players
- Radiant Energy
- Standing in small circle around active Core reduces player damage taken from Unstable Energy by 85%
- Meltdown
- When a core reaches 0 energy, it explodes & deals 58k Arcane damage to players within 15 yards, and 18k Arcane damage to players further than 15 yards. That Core is now no longer available to use the rest of the encounter

- You have a hard limit of using the 3 Cores each one time. After that, if the boss reaches 0 energy and you haven’t killed him yet, it’s bad news bears.
Guardian
- Disintegration
- Shoots a line from the boss at a random player
- Deals 29k Arcane damage to anyone hit. Also applies a debuff, stunning you and dealing 4k Arcane damage per second for 6 seconds DoT
- Threat Neutralization
- Targets several players, puts an 8 yard circle around them for 4s
- Deals 20k Arcane damage to anyone inside circle when it explodes
- Form Sentry
- Boss creates several little floating orb thingies
- These put a circle on the ground beneath it called Suppression Field
- Deals 2k Arcane damage every 2 seconds to anyone inside it
- Also incapacitates you while inside it
- Move around platform randomly, seem to be pulled towards random player
- Also deals 5k Arcane damage every ½ second to a few random players

- Elimination Pattern
- Tank combo, 2 different abilities
- Sunder
- Slams the tank and the ground around them
- Deals 66k Physical damage to the tank, and anyone within 6 yards
- Also increases damage taken by subsequent Sunders by 200%for 20s
- Obliterate
- Massive Physical + Arcane smash
- Deals 62k Physical damage to the tank
- Also simultaneously deals 124k Arcane damage, split evenly between everyone within 6 yards of the tank
- Also causes everyone hit by the Arcane damage to take 500% increased damage from Obliterate for 12 seconds
- Always happens in the same order – Sunder > Obliterate > Obliterate > Sunder
- Purging Protocol
- Begins chain-casting when energy hits 0
- Deals 18k to the raid every 5s, increasing subsequent ticks by 100%
- Stops casting once he gets linked with an Energy Core
- Linking the boss to an Energy Core WILL interrupt a cast of Purging Protocol, mid cast
Strategy
- Lust on pull
- Start with boss at the front of the room
- Keep him here until he hits 0 energy
- After 2nd pulse, bring him to an Energy Core & regen his energy back to 100%

- From here, you’ll keep repeating this positioning. Move the boss towards the middle while his energy ticks down, let 2 ticks of Purging Protocol go off, then move him to a new Energy Core
- You’ll likely need to use a raid CD for the second tick of Purging Protocol
- Remember, while the boss is linked to an Energy Core, the raid needs to be stacked within the safe zone around the Core. The tighter the stack, the better
- Players affected by Threat Neutralization need to move away from the group
- If you have Threat Neutralization occur while the boss is linked to a Core, the affected players need to stand as close to the edge of the safe zone as possible
- It’s better to sacrifice yourself and die if necessary, than have the explosion hit the raid
- The rest of the raid should be stacked as tightly as possible in whatever clear spot is available inside the safe zone, where you aren’t standing in the Threat Neutralization circles

- Dodge the Disintegration lines. These are super obvious, and your raid will just laugh at you. The extra one cast of Fireball isn’t worth it bruh, you’re still gonna lose to an Arcane Mage
- Tanks each need to take half the Elimination Pattern Combo.
- The first tank will take the initial Sunder and the first Obliterate.
- Then swap, second tank gets second Obliterate and the final Sunder
- Important for tank #2 to NOT be within 6 yards for either of the first 2 abilities, or you’ll end up getting hit, getting the debuff, then dying when it is your actual turn to tank
- Raid needs to help soak Obliterate
- You’ll want about half the raid soaking the first Obliterate, and the other half soaking the second Obliterate
- Use a healing CD if necessary to keep everyone stable
- The Sentry Orbs were more of a nuisance during testing than actually dangerous. Just don’t stand in the circles under them
- There isn’t a whole lot else to say, this fight is pretty straightforward. You’re in a DPS race against the boss’s energy bar.
- You’ll want to maximize every last second to fight this dude. This is why we recommend letting 2 Purging Protocols go off each time, to give you a hair more DPS time
← Back to Guides
Posted in Sanctum of Domination - Heroic, Guides | No Comments »
July 5th, 2021
Written and produced by Crzypck
Special thanks to our consultant: Tagzz
← Back to Guides
Painsmith Raznal
This is a 2 stage encounter. Stage 1 you’ll be fighting the boss, Stage 2 is an intermission. Intermissions last 50 seconds, with Raznal jumping away and crafting himself a new weapon. When he returns, his weapon ability becomes empowered.The Stage 2 intermissions occur at 70% and 40% HP on the boss.
Stage 1 Abilities
- IMPORTANT – the floor is a grid of squares. These come into play for some abilities

- Weapon Abilities
- Boss starts with the Cruciform Axe (100% HP > 70% HP)
- Periodically targets the tank, puts a big circle around them, then shortly afterwards throws his axe at that tank
- Deals 74k Physical to the tank, and causes an explosion at the location the axe landed. Explosion deals 49k Fire damage to all players, except the tank
- Explosion damage is reduced by distance
- The targeted tank also gets a debuff called Blackened armor, dealing 6k Fire damage per second and increases Physical damage taken by 200% for 12 seconds. Stacks.
- Also causes Spikes also erupt from the floor in 4 directions, starting at the location the axe landed
- Reverberating Axe (70% HP > 40% HP)
- Works exactly the same, but deals more damage. Tank damage increased to 87k Physical, explosion increased to 62k Fire
- Spikes ripple outwards this time, from wherever the hammer landed, instead of just shooting out 4 directions
- Dualblade Scythe (40% HP > 0% HP)
- Also works exactly the same, but buffed again. Tank damage increased to 99k Physical, explosion increased to 74k Fire
- This time, Spikes will shoot out in 4 directions, AND ripple from the location the Scythe lands
- Example of the Spikes:

- Spiked
- Spikes shoot up from the floor, dealing 33k Physical to anyone hit
- This is caused by the boss’s weapon throw, AND occurs back-to-back during the intermissions
- Spiked Balls
- A line of spiked balls appears on one edge of the room, the entire length of the edge
- These roll directly across the platform
- Anyone hit takes 165k damage, and stuns them for 8 seconds, if you live. Which you won’t, because you don’t have 165k health
- These actually have a healthpool though, and can be killed to create an opening
- Example of the balls:

- Shadowsteel Chains
- Puts a circle of chains around several players, deals 3k Fire damage per second for 20 seconds
- Running into someone’s circle deals 16k Physical damage to you, and knocks you back
- Flamescale Trap
- Places traps under up to 4 random people, activates them after 8 seconds
- Traps explode if they get stepped on, get hit with Spikes, or get run over by a Spiked Ball
- Flameclasp Eruption
- Explosion from the trap, deals 10k Fire damage to all players and increases damage taken by subsequent traps by 200% for 1.5 seconds
Stage 2 (Intermission) Abilities
- Spiked happens back to back for the duration of the intermission. They cover an entire edge, then move straight across the platform. However, there’ll be one safe spot that you can use to not get hit

- Shadowsteel Embers
- Red swirlies on the ground
- Deals 25k Fire damage to anyone in the swirlie when it explodes
- Black Flames
- Deals 6k Fire to the entire raid every time the boss hits his new weapon with a blacksmith hammer
- Also applies a stack of Lingering Flames
- Deals 165 Fire damage per second, stacks
- Permanent debuff, persists the remainder of the encounter
Strategy
Stage 1
- While fighting Painsmith, you’ll want him a bit off-center on the platform, to whichever side you choose
- By doing this, you’ll naturally have at least 1 corner that’s pretty open, perfect for the tank to drop the weapon toss on. As an example, position like the picture below, and use the SKULL as your drop point for the throws

- This’ll give your team a lot of area to work with to dodge spikes when the boss has the Axe and the Scythe, as the radiating Spikes are the more dangerous formations
- To dodge the radiating spikes, you’ll need to stand on a block directly in front of them, wait for them to shoot the floor right in front of you, then immediately move to stand on the block the spikes just shot up through
- When the Spiked Balls spawn, your RL should mark one and the ranged DPS should swap immediately and kill it as quickly as possible
- You’ll want to try and pop the Flamescale Traps relatively soon after they spawn, based on timers
- Ideally, you never want the Spiked Balls or the ground Spikes to hit a trap and break it in an uncontrolled way
- Because of the increased damage debuff, this can be a bad time very quickly
- Instead, have 1-2 people working to break them in a staggered manner, spreading out the explosions by 2-3 seconds
- We recommend having the tank not currently holding the boss run over these, with your raid leader calling exactly when to pop them
- Make sure to communicate when doing this, so the healers know it’s coming and can use CDs as necessary. You’ll definitely want CDs if you pop 3 or more in quick succession
- Players with Shadowsteel Chains just need to spread out a bit from the group, and be careful not to run into people
- This is especially important during the Spiked Balls, as you’ll likely have a small area to run through
- As you enter the 2nd, then 3rd, occurrences of Stage 1, the weapon toss on the tank gets progressively more dangerous. By the 3rd Stage 1, each toss creates both a cross-shape with Spikes, AND radiates them out. This can get super dicey, so watch your feet
- The tank should always try to be directly on the corner square, which helps mitigate the cross-shape almost entirely
- Last note here, because the DoT that stacks in the intermission is permanent, the raid-wide damage ramps up pretty hard later into the fight.
- You should use Bloodlust after the 2nd intermission ends and the boss returns to the platform
- Blow him up before the increased raid damage from the ticks, and the weapon throws, gets overwhelming
Stage 2 (Intermission) Strategy
- When the boss jumps away to make a new weapon, you basically have this dance period where you don’t really stop moving
- Between running to the safe spot for the Spiked lines and the Shadowsteel Ember swirlies, there’s a ton of bad on the ground that’ll hurt pretty bad
- Not really much to say here, other than dodge the bad and don’t die
← Back to Guides
Posted in Sanctum of Domination - Heroic, Guides | No Comments »
July 5th, 2021
Written and produced by Crzypck
Special thanks to our consultant: Tagzz
← Back to Guides
Soulrender Dormazain
This is a single-phase encounter. You’ll be fighting Soulrender Dormazain while he’s torturing Garrosh Hellscream. It’s a fairly neat encounter with a basic dance mechanic.
Encounter Abilities
- Soulrender
- Torment
- Soulrender tortures Garrosh an extra bit, unleashing Anima that coats the room
- You’ll notice there’s 4 distinct “zones” of the room, separated by the chains on the ground
- When Torment is cast, 3 of the 4 zones will slowly fill with Anima, then explode, dealing 45k Shadow damage to anyone hit
- Also applies a DoT, dealing 10k Shadow per 2 seconds for 6 seconds
- Stacks
- Happens at 0:12, then every 45s
- Tormented Eruptions
- At 100 energy, Soulrender casts Torment for 30 straight. In testing, this ended up causing the Torment effect 5 times over the 30 seconds, making it basically a dance – you’re running from safe spot to safe spot

- Warmonger Shackles
- Soulrender creates 3 Shackles on the ground, which connect to Garrosh with chains
- Causes Garrosh to start casting Hellscream, 35 second cast bar
- If the cast completes, he starts dealing ticking damage, dealing 31k Physical per second until interrupted
- Clicking on a Shackle makes you pick it up and able to move with it
- Moving 40 yards away from Garrosh breaks the chain, dealing 25k Shadow damage to the raid
- To interrupt the Hellscream cast, either before or after it completes, you need to break the chains from all 3 Shackles
- When a player breaks a Shackle chain, they then get a permanent debuff that deals 2k Shadow every 3s, and prevents you from picking up another chain

- Brand of Torment
- Puts a circle around a couple random players
- Doesn’t really matter, but cool to note, this animation is the exact same as the Sargeras’ Rage ability from P3 Mythic Argus.
- The circle doesn’t deal damage to the affected players
- Instead, it deals 13k Shadow to anyone inside the circle, INCLUDING adds for the fight
- Additionally, any adds standing in the circle take 50% increased damage
- Ruinblade
- Big tank slap, deals 64k Physical damage & increases Physical damage taken by 100% for 40s. Stacks
- Garrosh
- Torturing Garrosh creates a couple more mechanics
- Rendered Soul
- Throws several swirlies on the ground. Being hit by the swirlie when it explodes deals 33k Shadow damage
- This seems to be always cast 1-2 times during Torment & Tormented Eruptions
- If any adds successfully reach Garrosh, they become Defiant, making them immune to CC effects & increasing damage dealt by 200%
- The River of Souls, the area around Garrosh, is bad news bears if you stand in it. Deals 8k damage every 0.2s, and reducing healing taken by 100%
- Probs don’t stand in that stuff
- Echoing Screams
- Deals 4500 Shadow to the raid every 5 seconds
- This didn’t appear on testing in any difficulty. Unsure if this is just encounter-long passive, or specific to certain times
- Adds
- Mawsworn Agonizer
- Smaller adds, spawn in sets of 3-4
- Immediately start walking slowly towards Garrosh
- If they reach him, they get Defiance and deal 200% extra damage
- Also cast Agonizing Nova, dealing 11k Shadow damage and reduces movement speed of the entire raid by 20% for 6 seconds
- These guys can be slowed, gripped, knocked back, etc until they reach Garrosh
Strategy
- Lust on pull
- Tank the boss near the middle of the room
- Tanks need to swap after every Ruinblade cast
- Put a raid marker in each of the 4 zones of the room
- When Torment is cast, your raid leader should call out which marker is the safe zone
- When the boss reaches 100 energy and uses Tormented Eruptions, make sure you’re staying with the group and following the raid leader from safe zone to safe zone
- It’d be a major shame if you ran the wrong direction during Tormented Eruptions and blew yourself up. I mean, everyone would laugh and get enjoyment out of it, but it’d be bad for your parse
- During the Tormented Eruptions, you may want to use raid-wide speed buffs like Stampeding Roar or Wind Rush Totem
- For Warmonger Shackles, assign 3 groups of 3 people to run the Shackles out. You’ll likely only have this occur 2-3 times total through the fight, so assigning 3 groups should suffice
- Put a raid marker near Garrosh, but not so close that you’re in the River of Spirits
- Everyone should stack on this marker when the Shackles go out
- Drop 1-2 DR cooldowns on the raid, like Power Word Barrier or Anti Magic Zone
- Try to pop all 3 Shackles as quickly as possible
- Mawsworn Agonizer & Brand of Torment
- When Brand of Torment goes out, affected players should just make sure they aren’t standing on other raiders
- When the Mawsworn Agonizers spawn, you’ll want to use knockbacks and grips if possible to get them all stacked together
- Then, have any players with Brand of Torment go stand on the adds
- Everyone else should be nuking as hard as possible
- With multiple stacks of 50% increased damage taken, the Agonizers will get annihilated
- Absolutely do NOT let the Agonizers reach Garrosh
- If you don’t have many knockbacks or grips in your raid, utilize slows, and have the Brand of Torment players basically run from add to add, so you always have something to attack with the 50% increased damage debuff
- Also make sure to interrupt every cast of Agonizing Nova. Letting any go off is a bad time.
- Make sure you watch for the swirlies from Garrosh, they’re a bad time
- They tend to overlap with Torment, so things can get dicey. Watch your feet, pay attention, and don’t die to stupid things.
- Das pretty much it. Nuke the hell outta the guy, kill adds, dodge stuff, have a nice dance party, and collect some loot
← Back to Guides
Posted in Sanctum of Domination - Heroic, Guides | No Comments »
July 4th, 2021
Written and produced by Crzypck
Special thanks to our consultant: Tagzz
← Back to Guides
Remnants of Ner’zhul
Single-phase encounter. You nuke down Ner’zhul, breaking apart his armor. As you break off his armor, the raid damage steadily increases. He’ll also summon orbs to try and kill you that you’ll be able to yeet off the platform. Pretty cool tbh.
Ner’zhul Abilities
- Shatter
- At 80%, 60%, and 30% HP, a piece of armor breaks off Ner’zhul, dealing 16k Shadow to the entire raid
- Deals unavoidable damage to the raid, and also puts down a boatload of swirlies. Dodge swirlies.
- This damage ramps each time Shatter happens
- Malevolence
- Puts a 21 second debuff on 2 random players. Dispellable
- When the debuff is removed, either from expiring or dispelling, the player explodes & the entire raid gets knocked back away from the affected player. Also deals mild raid damage
- Also leaves a puddle on the ground, deals 12k Shadow per second if you’re standing in it
- Grasp of Malice
- Puts several lines on the floor, radiating from the center of the platform
- Super obvious looking cones of bad
- They explode after a few seconds, dealing 20k Shadow to anyone hit, and knocking them back

- Aura of Spite
- Boss passively deals 3306 Shadow damage to the entire raid every 3s
- Intensity of this increases with each piece of armor broken off.
- 3857 Shadow per tick after 1 piece broken
- 4408 after 2 pieces broken
- Spite
- Periodically puts swirlies on the ground that explode after a few seconds
- Getting hit deals 16k Shadow damage and incapacitates you for 3 seconds
- Orb of Torment
- Orb add that spawns periodically.
- They spawn with Eternal Torment, reducing damage taken by 99%
- Cast Torment regularly, dealing 4k Shadow to several random players every 3s for 15s
- This continues happening even if the Orb is killed
- Sorrowful Procession
- Once the Orb is “killed,” it can be picked up by a player, granting you an extra action button
- Doing this deals 3k Shadow damage every 3s, and reduces your movement speed by 30%
- The extra action button throws the Orb
- You want to pick up the Orb, walk it to the edge, then yeet it off

- Suffering
- At 100 energy, boss shoots a shadow lazer at the current tank, goes through the tank to the edge of the platform
- Anyone hit takes 25k Shadow, and increases their damage taken by Suffering by 500% for 30s
- Any Orbs of Torment hit by this lose Eternal Torment, making them take full damage

Strategy
- You’ll want to keep the boss near the middle of the room, with the raid loosely spread, but generally staying towards the center of the room.
- Players with Malevolence should move all the way to an edge of the platform
- Your raid leader should call out when a dispel should happen, so everyone knows when the knockback is coming
- Make sure nobody is too close to an edge, or you’re going byebye
- For the person with the debuff, the knockback will knock you backwards based on where you’re currently facing
- Make sure your back is facing the center of the room
- You’ll want to set up raid markers on opposite ends of the room. The first affected player runs to one marker, and the raid shifts towards that side of the room
- Dispel debuff, everyone gets knocked towards opposite marker
- Player #2 with debuff gets dispelled, everyone gets knocked back again in the opposite direction

- Dodge the super obvious cones of bad from Grasp of Malice. If you get hit and get knocked off, your RL or GM is probably gonna put it on Twitter or Youtube to meme you
- When the boss reaches 80%, 60%, or 30%, healers should be aware of the Shatter damage
- This ramps each time it happens, so plan on using healer CDs for the 2nd and 3rd Shatter. Probably want 2-3 for that third Shatter
- Make sure to dodge the swirlies on the ground from Spite. Big chunk of damage + incapacitate = gonna have a bad time
- Aura of Spite isn’t really something to be directly concerned about. It’s just constant ticking damage so the healers don’t get bored
- Later on in the fight, after all 3 pieces of armor have broken off, the ticking damage can get a bit intense. Rotate healing CDs as necessary
- Orb of Torment + Suffering
- When a new Orb of Torment spawns, everyone should move away from it, except the active tank
- Active tank should make sure they are standing directly between the Orb and Ner’zhul
- Ensure the Suffering lazer hits the Orb
- As soon as the Orb gets hit with Suffering, all DPS should hard-swap and kill it ASAP
- Once it “dies,” have an assigned player pick it up, run it to the edge, and lob the thing off the platform
- Continue repeating this for each Orb of Torment
- A single missed Suffering lazer can set you back significantly on healing, as the extra random damage they put out, especially later in the fight, can get overwhelming
- Oh, and make sure nobody but the tank and the Orb get hit by the Suffering lazer
- Tanks should swap after each Suffering
- As far as Bloodlust goes, pop at 30% HP on the boss
← Back to Guides
Posted in Sanctum of Domination - Heroic, Guides | No Comments »
July 4th, 2021
Written and produced by Crzypck
Special thanks to our consultant: Tagzz
← Back to Guides
The Nine
This is a two phase fight. You start by fighting Signe and Kyra. When either of these hits 15%, a third boss drops down, Skyja, who has significantly higher HP than the other two. Activating Skyja is the beginning of Phase 2.
Phase 1
- Kyra
- Unending Strike
- Tank smack, deals 51k Physical damage
- Also applies a 10% increased damage taken debuff, stacking
- ALSO hits the entire raid with Repeating Slash
- This deals 5k Physical damage, PER application of the stacking debuff on the tank who was hit with Unending Strike
- Formless Mass
- Creates a small blob add that has to be killed
- Casts Siphon Vitality, which leeches 12k Shadow from every player & heals the add for the same amount
- Can be interrupted
- Wings of Rage
- At 100 energy, Kyra sucks everyone towards her for 7s
- At the end of the 7s, she does a big smash within 10 yards
- Deals 49k Physical + stuns for 10s

- Signe
- Song of Dissolution
- Channeled ability, ticks every 1.5s for 6s
- Each tick applies a stacking debuff to the whole raid
- Deals 1600 Shadow per second for 5s, per stack
- Each stack refreshes duration
- Interruptible
- Soulful Blast
- Casted ability at the tank, deals 25k Shadow damage
- Interruptible
- Reverberating Refrain
- At 100 energy, pushes all players away for 7s
- After the 7s, she explodes and deals 49k Shadow to all players FURTHER than 10 yards from her, and also fears anyone hit for 6s

- Val’kyr Stuffs
- While you fight the first two bosses, the third will call down adds to cast abilities at you
- These happen one at a time, spread out over time
- Agatha’s Eternal Blade
- Several lines appear, and shortly afterwards Val’kyr fly down the lines. Being hit deals 51k Physical damage & knocks you back
- Daschla’s Mighty Impact
- Puts purple circles around a few players, 20 yards
- Circles explode after a few seconds, dealing 25k Shadow to anyone within the circle
- Annhylde’s Bright Aegis
- Annhylde drops to the ground and puts down a massive AoE protective shield for 40. Reduces damage taken by all bosses by 90% while inside the circle
- Aradne’s Falling Strike
- Creates several small soak circles around the room
- After 8s, the soak circles explode
- Deals 14k Shadow damage to anyone in the soak circle
- If any circle is NOT soaked, the whole raid takes 29k Shadow damage
- Brynja’s Mournful Dirge
- Puts small 5 yard circles on several players
- Affected players take 2500 Shadow per second for 6s
- When the circles expire, they explode and deal 27k Shadow damage to anyone hit, except the person who actually had that circle
- Arthura’s Crushing Gaze
- Picks a random player & puts a 10 yard circle around them
- After 8s, slams into that player, dealing 124k Frost damage, divided evenly among everyone hit
- End of Phase
- When either Kyra or Signe reaches 15% HP, Skyja activates, and you move into Phase 2
Phase 2
- Both Kyra and Signe continue using all their abilities until they each respectively die
- All of the Val’kyr stuff continues happening
- Skyja
- Fragments of Destiny
- Puts a debuff on several random people. Deals 3k Frost damage every second. In testing, there were 3 debuffs out.
- Dispellable, but no duration
- When dispelled, jumps to the next closest player
- If all 3 of the debuffs jump onto the same player, they all disappear and instead leave a puddle of ice on the ground
- Puddle is 10 yards wide, deals 10k Frost per second & slows you by 50% while standing in it
- Word of Recall
- Cast every roughly 1:15 after Skyja activates
- Causes all previous Val’kyr abilities to be re-cast
- Link Essence
- Links several players together
- If any linked player takes damage, 60% of that amount will be split evenly to the remaining linked players
- Ex – one player in the link takes 10k damage. 6k damage will be split between the other linked players
- Pierce Soul
- Big tank smack, deals 62k Physical damage
- Also reduces movement speed and healing received by 10%. Stacks
- Resentment
- Applies a raid-wide DoT for 12 seconds
- Ticks for 3700 Shadow damage every second
Strategy
Phase 1
- You’ll want to stack Kyra and Signe on each other for cleave damage, just off-center of the room. Give plenty of room to spread as needed
- Tanks should swap when Kyra’s tank has 3 stacks of Repeating Slash
- Or more, if your healers really want to pad
- When a Formless Mass spawns, everyone should hardswap and burn ASAP.
- Interrupt every cast, do not let any get off
- Interrupt Signe’s Song of Dissolution ASAP, unless again your healers are begging you to let them pad. Gotta get that Rank 1 parse somehow
- Interrupt Soulful Blast as much as possible. This is a much lower priority than the Formless Mass casts or Song of Dissolution.
- When Wings of Rage is cast by Kyra, run away from the circle. When Reverberating Refrain is cast by Signe, run TO Signe and have a dance party in that circle
- Keep an eye on timers for when Val’kyr are coming. Dodge lines, soak the small purple circles, spread out with big purple circles, move bosses out of the giant shield zone, move away if you have small white circles
- Most important one here is the Crushing Gaze. If you’re the target run into melee
- If you don’t have at least 4 people in melee, you’ll need some ranged to come in as well to help soak
- Nuke these two down fast, and try to get them to both reach 15% HP as close as possible. As soon as one reaches 15%, Skyja activates
Phase 2
- Pop Bloodlust when Skyja activates
- Alternatively, if you’re struggling to keep up with all the mechanics coming in from the Val’kyr later in the encounter, you could save lust for the last ~30% HP
- Prioritize finishing off Kyra and Signe, so you don’t hafta deal with their abilities anymore
- Continue handling all the Val’kyr stuff. Soaks, dodges, etc.
- As far as Skyja is concerned, the biggest deal is Fragments of Destiny
- You’ll want to assign a starting spot somewhere near the edge of the room
- Use this as the drop point for the first set of Fragments
- You’ll need to dispel the debuff and bounce it to people. Have one assigned person without the debuff stand directly on the marker. All 3 people with the debuff should stand around this person, then have healers dispel all 3 debuffs in quick succession
- It may take a few pulls for some people to learn proper positioning here, but shouldn’t be too bad
- Do it right and it essentially negates the mechanic
- Just make sure to always have a marker down for the assigned person who’ll get all 3, and have it be near the edge of the room
- See image below, the icons with blue outlines are the ones with the fragments, the player on Orange is going to get all 3 when they’re dispelled, leaving a puddle behind

- Healers will need to keep a close eye on Link Essence players, so none of them die.
- If your GM gets the Link Essence, your healers should band together as a council and ensure nobody heals them
- Tanks will want to swap after every 1-2 Pierce Souls
- You’ll want to use some type of throughput CD for Resentment, to keep the raid stable
- This phase can get pretty hectic. Between having the Fragments going out, lines to dodge, circles to soak, people needing to spread, needing to move the boss out of the shield circle, etc. Things start to ramp up as Skyja casts Word of Recall, and after her 2nd cast of it you basically have mechanics coming out non-stop
- Keep your cool, focus on each thing going on, and nuke down the boss
← Back to Guides
Posted in Sanctum of Domination - Heroic, Guides | No Comments »
July 4th, 2021
Written and produced by Crzypck
Special thanks to our consultant: Tagzz
← Back to Guides
Eye of the Jailer
This encounter is you against Odin’s Eye, which has been turned against you by the Jailer. The Eye is aided by a handful of Deathseeker Eye adds. This is a three phase encounter. You’ll alternate between Phases 1 and 2, until you’ve completed Phase 2 twice, at which point you’ll enter Phase 3.
General Info
- The boss platform is a crescent, and the boss generally hangs near the middle of the crescent. In testing it seemed like he wasn’t supposed to move, but could move along the edge of the platform
- On each of the 2 furthest edges of the platform, there is a harpoon pile. Clicking this will yeet you over to the opposite side.
- These are active the entire encounter, and can be used to quickly hop from one side to the other
- (I couldn’t get a clear picture of the harpoon pile, so used SKULL instead)

Phase 1 Abilities
- Piercing Lens
- Focused smack on the tank. Deals 33k Physical damage. This is the Eye’s primary “melee” damage ability on tanks.
- Deathlink
- The Eye shoots a bolt at the current tank, dealing 41k Physical damage, and dealing splash damage to anyone near the tank as Shadow damage. 2 second cast time
- Eye Bolt
- The adds (which aren’t attackable at this point) randomly shoot people for 6k Shadow damage periodically
- Fracture Soul
- The boss puts a few swirlies on the ground under random people. These explode after a short time, dealing 10k Shadow damage
- Anyone hit has their soul Fractured, creating 3 images of themselves called Fractured Souls
- These images deal 1k Shadow per second, reduce movement speed by 20%, and reduce damage & healing by 30%, stacking per image
- Images despawn when the affected player runs over them
- Annihilating Glare
- The boss shoots a giant freaking Eye Beam in a straight line in front of itself. Deals 62k Shadow per second to anyone hit, and knocks them back
- The boss will rotate here and do nearly a full 360 with the eye beam

- Stygian Abductor
- Big add that starts in the sky
- It’ll pick a random target and cast Dragging Chains. Target gets a circle around them
- Attaches chains to the target, and anyone within 6 yards
- Splits 25k Shadow damage evenly between everyone hit
- Also pulls everyone hit towards the flying add. The strength of this pull is based on how many people hit – less people hit = stronger pull
- If too few people are hit, those who did soak get pulled off the ledge and die
- After Dragging Chains ends, the Abductor lands on the ground and starts casting Assailing Lance at the tank
- Assailing Lance deals 37k Physical, and puts a 3k/s bleed for 10s, stacks.
- Forces tank swaps
- When the boss reaches 66% and 33%, he puts up a shield, becomes immune to damage, and you enter Phase 2
Phase 2 Abilities
- Eye of the Jailer
- Stygian Ejection
- Boss throws 2 Deathseeker Eye adds at the platform, one near each of the Harpoon piles. You’ll see swirlies on the ground where they’ll land. If you’re in the swirlie when they land, you’ll be smacked for 16k Shadow damage and get yelled at by your raid leader
- Titanic Death Gaze
- Big AoE explosion, deals 16k Shadow to the entire raid. 8 second long cast, begins casting 16s after the Deathseeker Eye adds land, then every 34s you remain in Phase 2
- Desolation Beam
- Shoots a beam at a random player, dealing 8k Shadow then chaining to additional nearby players. Damage increased for each jump
- Fracture Soul
- Works exactly the same as Phase 1
- Deathseeker Eyes
- These need to be tanked, can be moved around the platform
- Piercing Lens
- Same thing as when the big boss does this, just a basic Physical damage smack that serves as their melee
- Slothful Corruption
- Debuffs random players for 21s. Deals 2k Shadow per second, and reduces casting, ranged attack speed, and movement speed by 40%
- Dispellable
- Spreading Misery
- Debuffs a few random targets, dealing 4.5k Shadow damage per second for 5 seconds
- When this expires, leaves a puddle on the ground
- Puddle lasts for 10 minutes. Standing in puddle deals 4.5k Shadow every 1.5 seconds
- Shared Suffering
- If the two Eyes are within 30 yards, they cast Suffering every 3s
- Deals massive raid-wide ticking damage. Deals 41k Shadow damage, and each tick applies a raid-wide debuff increasing shadow damage taken by 20% for 1 minute
- Dying Suffering
- A dead Eye will cast Suffering every 8 seconds if the other Eye is still alive
Phase 3 Abilities
- When the final set of Deathseeker Eyes dies, the boss casts Immediate Extermination
- Increases attack rate by 50%
- Also pulses on the raid every 10s for the remainder of the fight
- Each pulse deals 13k Shadow damage to everyone
- Also applies a debuff reducing healing received by 10%, stacking
- The Eye of the Jailer also retains everything from Phase 1, including the Stygian Abductor adds spawning
- Phase 3 is a race, kill the Eye before you can’t heal anymore and just die
Strategy
Phase 1
- You’ll start with the tanks in the middle holding the boss. Stand a few steps away from each other so you don’t splash Deathlink
- Melee should be on the sides, away from the tanks
- Ranged & healers spread out around the platform
- Dodge the Fracture Soul swirlies
- If you fail at this, you get those 3 images spawning. You’ll need to go and run over all 3 as quickly as possible, when the raid points and laughs at you for getting hit
- Watch your spell timers. When the boss is about 5s away from casting Annihilating Glare, start moving towards one of the Harpoon piles.
- Click the pile as the beam gets close, then spread back out around the platform
- When a Stygian Abductor spawns, you’ll want 5-6 people stacking on the Dragging Chains target
- If YOU are the target, run towards the back of the platform, so it’s further to be dragged
- If needed, assign a set stacking point for the target of Dragging Chains to run, and have your soakers meet the target there
- Outside that, just nuke the boss until you hit a Phase 2 trigger point. Remember, you’ll enter P2 at 66% and 33% HP
Phase 2
- Tanks need to pick up the Deathseeker Eyes ASAP
- Keep them about 35-40 yards apart
- We recommend moving them towards the back of the platform, and the raid loosely spread between the 2

- Being loosely spread is important, you don’t want a giant clump of people or Desolation Beam could mess your raid up
- Like in P1, don’t get hit by Fracture Soul swirlies
- Healers should keep an eye on timers so they know when Titanic Death Gaze is being cast. It’s not lethal damage by itself, but can certainly finish off anyone who’s low
- Also make sure to dispel Slothful Corruption ASAP
- Any players targeted by Spreading Misery should move to the edges of the room ASAP. Drop the goop as far out of the way as possible
- Remember, the goop lasts 10 minutes, so dropping them in the middle of the platform early on could screw you later in the fight
- Make sure both Eyes die at nearly the same time, ensuring it’s within 8 seconds of each other, so you don’t let any ticks of Suffering go off
Phase 3
- Pop Bloodlust as soon as the boss reactivates after the 33% HP Phase 2 ends
- This is just Phase 1, but on steroids. Nuke the boss down before it gets out of hand and you just all start dying
← Back to Guides
Posted in Sanctum of Domination - Heroic, Guides | No Comments »
July 4th, 2021
Written and produced by Crzypck
Special thanks to our consultant: Tagzz
← Back to Guides
Tarragrue
2 phase fight. P1 is 100-10%, with a hard burn phase for the last 10%.
Before the Encounter
- Your raid clears one Torghast floor to reach Tarragrue, picking up Anima powers.
- Everyone gets to pick 4 Anima Powers you get to keep for the boss.
- They’re all generic, and you should mostly just pick the best throughput ones for yourself.
- Have 2-3 people in the raid take the “Ever-Beating Heart” Anima power, you’ll need it.
Phase 1 Abilities
- Overpower
- Tank smash that deals 83k Physical + applies a 4s stun
- Also increases physical damage taken by 200% for 20s
- Chains of Eternity
- Targets a player for 8s
- Throws chain at them
- Deals damage to the first person hit, 20k
- Pulls that person to the boss, 30s stun. Deals 413k damage to you if you reach the boss
- Remnant of Forgotten Torments
- Actually 3 similar abilities, with similar effects
- Upper Reaches’ Might
- Soak circle on the ground. Increases boss’s Physical damage by 50%
- Can be soaked by players to reduce the potency
- Each tick soaked by a player increases their physical damage taken by 10% for 1.5 minutes
- Mort’regar’s Echoes
- Increases boss’s Magic damage by 50%
- Can be soaked by players to reduce the potency
- Each tick soaked by a player increases their magic damage taken by 10% for 1.5 minutes
- Soulforge Heat
- Deals 10k Fire damage to the entire raid every 3s
- Can be soaked by players to reduce the potency
- Each tick soaked gives that player a DoT, 2k/5s for 1.5 minutes
- Predator’s Howl
- Creates circle around several players, 5 yard radius
- Pulses every 3s for 21s
- Anyone hit by your pulse gets feared for 8 seconds
- Magic effect, dispellable
- Grasp of Death
- Targeted DoT against random player, heavy DoT for 40s
- Hungering Mist
- Forms several images of itself around the room
- Images then cause a black mist
- Mist explodes after a few seconds, dealing lethal damage
- There are small safe zones, raid needs to stack in the safe zone or people die
- Safe zones are random around the room
- Fury of the Ages
- Boss enrages himself, increases damage & haste by 25% for 35s
- Can be dispelled by Tranquilizing Shot, Soothe, etc.

Phase 2 Abilities
- Jailer’s Gaze
- At 10% HP, boss casts Jailer’s Gaze
- Increases Tarragrue’s damage dealt by 500% until it dies
- Also removes all Anima powers on the raid.
- The boss ceases all other abilities. You kill him before the turbo-buffed boss kills you.
Phase 1 Strategy
- Tanks should swap after every Overpower
- Raid should move together during Hungering Mist, and stack together in safe spots
- Chains of Eternity is tricky.
- Whoever is targeted needs to run away from the boss
- Remember at the beginning, when we mentioned having 2-3 people get the “Ever-Beating Heart” Anima power? This is why – it makes you immune to stun effects
- Have a pre-assigned person with this “Ever-Beating Heart” stand in the way of the chain, and ensure this person is the one hit
- Since Ever-Beating Heart players are immune to stun, they’ll only take the damage competent, then can run away from the boss. Since you never get pulled in, you don’t insta-die!
- Players debuffed with Predator’s Howl need to move away from the rest of the raid
- Dispel these people if possible
- Healers will need to ensure they’re giving proper attention to people with Grasp of Death
Phase 2 Strategy
- At 10% HP, you lose all your Anima power and the boss absolutely TRUCKS you.
- Immediately pop Bloodlust here
- Your tanks will almost certainly not be able to survive the increased damage
- Instead, you’ll need to kite him around the room. Tanks should just run, using any movement abilities they have to get away from the boss
- Eventually, he’ll reach you, and you will die
- As he eventually reaches and kills people, the next highest person with threat needs to continue kiting
- You’re basically in a race – kill the boss before he’s killed off your raid
← Back to Guides
Posted in Sanctum of Domination - Heroic | No Comments »
