Heroic Denathrius Boss Guide

December 4th, 2020

Written and produced by Crzypck

Special thanks to our consulting team: Tagzz, Xyronic, and Ftbubbler

Sire Denathrius

This is a three phase encounter. Phase one you’ll fight Denathrius, Phase 2 you’ll fight Denathrius, his sword Remornia, and a couple adds that spawn, and Phase 3 you’ll fight Denathrius and a Reflection of himself. There’s also a short intermission between Phase 1 and Phase 2.

Phase 1

  • Burden of Sin
    • Permanent debuff, deals 230 Shadow damage per stack
    • 5 stacks are applied to everyone in the raid the moment the encounter begins
    • Several mechanics in Phase 1 and the intermission interact with this debuff.
  • Cleansing Pain
    • Frontal cone ability. Deals 14k Shadow to anyone hit
    • Also removes 1 stack of Burden of Sin
    • Anyone hit who does NOT HAVE a stack of Burden of Sin left instead takes 300% increased damage from the ability.
      • For each stack of Burden of Sin removed, 1 Echo of Sin add spawns
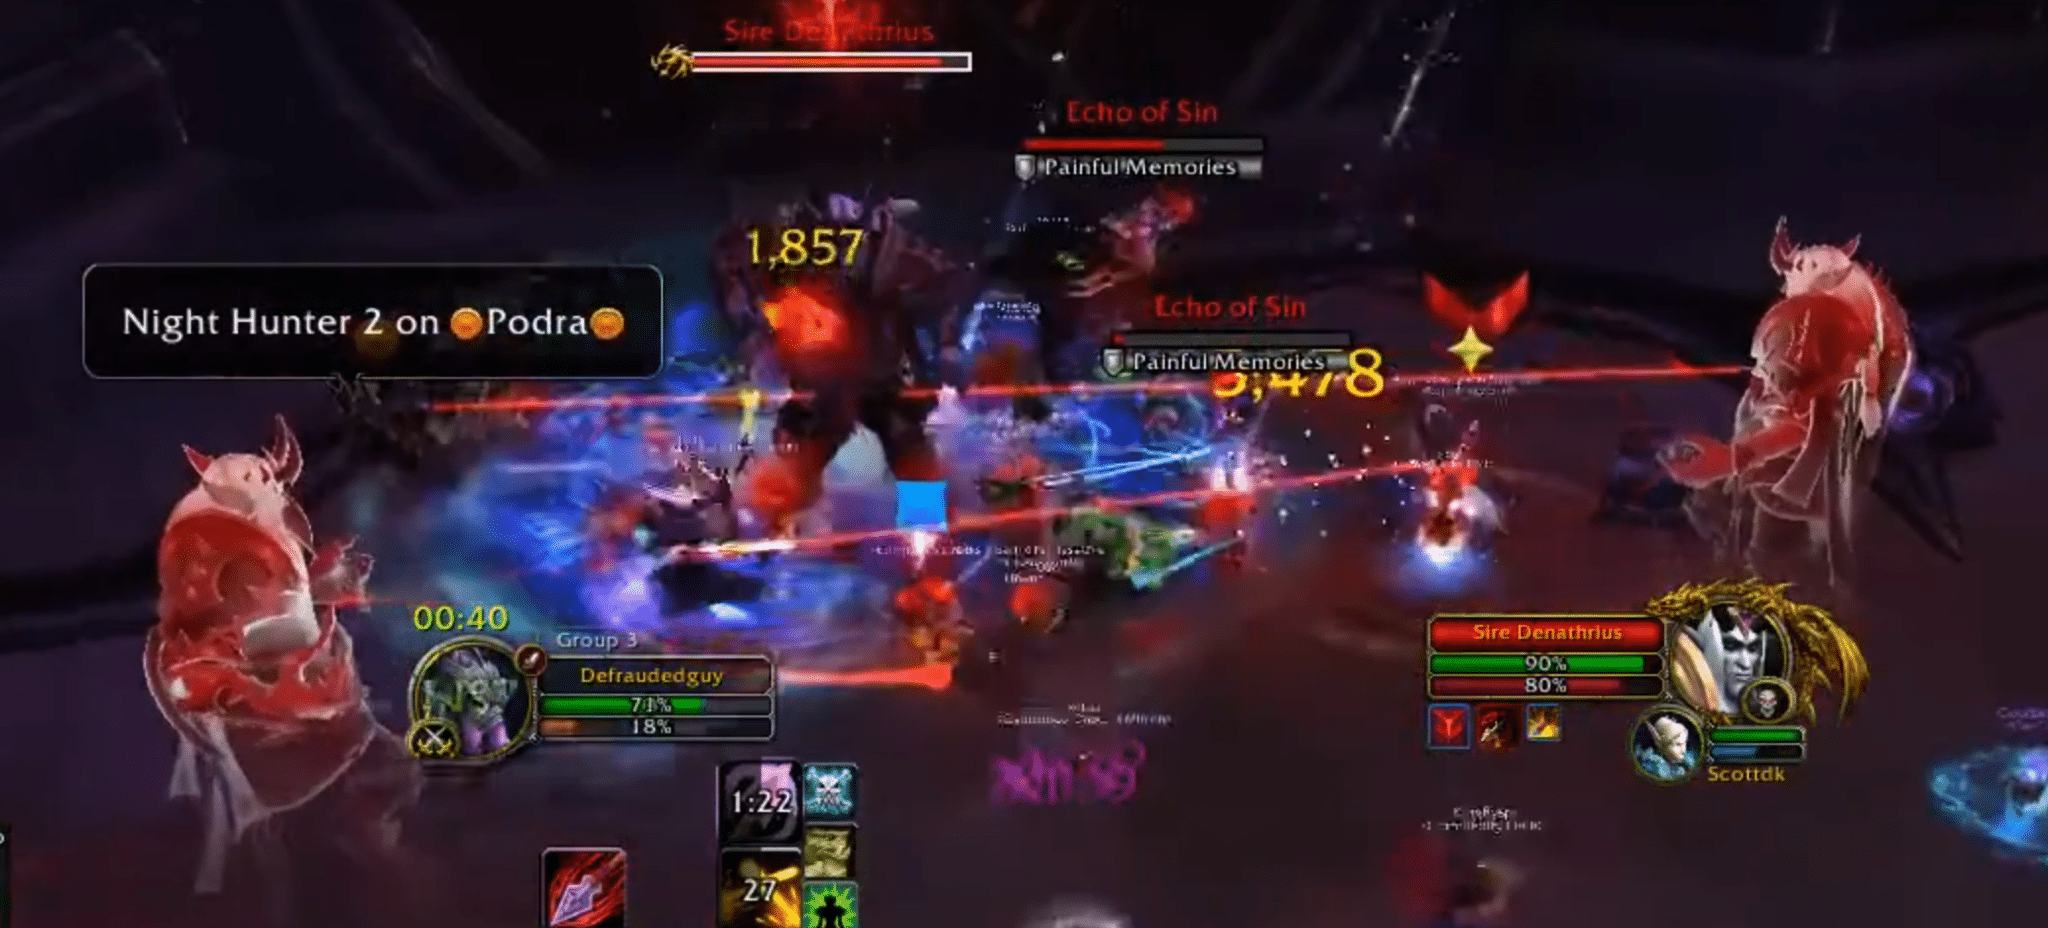
  • Echo of Sin
    • Small adds, pretty low HP
    • Chaincast Painful Memories, deals 1500 Shadow to all players every 2s
    • Cannot be crowd controlled or interrupted in any way
    • Must be killed ASAP

  • Blood Price
    • Denathrius stuns all players and lifts them into the air for 3.5 seconds
    • When this expires, every player explodes and deals 3700 Shadow damage to any player in the raid with the same number of Burden of Sin stacks remaining
  • Night Hunter
    • 2 images spawn, each marks a random player. The affected players will have a line connecting them to their Night Hunter, and also have a small targeting circle around them
    • After 6s, the images charge at their marked players.
      • Deals 6k Physical to all players hit, and applies Touch of the Night
        • Touch of the Night causes you to take 500% increased damage from the Night Hunter’s abilities.
        • In testing, this debuff only lasted 4 seconds
      • Night Hunter casts Insatiable Hunger immediately upon reaching their targets
        • Deals 46k damage to anyone within the targeting circle of the marked players
          • Also heals Denathrius for 150% of damage dealt by this ability
        • Damage is reduced based on how many people were hit by the initial charge component
  • Command: Ravage
    • At 100 Energy, Denathrius commands his sword Remornia to unleash Anima at the raid
    • Remornia is placed in the exact center of the room. About one quarter of the room will glow red
      • After 6s, the red glowing area will explode, dealing 28k Shadow to anyone hit
      • Leaves behind a giant Desolation puddle
        • Big puddle of anima. Standing in the puddle deals 5k Shadow/1 second and reduces healing taken by 100%
  • Commanding Presence
    • After Ravage ends, Denathrius gains a 10% increased damage buff

Intermission

  • At 70% HP on Denathrius, you’ll enter the intermission
  • Denathrius will move to the middle of the room, pull everyone in to the middle, then push back the whole raid towards the edges
    • The room then fills with swirling red Anima
  • All players are slowed by 20% per remaining stack of Burden of Sin
  • There’ll be a clear area around Denathrius, within a 16 yard range of him
    • Reaching this clear area removes any remaining stacks of Burden of Sin
    • The pushback effect also ceases once you reach this clear area
  • After 15 seconds, you fall down to a lower platform and start Phase 2
    • Anyone who still had Burden of Sin stacks dies in the fall
    • If you do not have stacks, the fall does not damage you at all


Phase 2 – 70%

Now in a new room. This is a + shaped room. At the edges of each of the 4 sides are Mirrors. Stepping through a Mirror instantly ports you through the exact opposite side Mirror. There are smaller platforms in between the four sides of the platform. You cannot reach those sides, but adds can spawn on them.

  • Crimson Cabalist
    • Big adds, spawn on the smaller platforms you cannot get to
    • Cast Crimson Chorus, deals 900 Shadow to all players every 2 seconds
      • This is from each Cabalist. If there’s 4 up, it’ll deal 900*4= 3600 damage every 2s
    • Crescendo
      • When a Cabalist dies, it’ll release Anima. A whole shitton of red swirlies will appear on the ground. Standing in a swirlie when it explodes deals 9k Shadow damage
      • Don’t stand in the swirlies
    • Dusk Elegy
      • When Denathrius reaches 40% HP, any remaining Cabalists port to the inner platform that you’re standing on.
      • Their AoE effect now also reduces your healing received by 15% per Cabalist
  • Remornia
    • Bloodbound
      • The sword is attackable this phase. Any damage dealt to the sword is replicated and taken by Denathrius
    • Carnage
      • Being hit by any of Remornia’s attacks or abilities puts a DoT on you. Deals 750 Physical/1 second for 15 seconds. Stacks.
    • Command: Massacre
      • When Denathrius reaches 100 Energy, Remornia will slash throughout the room several times
      • You’ll see giant red lines from multiple directions
      • Getting hit by the blade deals 46k Shadow damage
      • Here’s what they look like:

    • Impale
      • Marks several random players
      • After a few seconds, Remornia impales the targets, dealing 20k Physical to the targets, and anyone in her path
    • Rancor
      • Anyone hit by Impale or Massacre leaves a puddle underneath them
      • Deals 2500 Shadow every 1s, and increases damage taken by 50% while standing in the puddle
      • Puddle lasts 1 minute
    • Whenever Remornia isn’t casting one of the above abilities, she’ll just attack random players throughout the raid
    • Inevitable
      • If Remornia cannot reach her target, she’ll port to them
  • Denathrius
    • Inevitable
      • Whenever he cannot reach his current target, he’ll port to them
    • Wracking Pain
      • Frontal cone ability
      • Deals 14k Shadow damage to anyone hit, including the Cabalist adds
      • Also applies a debuff, increasing all damage taken by 50% for 24s
        • This is also applied to the Cabalists, if they’re hit
    • Hand of Destruction
      • Pulls all players to himself, then spawns an Image of himself
      • After 6s, the image explodes, dealing 57k Shadow to all players
      • Damage is reduced based on distance
      • There’s a visible circle around the Image. Inside the circle = full damage, outside circle = notable drop off

Phase 3 – 40%

  • Denathrius is now pissed off at you and is tired of the fight. He picks up Remornia and uses the blade himself
    • He now attacks 25% slower, but his melee attacks deal 50% more damage
      • Also apply Scorn. Small DoT, deals 900 Shadow/1s for 15s
    • Denathrius also disables the Mirrors. You’ll see a really obvious giant red circle, signifying the out-of-bounds area, around the outer edges of the platforms, blocking you from getting to the mirrors. Running into the giant red circles deals 12k Shadow/1s.
  • Shattering Pain
    • Series of 3 attacks at the tank. Starts with 3 melee swings over 3 seconds
    • Finishes with a massive slam, deals 9k Shadow to the whole raid and knocks everyone back
  • Fatal Finesse
    • Marks a few random players, then slashes them 5 seconds later
    • Deals 14k to the targets, and anyone within 9 yards
      • Also applies a DoT. Deals 1900 Shadow/1s for 20s
    • Smoldering Ire
      • Leaves an anima orb behind
      • Explodes after 10 seconds, deals 25k Shadow to all players
      • Every 0.7s, the orb deals 2500 Shadow to anyone within 3s
        • Each tick of this 2500 Shadow reduces the explosion by an equivalent amount
  • Hand of Destruction
    • Works just like in P2. Pulls everyone to himself, makes an image, then the image explodes 6s later for 57k Shadow damage
      • Get out of the circle
  • Sinister Reflection
    • At 100 Energy, Denathrius makes an Image of himself
      • After 6s, casts Ravage
        • Same as Phase 1. Covers huge area of the room in red anima, deals big damage, leaves goop. Don’t stand in the red.
    • Massacre
      • Same as Phase 2. Lots of giant red lines of death. Don’t stand in lines.
      • This also leaves puddles of Rancor, just like p2

Strategy

Phase 1

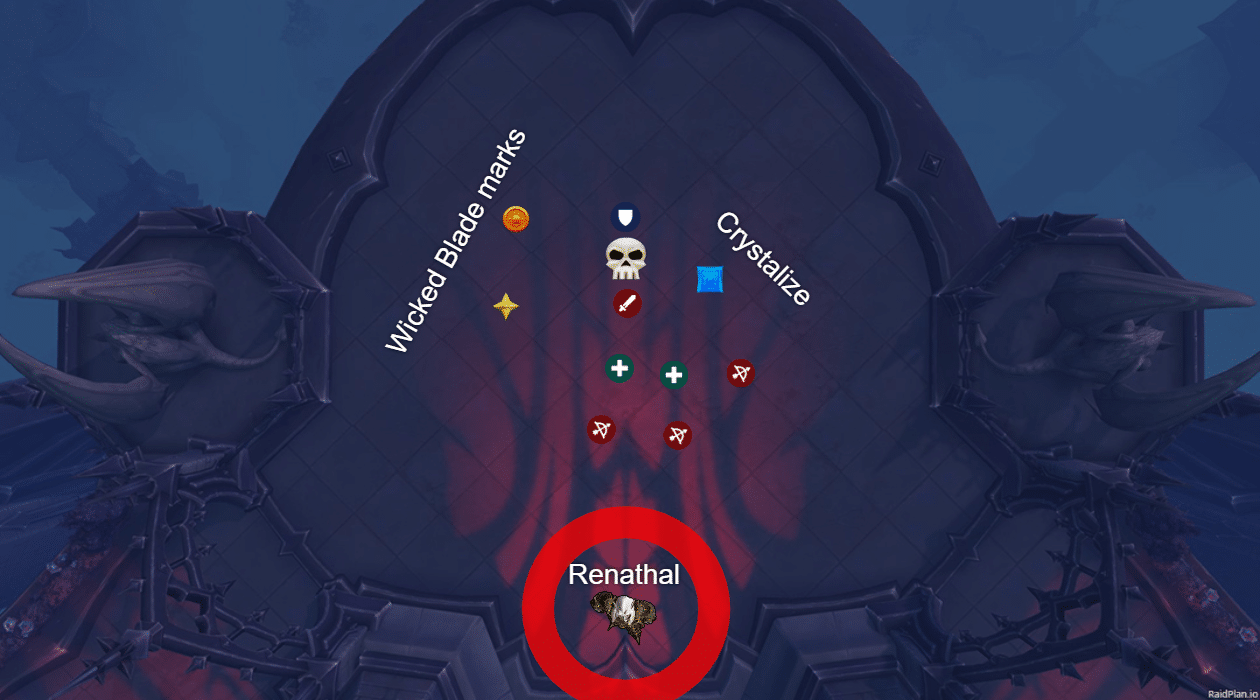
  • You’ll want to start on the side Denathrius is on, the western end of the room. Pull Denathrius near the wall.

  • You’ll need to alternate groups intentionally being hit by the Cleansing Pain. The larger your raid, the more you’ll need to stagger people’s stacks.
    • You’ll only have one Cleansing Pain before the first Blood Price
    • As such, you’ll want half your raid being hit by that first Cleansing Pain
    • To get hit by Cleansing Pain, literally just stand in front of the boss when he casts it

  • Managing Burden of Sin Stacks, Cleaning Pain, & Blood Price
    • The first Cleaning Pain occurs 8s into the fight. After that, you’ll have a Cleaning Pain 8s after each Blood Price ends, and another 25s later.
      • The timeline here is Cleansing Pain 1 > Blood Price 1 > Cleansing 2 > Cleansing 3 > Blood Price 2 > Cleaning 4 > Cleaning 5 > Blood Price 3 > Cleaning 6 > Cleaning 7, etc.
    • **PLEASE NOTE** If you have more than 20 people in the raid week 1, splitting into 2 teams may not be doable. The damage might just be too much to survive. Please see the section at the very end detailing how to split with more than 20 people. Strongly recommend follow this if you go with a group of 30 week 1.**
    • We recommend splitting the raid into Team 1 and Team 2. Each half the raid will have assigned Cleansing Pain casts to gets hit by
    • Doing this ensures  half the raid always has less stacks than the other half, so Blood Price won’t kill you.
      • Team 1 gets hit by each of the first 2 casts
      • Team 2 gets hit by casts 3 and 4
      • Team 1 gets hit by cast 5
      • Team 2 gets hit by cast 6
      • Team 1 gets hit by cast 7
    • We recommend using a raid healing CD for the first Blood Price
  • When Night Hunter is cast, you’ll want to have 2-4 people soak each line. YOU CANNOT SOAK BOTH LINES.
    • The more people who soak each line, the less damage is dealt to the actual target, and therefore, less Denathrius is healed for.
    • Nobody should be inside the target circles except the actual targets

  • The first Ravage occurs about 50 seconds into the fight. Your whole raid needs to get out of the red area before the explosion happens. The puddle it leaves behind forces a repositioning for the raid. We recommend moving north.

  • Keep repeating this until you get the boss to 70%.


Intermission

  • Fairly straightforward, run towards the boss. Everyone should have 3 or less stacks of Burden of Sin, so you should be able to run against the pushback
  • Use movement abilities if necessary. Just make sure you get to the safe zone near the boss
    • Stampeding Roar and/or Wind Rush Totem should be used here, if available
  • You can also set up a Warlock’s Demonic Gateway from near the edge of the room to near the middle. #cheatcodes


Phase 2

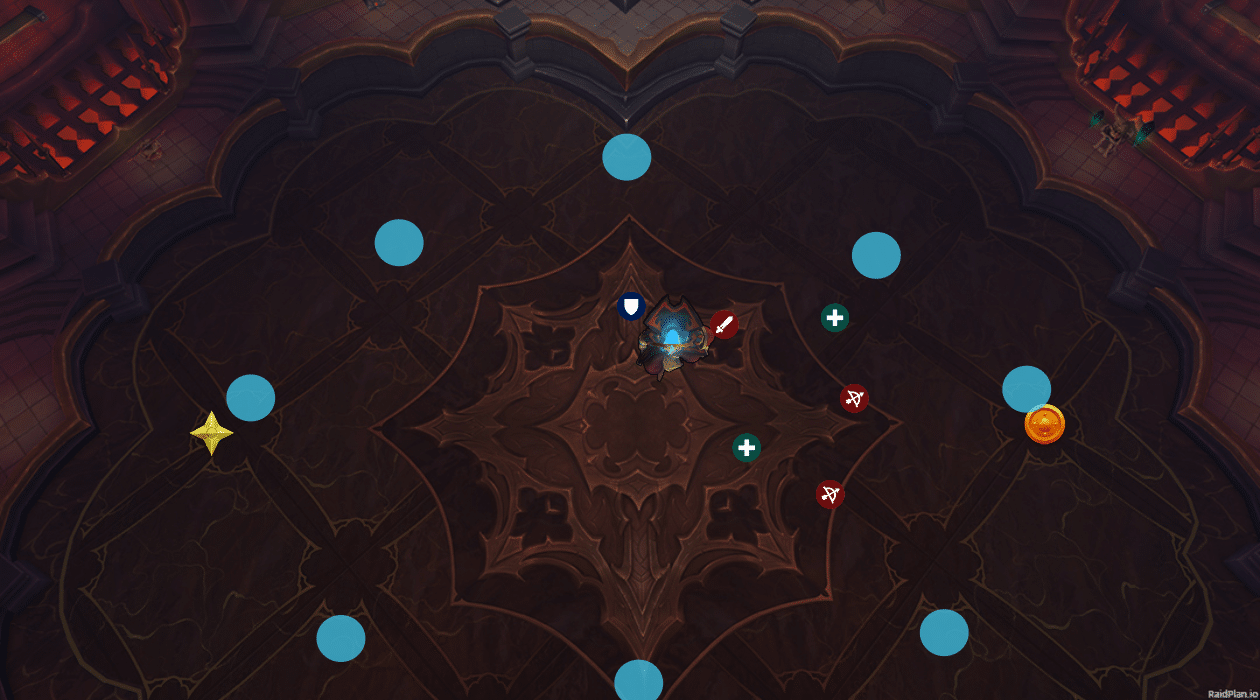
  • Start with the following positioning:

    • Each of the X markers on the diagram show where a Cabalist spawns at the start of the phase
    • Move Denathrius to be between the two on the main platform, and cleave them down
    • DPS down the side ones after the middle ones die.
    • Don’t stand in the swirlies
    • Once the middle 2 are dead, work on the side Cabalists
  • The next several abilities are scripted based on the moment the Cabalists spawned.
  • 35 seconds after the adds spawn, Denathrius casts Hand of Destruction
    • About 5 seconds before this casts, the tank should move the boss close to the northern mirror
    • As soon as this is cast, everyone in the raid will be pulled on top of the boss
    • Immediately run through the Mirror, and wait for the explosion to go off
    • Once the explosion goes off, run back through the mirror to port back where you started
    • In the graphic below, go from your initial positioning straight north through the mirror. You’ll port to the purple circle
      • As soon as the explosion goes off, go back through that southern mirror, and you’ll pop out where you started

  • By the time you get back, you’ll have about 5-7 seconds before the next major mechanic, Massacre
  • 56 seconds after the adds spawn, Denathrius hits 100 energy and casts Massacre
    • This is big red obvious lines, don’t get hit
    • Do NOT kill Cabalists within 5 seconds of this
      • Doing so means you’ll also have swirlies, and that’s really just too much shit to dodge.
      • Either kill the adds quickly, beating the Massacre, or wait until Massacre ends
  • As soon as Massacre ends, clean up any remaining Cabalists
    • Make sure you’re positioning close to the mirror again here
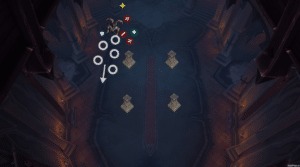
  • At about 1:10 after the adds spawned, a set of Impales will go out
    • Targets should move to the side of the group, and the raid adjusting away from them
    • Example below, affected players move to edges:

  • Immediately following Impale dealing damage, you’ll get another Hand of Destruction
    • Handle this the same way you did the first one, port through the Mirror
    • However, DO NOT come back through this time. Stay South.
  • As soon as the explosion goes off, a new set of Cabalists spawns, this time all in the south.
    • This occurred about 1:20 after the initial add spawn.
    • Positioning can be seen below

  • As you did before, cleave down the 2 on the main platform. Make sure to get them down as quickly as possible
  • 20 seconds after this set of Cabalists spawn, Denathrius reaches 100 energy and casts Massacre
    • Dodge the lines. Don’t die to this, seriously, everyone is gonna laugh at you. They won’t be mad, they’ll just be disappointed.
  • Once Massacre ends, all ranged should hard-swap the two adds on the side platforms
    • Kill them ASAP
  • You’ll have another Impale about 10 seconds after the Massacre. Just move to the edges of the platforms again
    • Like before, get close to the mirror
  • Next up is another Hand of Destruction. Handle this exactly as you did the first one – take the mirror, wait for explosion, take mirror back to where you started
  • From here nuke the freaking boss. There’ll be an Impale, handle it like you have been, no biggie
  • Get Denathrius to 40% here before a third set of Cabalists spawn. You have about 1 minute from the second Massacre to the third set of adds


Phase 3

  • This is hectic as all hell, and has a “soft” enrage timer 3:30 after you begin Phase 3
    • This is when the 3rd Ravage occurs, which’ll cover the remaining clear spots in the room and wipe the raid. We’ll get back to this.
  • Lust immediately when you enter Phase 3
  • To start, clean up any Cabalists you have remaining. They are absolute first nuke priority here. 
  • Denathrius’s first ability will be a Shattering Pain. 
    • Make sure you’re near the boss, and are not near an edge, or you’ll get knocked off
  • This’ll be immediately followed by a Fatal Finesse
    • Place these circles near each other
    • Affected players can essentially Venn-Diagram them, as long as you don’t take damage from someone else’s circle
    • Once the Anima orbs spawn, all ranged should help soak them down
      • Any unsoaked Anima orbs will result in a wipe. 
  • While you’re soaking these Anima Orbs, Denathirus will cast Hand of Destruction
    • Your tanks need to move Denathrius near an edge, ensuring the raid has a safe place to get out of the explosion and stack
    • Raid should stack near the center of the platform
    • Use a raid CD here once you get out of the blast radius for Hand of Destruction, as you likely won’t have fully soaked the Anima orbs and they’ll explode near the same time
  • Immediately following the Hand’s explosion will be a Shattering pain. Make sure you get knocked back down one of the 4 sides and not off the edge
  • Ravage is next. This’ll cover 1 third of the platform. Do not get hit by it, move to the clear areas.
    • As soon as Ravage completes and coats a third of the floor, the boss uses Shattering Pain again. Get close to the boss, make sure you don’t get knocked off
  • Next is one of the hardest points of heroic – 2 sets of Fatal Finesse back to back. 
    • Three people get the debuff, drop Anima Orbs
    • At the same moment the first set of debuffs expire, a second set of 3 people get the debuff
    • Place the first 3 Orbs as close together as you safely can, back behind the ranged DPS
    • Place the second set of Orbs near the first set, but closer to the boss
    • Soak the further-back Orbs, then the closer orbs. You’ll need to start soaking the first set of orbs while the second group of Fatal Finesse debuffs are still out.
  • As the second set of Orbs explodes, the boss starts casting Shattering Pain again. Use a raid CD here, as you’ll likely need to leave the Orbs before they disappear, meaning a chunk of raid damage then directly into the knockback
  • This is followed by a Massacre, the red sword lines from P2, happening at the same time as another new set of Fatal Finesse debuffs
    • Dodge the lines, make sure to give people with Fatal Finesse room to maneuver and drop the Orb without getting hit by the lines
    • Soak if possible during the lines, but everyone needs to help soak as soon as the lines finish
  • From this point on, you’ll really just be rotating between Fatal Finesse(Anima Orbs), Shattered Pain(knockback), Hand of Destruction, Ravage, and Massacre. 
  • Keep handling the mechanics as you have been
    • Don’t get knocked off, soak Orbs, run out of Hand of Destruction, etc. 
    • Kill the boss before the 3rd Ravage occurs, which is 3:30 after Phase 3 begins. 

Burden of Sin, more than 20 raiders

  • Just going off the Dungeon Journal numbers and expected health pools, if you have more than 20 people in your group, you likely cannot just do half and half teams for Blood Price.
    • Blood Price is currently worded as “you deal 3700 damage to anyone in the raid with the same # of stacks as you”
    • So if you run a 30 person raid, and do half/half, YOU will have 14 people at the same # of stacks.
      • 14 * 3700 = 51,800.
      • Expected DPS health pools? ~40k
      • Bad news bears.
    • After quite a bit of work, here’s what we came up with:

    • In more simple terms:
      • Split the raid into 4 teams, as equal as possible. For a 30 person, it’ll be 8,7,8,7.
      • For the very first Cleansing Pain, at 0:08, Teams 1 and 4 soak this.
        • Everyone in the raid should use a defensive for the first Blood Price. Use immunities if possible.
      • From there on, here’s the order:
        • Cleansing 2 – Team 1 & Team 3
        • Cleansing 3 – Team 1 & Team 3
        • BLOOD PRICE
        • Cleansing 4 – Team 1 & Team 2
        • Cleansing 5 – Team 3 & Team 4
        • BLOOD PRICE
        • Cleansing 6 – Team 1 & Team 2
        • Cleansing 6 – Team 3 & Team 4
        • BLOOD PRICE
      • By following this order, with a group of 30, the most people at the same number of stacks for a Blood Price cast will be 8. This will ensure the Blood Price casts are survivable for larger raid groups.
      • Yes it’s more complicated. Yes it’s a pain in the ass. But yes, you’re going for AOTC week 1 with a full 30 person raid group. What did ya expect? =P

Heroic Sludgefist Boss Guide

December 4th, 2020

Written and produced by Crzypck

Special thanks to our consulting team: Tagzz, Xyronic, and Ftbubbler

Sludgefist

Big ol’ ugly fella. 4 big pillars around the room, you’ll need these. This is a single phase fight, but the boss has an energy bar. At 100 energy, he casts a unique ability you need to deal with.

  • Giant Fists
    • Sludgefist’s melee attacks also hit the next closest player to the active tank
    • Tanks need to stay stacked
    • If no other players are within 5 yards of the tank, the tank is just hit with both parts (meaning double damage)
  • Chain Link
    • Puts chains around most of the raid. After 6s, links players together in pairs
    • Lasts 56 seconds, deals 300 Physical every 2s to the affected players
    • Moving 12 yards apart breaks chains
      • Breaking chain deals 187k damage to both players & stuns for 6s
  • Destructive stomp
    • Massive aoe circle around boss. 20 yard range
    • Deals 93k Physical to anyone hit, also destroys any pillars within the circle
  • Falling Rubble
    • Swirlie on the ground. Getting hit deals 15k Physical and stuns for 2s
    • Also leaves a puddle of falling rock behind, deals 900 Physical every 0.5s and reduces movement speed by 25%. Don’t stand in the bad
    • This seemed to be targeted at random players during testing
  • Colossal Roar
    • Big roar by the boss, deals 14k Sonic damage & slight knockback
  • Chain slam
    • Roots random player for 4 sec, red circle around them
    • After 4s, pulls everyone within circle to boss, deals 50k Physical split between everyone hit
  • Gruesome Rage
    • At 30% HP, Sludgefist enrages dealing 20% increased damage and 20% increased attack speed
  • Hateful Gaze
    • At 100 energy, Sludgefist picks a random player and charges at them after 6s
    • Deals 187k to anyone hit
    • If he hits a wall or pillar, he deals 15k Physical to the whole raid and stuns the boss
      • Boss then takes 100% increased damage for 12s
      • If he hits a pillar, it’ll collapse and cause the raid to take 300 Physical per second to all players for the rest of the encounter. This effect stacks
      • If he hits a wall, deals 12k Physical every second to all players for the remainder of the encounter


Strategy

  • Tanks will need to be stacked on top of each other, and keep the boss 20 yards away from any pillar.
    • If you tank too close to a pillar, Destructive Stomp will blow one up and you’ll likely end up wiping later in the fight
    • If tanks aren’t stacked, melee are gonna be face-down on the floor relatively quickly
  • The ranged should be mostly stacked, and try to be near the walls to bait Falling Rubble
  • Make damn sure you get out of the giant circle around him for Destructive Stomp
  • Colossal Roar just needs to be healed through. It’s really only dangerous to the Chain Linked players
  • Throughout the fight, the most important abilities to manage properly are Chain Link and Chain Slam. Improper management of either will cause wipes pretty quickly
    • Chain Link – the linked players need to stay within 12 yards of each other, no matter what. When Colossal Roar happens, make sure you’re stacked on top of each other so you don’t get knocked out of range
      • You can see who your partner is by the big red arrow over their head before the link finishes, and by the red orb over there head after the link is complete.
    • Chaim Slam – you’ll want 3-4 players helping soak this. In testing, it WAS possible for a Chain Link target to get Chain Slam. If this happens, the connected person obviously has to be one of the soakers.
      • Since this is immediately followed by Destructive Stomp, make sure you get out ASAP
      • You pre-assign 3-4 soakers for this, so the same people can handle it each time
  • When the boss hits 100 energy, he casts Hateful Gaze
    • The targeted player needs to get behind a pillar, so the boss runs into said pillar.
    • If you miss, you wipe. If you get hit by the charge, you die.
    • You only have 4 pillars to work with, so that’s the true enrage. If you get a 5th Gaze and he hits the wall, you will almost certainly wipe. You’ll be able to hang on for a few seconds, but not long
  • For positioning, please see the graphics below. You’ll start near the northeastern-most area of the room (where the boss starts the encounter), and slowly move around the room after each Hateful Gaze
    • The goal with this movement is to both maximize your space by moving away from Falling Rubble, as well as minimize required movement to each successive pillar
  • Lust one of the times the boss is stunned. A great time is the 3rd pillar, and this occurred at about 3:10 into the fight in testing. That means 3 minute CDs were back up, potentially maximizing raid damage.
  • Make sure he dies before a 5th Gaze and you’re good ^.^


Positioning

Start at the very front of the room, and work your way around, repositioning where the most recent pillar was destroyed.

Start of fight:

After first Hateful Gaze:

After 2nd Hateful Gaze:

After 3rd Hateful Gaze:

Heroic Stone Legion Generals Boss Guide

December 3rd, 2020

Written and produced by Crzypck

Special thanks to our consulting team: Tagzz, Xyronic, and Ftbubbler

Stone Legion Generals

This is a 3 Phase encounter. In Phase 1, you’ll fight Kaal, with Grashal flying around the room throwing bad things at you. Phase 2, the roles are reversed. Phase 3, you’ll fight Kaal and Grashal side by side. Adds will spawn throughout the encounter, and there’s a Prince Renathal event that you’ll need to complete to move into subsequent phases.

  • Encounter-Wide Abilities
    • The following abilities will appear in all 3 phases, and are incredibly important for you to understand and handle properly. Mess these up, and it’s like trying to french fry when you’re supposed to pizza – you’re gonna have a bad time.
  • Wicked Laceration
    • Stacks, hurts, permanent. Deals 2500 Physical/2s. Several mechanics apply this
  • Wicked Blade
    • Kaal throws a blade that bounces between two people. Blade goes from boss, to person 1, to person 2, then back to boss
    • Anyone hit, including the 2 targets, takes 11k Shadow and gains 1 stack of Wicked Laceration
  • Stone Breaker’s Combo
    • Grashal periodically casts Crystalize at ONE person
    • Channeled ability, deals 3k Nature/s for 5s
    • When the 5s channel expires, it explodes in an 8 yard range
      • Targeting circle indicates person & radius
      • Anyone in the explosion takes 9300 Nature damage
      • Removes any Bleed effects on the people hit (Wicked Laceration and Serrated Tear), and also stuns anyone hit for 4s
    • The explosion is immediately followed by a Pulverizing Meteor
      • Deals 93k Nature damage split evenly between everyone hit, 8 yard radius
      • Impact is about 2-3 seconds after the Crystalize explosion
  • Phase 1
    • You’ll be fighting General Kaal in Phase 1, which lasts until she hits 50% HP. While you do this, Grashal will be flying above, throwing bad things at you.
    • General Kaal
      • Heart Rend
        • Puts a 36s DoT on 4 people. Deals 3k Shadow/3s
        • When removed, whether dispel or expires, applies Heart Hemorrhage
          • More potent DoT, deals 6500 Shadow/1s for 6s
          • You’ll want to time the dispelling or expiration of this so it does NOT coincide with a Crystalize
        • Healers need to keep an eye on these people to keep them up
      • Serrated Swipe
        • Frontal at the current tank, deals 37k Physical damage and applies a stack of Serrated Tear
          • Permanent DoT, deals 1500 Physical/1s
          • Also increases damage from Serrated Swipe by 50%
          • Stacks
          • Will eventually force a tank swap so the one with stacks can stand in Crystalize
      • Hardened Stone Form
        • Reduces damage taken by 95%
        • Activates when Kaal hits 50% HP, starts the Prince Renethal Event
    • Grashal
      • While you fight Kaal, Grashal is flying around
      • He’ll periodically cast the Stone Breaker’s Combo that you’ll need to deal with
      • Also throws out Stone Spikes, just deals 4600 Physical and reduces movement speed by 30% for 8s. Unavoidable, just heal through
    • Add periodically spawn to fight you
      • A Stone Legion Goliath will periodically spawn while you fight Kaal. During the Prince Renethal event, Stone Legion Commandos also spawn
      • Stone Legion Goliath
        • Ravenous Feast
          • Leaps at a random target, dealing 7800 Physical damage & stunning them for 4s
          • After landing, immediately does a blade flurry thing, 3k Physical damage every ½ second for 4s
          • Healers need to keep this person up
        • Ravenous Hunger
          • Dude buffs himself, dealing 75% more damage
          • Seemed to cast 30s after spawning
        • Soultaint Effigy
          • At 20%, transforms into a Soultaint Effigy, debuffing the whole raid with a stack of Soultaint
            • Decreases healing received by 10% every 1s. Stacks up to 8 charges
            • The debuff disappears when the add dies.
        • When this dies, he drops a Massive Anima Orb that lasts 15s
          • Used for the Prince Renathal Event
          • Running over the Orb causes you to pick it up. Infinite duration, so make sure someone picks up the orb.
      • Stone Legion Commando
        • Cluster Bombardment
          • Throws red swirlies at the ground, just dodge them
          • Deals 12k Shadow if you get hit, so just don’t get hit. Ezpz.
      • When these die, they drop an Anima Orb that lasts 15s. Also used for the Prince Renathal Event
      • Also unlimited duration
      • You only directly fight and need to kill these during the Prince Renathal Event
    • Prince Renathal Event
      • Begins in P1 when Kaal hits 50% HP, and in P2 when Grashal hits 50% HP
      • He starts at 0% mana, and you need to get him to full mana
        • Do this by bringing the Anima Orbs to him. He has a red circle around him, going inside the circle with an Anima Orb transfers it to Renethal
        • Smaller Anima Orbs from the Commando’s regen 10% mana
        • Massive Anima Orbs from the Goliaths regen 30% mana
        • If you picked up the Massive Anima Orbs from the Goliaths you got early, they can be dropped off on Renathal here.
      • When he reaches full mana, he pops and does 9k Shadow damage to the whole raid and knocks everyone back
        • This causes the phase transition
      • While you’re doing this part of the fight, Kaal & Grashal continue functioning as they did the rest of the phase. All abilities are still fully active. Need to manage everything AND fill Renathal’s mana as quickly as possible
  • Phase 2
    • This time you fight Grashal, while Kaal flys around
    • While Kaal is in the air, she still casts Wicked Blade
      • Also throws a small shuriken at people. Deals 2800 Physical, and bounces to up to 3 more players
    • Grashaal continues using Stone Breaker’s Combo like in P1
    • He also gets a few new abilities
      • Stone Fist
        • Smash on tank. Knocks them back & deals 31k Physical.
        • Also applies a debuff, Increasing damage taken by Stone Fist by 100% for 40s, stacks up to 5 time
      • Seismic Upheaval
        • Marks several players
        • Every 2s for 4s, the marked players have swirlies appear under them
        • Swirlies explode after a short amount of time, with a giant rock pillar erupting from the ground then disappearing
        • Getting hit deals 7700 Physical damage
    • Reverberating Eruption
      • Marks random players, then sends a shockwave to them
      • Deals 12k Nature damage when hit
      • Also applies Reverberating Vulnerability, and leaves a puddle of Unstable Ground where the player was hit
        • Reverberating Vulnerability causes Reverberating Eruption and Echoing Annihilation to deal 500% increased damage for 45s
      • Old Unstable Ground puddles explode when Reverberating Eruption is cast
        • Explosion is called Echoing Annihilation, deals 12k Nature damage and applies Reverberating Vulnerability
        • Any explosions NOT SOAKED deal 12k Nature to the whole raid
    • Adds spawn and work the same as in Phase 1
    • Like Kaal, when Grashaal hits 50% HP he goes into Hardened Stone Form, takes 95% less damage
      • Like before, this starts the Prince Renathal Event.
      • Get Renathal to full mana, and you’ll move into Phase 3
  • Phase 3 – Unified Offensive
    • You fight both bosses together
    • They each retain the abilities they had during their respective primary phases
      • Kaal functions just like in p1
      • Grashaal functions just like in p2
    • When one boss dies, the other gains Soldier’s Oath, increasing damage dealt by 200%
      • Kill them at the same time. I’m sure you’ve never seen a fight require that one, amirite?

Strategy

Encounter Mechanics

  • Have markers set up going into the fight
    • Boss marker near the middle of the room, 2 markers to the left-hand side (looking towards where the bosses start), and one to the right-hand side
    • Left markers are for Wicked Blade targets to stand
    • Right marker is for Crystalize
      • Crystalize is cast at 0:39, then every minute.
  • Wicked Blade
    • Targets of Wicked Blade should go stand on the left markers
    • Everyone else in the raid needs to make sure they aren’t in the way of the Blade
    • Melee needs to be especially careful of this
    • The time between being picked for Blade and it actually being thrown is relatively short, so you need to move quickly
    • If one person messes this up, you could end up with a bunch of extra Lacerations. Not gonna have a good time with that.
  • In general, anyone with a Bleed should be in the Crystalize
    • For the Pulverizing Meteor, you’ll want to ensure at least 4-6 people soak to split the damage. More is not a bad thing.
    • Anyone who gets hit by Crystalize will also be hit by the Meteor
    • Healer CDs help the Meteor soaks a LOT, since it’s a lot of damage on the affected people in a short amount of time

Phase 1

  • Tank Kaal near the middle of the room
    • Tanks will need to swap as Crystalize is cast. Serrated Swipe is cast about every 20ish seconds, give or take. It’s a lower-ranking ability in the boss’s priority, so it can get pushed back a bit.
    • Make sure to use AM for the first Serrated Swipe you take, and an actual cooldown for the 2nd. If you get a 3rd Slash, use another CD and call for an external
  • Ranged + healers should be loosely spread. Not too far, but loosely spread will help prevent multiple people from being hit by a Goliath’s Ravenous Feast at the same time
  • About 10s after the encounter begins, a Goliath spawns.
    • They seemed to cast Ravenous Hunger on themselves after 30s
    • Goliaths will continue spawning about every 1:15
    • Healers need to spot heal the target of the Feast + the flurry so they don’t die. This just deals a ton of damage quickly, especially after the Goliath is buffed with Ravenous Hunger
    • You’ll likely want to try and kill Goliaths before the Hunger is cast
    • When the Goliath hits 20% and casts Soultaint Effigy, all DPS should hardswap and blow it up asap
  • Healers need to be keenly aware of the Heart Rend. The base DoT isn’t too scary, but the Hemorrhage can easy kill someone
    • Also need to be extremely aware of the Goliath. Their Ravenous Feast + frontal can quickly kill someone, so make sure you’re paying attention & spot healing the target
  • When Kaal hits 50%, you enter the Prince Renathal Event and get a Commando.
  • During the Event, the boss doesn’t take damage, and Commandos start spawning in addition to Goliaths
    • Have assigned high-mobility people bring the Anima Orbs to Renathal in the back of the room
    • Any Orbs that were picked up from Goliaths can be dropped off here as well, since they have unlimited duration.
    • That alone should result in a large amount of mana for Renathal
    • You want to make this Event as quick as possible
    • As the last Anima Orb is dropped off for Renathal to hit 100 mana, the raid should move towards him. If you’re too close to the edge, you’re gonna go flying off
      • Your raid will laugh at you
      • Your raid leader will be upset with you
      • Tbh it’s kind of funny though


Phase 2

  • Use the same boss positioning as P1
    • Handle Wicked Blade and Cystalize the same as P1
  • Have a pre-set area to drop the circles from Reverberating Eruption
    • Ideally, far sides of the room + back of room, but not over top of Renathal
    • You’ll need people to help soak old Unstable Ground during every Reverberating Eruption. Cannot soak 2 times in a row
    • Need to be careful with this, or the AoE will kill people
  • Tanks should swap at 3 stacks of Stone Fist
    • In the final testing, this was cast every 20 seconds. The debuff lasts 40s. In that testing, you couldn’t really swap every 2nd without the debuff getting refreshed. May change for live
  • Players targeted by Seismic Upheaval need to keep moving, and everyone in the raid should be aware of the location of the swirlies
    • This one’s easy, don’t get hit
  • Handle the Goliaths like you did in P1. Ranged/heals loosely spread, don’t take extra damage from the Feast, and blow the dude up ASAP once it reaches 20%
  • When Grashal hits 50%, you’ll need to complete the Prince Renathal Event again. Works exactly the same as the first time.


Phase 3

  • Lust as soon as this phase starts
  • Tank the bosses on each other near the middle of the room
    • Tank swap when the Grashal tank gets 3 stacks
    • Make sure that the tanks are NOT standing on top of each other. Remember, Serrated Swipe is a frontal cone. Don’t accidentally Swipe your tank friend, or you’re gonna have a bad time
  • Keep using the same markers for Crystalize and Wicked Blade
    • Handle both these like you have been
  • Reverberating Eruption, Seismic Upheaval, Stone Fists, Heart Rend, and Serrated Swipe work like they did in their own respective phases.
    • They all need to be handled how they were previously
    • This means there’s a LOT of things going on the whole phase. Fast paced with a lot of stuff
  • Biggest things here are to still properly manage the Wicked Blade, Cystalize, and the Reverberating Eruptions
    • Remember, the older Unstable Grounds will all explode when Reverberating Eruptions is cast. Make damn sure they’re all soaked, or you’ll probably just wipe
  • Not a lot else to say here. This phase is hectic as hell. Just relax, and handle the abilities like you did to get this far
  • Blow up the so-called “generals” at roughly the same time, collect your purples, and let’s go fight Dracu…..I mean Denathrius!


Positioning

Phase 1 & 2

Idea here is to have set locations for the Wicked Blade spots and Crystalize. This’ll help your raid know where to go, and avoid accidentally destroying the whole raid with one of these abilities. This positioning in general can be used P1 and P2. Skull represents the boss. You can see Renathal’s positioning in the back, that’s where you’ll need to bring Anima.

Phase 3

Same basic idea. Skull = Kaal, X = Grashal. Do NOT have them facing the same way. Kaal’s Serrated Swipe is a cleave, do not let the Grashal tank get hit by this.

Heroic Council of Blood Guide

December 3rd, 2020

Written and produced by Crzypck

Special thanks to our consulting team: Tagzz, Xyronic, and Ftbubbler

Council of Blood

Three phase fight. You start by fighting 3 bosses with independent health pools. When any boss reaches 50% HP, you enter a short dancing intermission. When one dies, the surviving bosses gain a new ability. When the second dies, the final boss gets another new ability. You can choose which order to kill them in. This fight is so great, Blizz had to test it 4 times to get it juuuuuust right!

Encounter-Long Mechanics

  • Oppressive Atmosphere
    • Stacking DoT. Deals 300 Shadow per second, per stack
    • Gain a stack every 10 seconds
    • This is reset during every dancing intermission
  • The Danse Macabre
    • This is the intermission mechanic
    • Occurs whenever a boss reaches 50% HP. The bosses will disappear and you get to have a dance party!
      • Every player will see their own spotlight. Run to your spotlight. Failure to do so results in a progressively more powerful DoT called Wrong Moves
      • After a few seconds, a whole bunch of little dancing NPCs spawn throughout the room
      • Starting in your spotlight, you must move in the same direction as them.
      • They will do 6 total directional moves
    • Fancy Footwork
      • Properly following the dancers applies 1 stack of this buff to you
      • Increases haste by 3% for 30 seconds
      • Since there’s 6 total moves, doing the dance correctly gets you 18% increased haste for 30 seconds! Awesome stuff, you get to go for the phat orange parse!
    • Wrong Moves
      • Failing to reach your spotlight, or not following the direction of the dancers, gives you a stacking DoT
      • Deals 900 Shadow per second
      • This increases in power until you correctly follow a direction
      • Wrong Moves also immediately removes any stacks of Fancy Footwork you had. Bye bye orange parse, hello grey parse!
      • Just follow the lil dancing dudes. It’s pretty simple. They aren’t very advanced dancers tbh
  • Here’s a screenshot of the lil dancing dudes:

Boss Abilities

  • Each boss has several unique abilities. When you kill a boss, the remaining two gain a new ability. When you kill a second boss, the final remaining one gains an additional new ability
    • Any time a boss dies, the surviving ones are immediately healed to full. Because of this, cleave/aoe damage on the bosses is wasted. Don’t be a filthy padder
    • To make things simple, Empowerment 1 below means “this boss is alive when the first died.” Empowerment 2 means “this is the last boss alive.”
  • Baroness Frieda
    • Drain Essence
  • Drains 3 players. Deals 4600 Shadow per second for 4s
  • Dreadbolt Volley
    • Casted AoE ability. Deals 6200 Shadow to everyone in the raid
    • Also applies a DoT to everyone, deals 2k Shadow every 1.5s for 12s
    • This can be interrupted
    • This should probably be interrupted, unless you just dislike your healers
  • Empowerment 1
    • Prideful Eruption
      • Causes all players to explode, dealing 14k Shadow within 6 yards
  • Empowerment 2 
    • Twisted Pain
      • All abilities Frieda does now also leave a puddle called Manifest Pain under the afflicted players
      • Puddle lasts 30 seconds. Deals 2300 Shadow every ½ second.
    • Soul Spikes
      • Summons 4 spikes that impale the tank for 4.5s
      • Each spike deals 23k Physical, and increases the damage of subsequent spikes
      • Also deals radiating AoE damage to all players
      • The values of the damage increase and AoE component are unknown. This boss was horrible to do last, so we just didn’t see this.
  • Castellan Niklaus
    • Duelist’s Riposte
      • Deals 23k Physical to the tank, and increased damage taken by subsequent Duelist’s Ripostes by 100% for 25s
      • Forces a tank swap
    • Summon Dutiful Attendant
      • Spawns a Dutiful Attendant who casts Unyielding Shield
      • Puts a protective barrier on the lowest-HP boss, making them immune to damage for 10 minutes.
      • These guys have a small HP pool and just need to be blown up
  • Empowerment 1
    • Dredger Servants
    • Spawns a couple Begrudging Waiters
    • They cast Throw Food, literally throwing food at random people
      • Deals 4300 Nature
    • These guys also have small health pools and can be blown up
  • Empowerment 2
    • Castellan’s Fury
      • Whenever any adds are killed, all remaining adds within 12 yards, plus the boss, gain 100% increased damage for 18s
    • Castellan’s Cadre – calls forth a Veteran Stoneguard
      • Veteran Stoneguard
        • Does a tank smack called Sintouched Blade, deals 25k Physical and applying a permanent debuff, causing subsequent Sintouched Blades to deal 50% increased damage. Stacks.
  • Lord Stavros
    • Evasive Lunge
      • Teleports behind the current tank, then jumps forward in a line 20 yards
      • Deals 23k Physical to anyone hit
      • Also applies a debuff to anyone hit, causing them to take 100% increased damage from Evasive Lunge, stacking. Lasts 25s. Cast every 18s
    • Dark Recital
      • Assigns several players randomly in pairs for 8s
      • If you go further than 8 yards from your partner, deals 1400 Shadow every ½ second
      • Also throws gunk at the affected players each ½ second, red swirlie on the ground.
        • Swirlie deals 12k Shadow if you get hit
    • Empowerment 1
      • Waltz of Blood
        • Calls several  Waltzing Venthyr to dance across the dance floor. Deals 12k Shadow + a 1s stun if you get hit
        • They just kind of slowly move around the room. Don’t get hit. See screenshot:
    • Empowerment 2
      • Two Left Feet
        • While moving, you gain a stacking debuff. Reduces movement speed by 2% per stack
        • Gain 1 stack every 0.3 seconds
        • Standing still reduces your stacks
      • Dancing Fools
        • Stavros calls the Waltzing Venthyr back to the dance floor
        • After a few seconds, they all scream really loud, with anima apparently, making gigantic swirlies around themselves
        • Swirlies then explode for 155k Shadow damage. 11 yard radius.
        • There’s one called a “Dancing Fool” with a large health pool
          • The Dancing Fool is the only one that can be killed, and doing so creates a safe zone
          • Nuke this add down ASAP, or you wipe
        • Go to the safe spots. Don’t stand in the somehow anima empowered yelling
        • Standing in the bad here kills you

Strategy

Many possible kill orders were tested. Below, we’ll go over the recommended kill order.

  • AFTER WEEK 1, we recommend killing Baroness Frieda > Castellan Niklaus > Lord Stavros.
    • This is the most manageable order mechanically
  • FOR WEEK 1, you may want to consider killing Baroness Frieda > Lord Stavros > Castellan Niklaus
    • This is due to being relatively undergeared. Once you are 205-210 ilvl, killing the Dancing Fool won’t be difficult. Week 1, you’re floating around 185-190 ilvl. Because of that, the Dancing Fool is significantly more difficult to kill. Instead, kill Stavros 2nd and Niklaus last. 
      • Niklaus is mechanically difficult to kill last. Between the Stoneguard add, the buff applied when things die, and the Dutiful Attendants regularly spawning, this is a really tricky last phase. However, it doesn’t seem to have the same DPS requirement as doing Stavros last, and may be more management for your raid group.
  • Positioning in this fight overall isn’t too huge a deal. Tank the bosses at the front of the room near where they start. Ranged should be loosely spread.
  • Your DPS should do little to no cleave at the start of the fight, unless cleave builds resources that can be funneled into single target DPS
  • Phase 1
    • You’ll be fighting all 3 at the start of the fight. All 3 bosses have just their base abilities
      • Tanks will need to swap off threat on Niklaus and Stavros after every Evasive Lunge
      • This’ll also deal with Duelist’s Riposte, two for one!
        • The tank holding Stavros should move away from the group about 5 seconds before Lunge is cast, so it only hits the tank and not anyone else.
    • When Niklaus summons the Dutiful Attendant, blow the living hell out of it
    • Make sure you go hang with your Dark Recital partner. Do NOT stop moving if you’re one of the targets, or you’ll get death by swirlie. Much less fun than death by snu snu.
    • Frieda’s Drain Essence just has to be healed through, no biggie
      • Her Dreadbolt Volley needs to be interrupted. If you don’t interrupt, your healers might parse. That’s not good for anyone.
    • When you get Frieda to 50%, you’ll enter the dance intermission. Just follow the little green bros, and you get an 18% haste buff. Woo!
      • Use that haste buff to put Frieda down and move onto Phase 2
  • Phase 2
    • Stavros and Niklaus will both get healed back to full and gain their Empowerment 1 abilities
      • Tanks should swap here so they can both reset stacks
      • When Niklaus spawns the Dredger Servants, pull him on top of them and AoE them down. Servants aren’t especially dangerous, so you don’t have to hard-swap to them. Just cleave um till they go poof
      • When Stavros spawns Waltz of Blood, just keep an eye where they are. They were relatively easy to dodge in testing.
        •  FYI, this can overlap with Dark Recital. Make sure you and your partner stay together while you dodge the Waltzing dudes
    • Continue handling the tank swap like you did in P1
      • If you were able to handle Phase 1 with the “keep Stavros away” strat, continue doing that in Phase 2. However, the tanks will have to swap as you enter P2 to reset stacks, so the opposite tank will now get to play keepaway
    • Blow up the Dutiful Attendant when it spawns. That’s #1 kill target priority
    • Dance intermission happens when Niklaus gets to 50%. Do your dance, get your buff, use it to blast Niklaus into oblivion
  • Phase 3
    • Lust when P3 starts. This is the most difficult phase, you wanna blast through it quickly.
    • Melee need to be careful to dodge the Evasive Lunge. If you aren’t a tank, getting hit while already having the debuff will almost certainly kill you
    • Handle the Dark Recital like you did in p1 and p2. Hang with your friend!
      • Like in p2, this can overlap with the Waltzing Venthyrs. Just be careful
    • Two Left Feet forces you to limit your movement. Keep your butt planted unless necessary to dodge mechanics
    • Dancing Fools is an extremely easy ability to die to
      • The way this works, the Venthyrs will go throughout the room and find somewhere to stand
        • One will be the Dancing Fool and be targetable
        • All DPS need to hardswap and blow this add up as quickly as possible, or you wipe
      • After a few seconds, each Venthyr will have a giant red swirlie surround them
      • After a few more seconds, all the swirlies explode
      • If you’re in one, you die
      • Here’s a screenshot of what the swirlies look like, along with the Dancing Fool:

    • Since you’ll lust at the start of this phase, you should reach the intermission relatively quickly, which is good
      • After the intermission ends, use your new shiny haste buff to pump into the boss
      • Don’t stand in bad stuff. Keep yourselves alive. Kill this boss, get your purps, and ggs!

Positioning

For Phase 1 and 2, if you plan on trying to have Stavros just completely away from the group, the positioning below will work. Idea is to just move Stavros away so his Lunge cannot hit anyone other than the active tank holding him. The rest of the raid will be moving fairly regularly, so don’t expect to have your feet set for long. In P1, you’ll need to move around with your partner for Dark Recital. P2 you’ll need to also dodge the Waltzing Venthyrs.

When you get to Phase 3, fighting Stavros alone, move him to the middle so you can more easily adjust around the room.

Heroic Lady Inerva Darkvein Boss Guide

December 3rd, 2020

Written and produced by Crzypck

Special thanks to our consulting team: Tagzz, Xyronic, and Ftbubbler

Lady Inerva Darkvein

This is a fight that doesn’t really have “phases” as much as a progression of adding abilities. The real twist here – you get to decide what abilities the boss does not gain access to.

  • Encounter-Wide Mechanic: Containers
    • There are 4 Containers around the room
    • One Container will be “Focused” at a time
    • All Containers are filling slowly with Anima
      • Focused Container fills dramatically more quickly
      • Each Container has 3 fill levels – each level grants Inerva a new mechanic to throw at you
        • Level 1 is always active
        • Level 2 is activated when the Container reaches 33% capacity
        • Level 3 is activated when the Container reaches 66% capacity
      • Clicking any Container causes Anima Release
        • Drains Anima from the clicked container
        • Also does raid-wide AoE damage, 300 Shadow/second for as long as a Container is being drained. Stacks with each additional Container actively being drained
          • Additionally deals 900 Shadow/second for 10s to whoever clicked the Container
        • You may not click the currently Focused Container
        • You can click a currently-open Container to close it early
    • Each Container has its own set of mechanics that are granted to Inerva based on the current fill level
      • The base mechanic for each Container is Level 1. Level 2 retains the base ability, but modifies it in some way.
        • Level 3 takes everything from Level 2, and further modifies it
    • If any container reaches full capacity, it’ll Breach, dealing 12k Shadow to all players per second
      • This persists until the Breached Container is clicked, and the Anima levels are reduced
  • Container of Desire – 100%-75% Boss HP
    • Level 1 – Expose Desires
      • Smacks the tank, dealing 28k Physical
      • Also applies a 21s DoT called Wicked Desires, deals 43k Shadow over 21 seconds
      • Forces regular tank swaps at 2-3 stacks
    • Level 2 – Expose Cognition
      • Adds the Shared Cognition effect
        • Debuff applied to several random players, lasts 8s
        • After Expose Desires is cast, the damage on the afflicted tank is copied to all players with Shared Cognition
    • Level 3 – Expose Heart
      • When Wicked Desires expires, the afflicted tank explodes for 18k Shadow damage to the raid.
      • Damage taken is reduced by distance
  • Container of Bottled Anima – 75%-50% Boss HP
    • Level 1 – Bottled Anima
      • 3 small soak circles appear on the ground.
      • Bottles of Anima fall on the circles after a few seconds
      • Soaking the circle deals 12k Shadow damage
      • Any circles NOT soaked deal 22k Shadow to the whole raid
        • This is bad. Do not let any circles go un-soaked or you’re gonna have a bad time
    • Level 2 – Lingering Anima
      • Bottled Anima circles now leave a puddle of Lingering Anima on the ground, regardless of if it was soaked or not
      • Deals 7800 Shadow damage continually to anyone standing in the puddle
    • Level 3 – Replicating Anima
      • Bottled Anima now bounces after the first impact, meaning they need to be soaked a second time
  • Container of Sin – 50%-25% Boss HP
    • Level 1 – Lesser Sins & Suffering
      • 3 Little orbs called Sins of the Past spawn around the room, relatively close to the center
        • These each deal 1500 Shadow damage per second to the closest player
    • Shared Suffering
      • 3 players are also afflicted by this debuff
      • Links the 3 afflicted players together with a blatantly obvious red line
      • Linked targets each take 900 Shadow damage every ½ second
      • Anyone who walks through the line connecting the players also takes 900k Shadow per ½ second
    • Sins of the Past disappear when the Shared Suffering players stand on them simultaneously
      • As a note, in testing this was really tricky to execute properly and, takes a while to get used to. Players with Shared Suffering needed to be ever so slightly OUTSIDE the orbs, such that all 3 orbs are within the connected area
    • If you do not successfully complete that task within a certain time period, the Sins of the Past explode, dealing 37k Shadow to the entire raid over 10s
    • Level 2 – Sins and Suffering
        • An Anima Web forms, connecting the orbs
        • Essentially a line connecting each orb to the other 2 orbs
        • Any player who walks through the Web takes 31k Shadow over 10s
    • Level 3 – Greater Sins and Suffering
      • The Orbs themselves, and therefore the Anima Webs, now spin.
  • Container of Concentrated Anima – 25%-0% Boss HP
    • Level 1 – Lightly Concentrated Anima
    • Debuffs 3 random players with Concentrated Anima. Red circle around affected players
    • Deals 8k Shadow damage over 10 seconds
    • When Concentrated Anima expires, the circles explode, dealing 15k Shadow to anyone within the circle
      • You absolutely, positively, should not use this to gang up on your own raiders and have 2 explode on someone, killing them
    • Additionally, an add spawns from each circle
      • 2 type of adds, Harnessed Specter & Conjured Manifestation
      • Harnessed Specter needs to be tanked. If nobody is within melee in range, it’ll chain cast Condemn, big AoE ability for 15k/s.
        • This add cannot be interrupted
        • Also applies a tank debuff called Unconscionable Guilt
        • Deals 15k Shadow damage, plus increases damage taken by Unconscionable Guilt and Expose Desires by 10% for 15s
      • Conjured Manifestation also chain casts Condemn
        • However, the Manifestations can be interrupted. Condemn freaking hurts, so you better interrupt this damn thing.
      • For each set of Concentrated Anima debuffs, 1 Specter and 2 Manifestations will spawn.
    • Level 2 – Concentrated Anima
      • The players afflicted with the Concentrated Anima debuff are now rooted in place
    • Level 3 – Highly Concentrated Anima
      • The explosion caused by Concentrated Anima expiring now also sends out red orbs called Fragments of Shadow
        • These deal 25k Shadow to anyone hit
        • Probably want to play dodgeball and avoid these things

Strategy

The list of mechanics seems intimidating, but this fight is not as complicated as it seems.

  • Tank the boss near the middle of the room, with the group spread around the encounter area
  • Lust on pull
  • All Level 1 abilities are active the entire encounter.
    • This means Exposed Desires, Bottled Anima, Lesser Sins and Suffering, and Lightly Concentrated Anima all regularly occur
      • The base versions are pretty simple to deal with
    • Exposed Desires necessitates a tank swap every 2-3 stacks
    • Bottled Anima is a traditional “soak the circle stupid” mechanic
      • This is a large reason why spreading is important. In testing, these could land just about anywhere in the room, so spreading helps ensure at least someone is close to each soak circle
    • Lesser Sins and Suffering is a bit tricky to get down the first couple tries, but really you’re just putting 3 orbs inside a triangle
      • In testing, we found the most consistent way was for each of the Shared Suffering players to stand near an orb, just outside of it. From there, all three walk slowly in towards their orb until it triggers them despawning
    • Lightly Concentrated Anima is just a DoT that eventually explodes, and results in some adds
      • This one is probably the most difficult base ability, as the Conjured Manifestations just chain-cast a massive AoE, so you’ll need an interrupt rotation
      • Recommend 3-4 people assigned to each Manifestation. In testing, Condemn was a 7 second cast, so 2 melee or 3 ranged were needed
        • Have the 3 melee interrupters assigned to one add, 4 ranged to another, if you can
      • As long as this Container stays Level 1, the affected players should move to the boss, but not overlapping their circles. This’ll keep the adds near the boss for cleave and easier interrupts
  • The Focused Container order is Exposed Desires > Bottled Anima > Sins and Suffering > Concentrated Anima
    • The Container being focused shifts every 25% Boss HP
  • Handing when to drain the Containers is actually pretty straightforward. There are three scenarios you should click to drain a container
    • First – whenever a Container had been Focused, but has just stopped being focused
    • Second – Whenever a Container is ~20-30 seconds away from being Focused.
    • Third – Drain the Sins and Suffering Container whenever it reaches 20% and is not being Focused.
      • This is the most difficult Level 3 Container, and as such you should do everything you can to minimize its time at Level 3
  • Handling Higher Levels
    • Exposed Desires
      • Level 2 is pretty straightforward – several people take copied damage from the tank with the debuff.
        • This is just a healer thing, make sure you’re throwing spot heals as necessary to the players with Shared Cognition
        • The tank with Exposed Desires needs to ensure they have Active Mitigation up for the 8s duration of Shared Cognition
      • Level 3 is simple to deal with. After a tank swap, when your Wicked Desires debuff has 5 seconds of duration left, yeet the hell outta the group towards an edge
    • Bottled Anima
      • Level 2 you really don’t have control over. The circles spawn in random locations, so the puddles will just be random. Don’t stand in bad things.
      • Level 3 you also don’t have control over. Soak the second set of circles, don’t stand in bad things.
    • Sins and Suffering
      • Level 2 makes running through the room more difficult and dangerous. There’ll be a giant red triangle, with the Orbs as the corners. Running through the beams really freaking hurts, so just don’t do it. I know it’s tempting and the beams look cool, but just don’t, okay?
      • Level 3 is horrifying. Those beams that hurt really badly? They spin now. They freaking spin. You can be safe one second, and have Burning Crusade Fel Reaver flashbacks the next as the beam sneaks up behind you.
        • This also makes the job of the Shared Suffering players much more difficult, as the orbs aren’t stationary. Try to get to your orbs and clear this as quickly as possible, before the rotating beams start silently sneaking up on people and wrecking them from behind
      • This is the Container we recommend always draining immediately after its Focus ends, and getting it lower than Level 3
    • Concentrated Anima
      • Level 2 makes this Container suck. The easy way to handle the adds is have them near each other, which you cannot do if the affected players are rooted.
        • The current offtank needs to book it to the Specter to prevent it from chain-casting Condemn
        • The assigned melee interrupters should go to the Manifestation closest to the boss
        • The ranged interrupters should be on the other one further away
        • Don’t let these casts get off, it’s bad news
      • Move the boss to whatever add you’re currently killing for some extra cleave damage
      • Level 3 doesn’t really add much, just dodge the orbs. They’re big, they’re mean, they’ll knock you on your ass and have you face-down on the floor. You don’t wanna be face-down on the floor. Don’t take a ball to the face.
  • And honestly that’s it. This encounter is a series of fairly easy to handle mechanics that periodically get more difficult. You can proactively choose to remove the most difficult versions of mechanics from the raid.

Positioning

Tank the boss near the middle of the room. Circle marker below is for the players affected by Concentrated Anima to get near when that Canister is still level 1. Star is the drop off point for tanks with Wicked Desires expiring, when the Exposed Desires Canister is level 3. The Canister marked Skull is the Sin & Suffering one, which we recommend draining out of level 3 as soon as it’s no longer focused. The group should be loosely spread throughout the room.

When Concentrated Anima is Level 2 or Higher:

Idea here is for the tank to just move the boss to the adds for cleave damage. You do NOT need to do this, but it is a way to pump a little extra damage into Darkvein and get through the fight a little more quickly.

Heroic Hungering Destroyer Boss Guide

December 3rd, 2020

Written and produced by Crzypck

Special thanks to our consulting team: Tagzz, Xyronic, and Ftbubbler

Hungering Destroyer

Big ol’ blue dude who tries to pummel you into the ground. Single phase fight, but the boss has a special 100 energy ability as well.

Abilities

  • Gluttonous Miasma
    • Debuff applied to a few raid members, lasts 24 seconds
    • Affected players take 4300 Shadow every 1.5s
    • These players also can not be healed
    • However, they leech health from nearby players.
      • Leech 2500 health every 1s from all allies within 5 yards
  • Expunge
    • Boss puts a debuff on every player in the raid. Applies a circle to everyone
    • Circle size is based on the player’s missing health. Lower HP, bigger circle.
    • Circle then explodes, dealing 11k Shadow to anyone within the circle
    • Leaves behind an Obliterating Rift
      • Little blue orb on the ground
      • If you touch an orb it’ll pop, and you’ll take 9300 Shadow damage
  • Volatile Ejection
    • Boss marks a few target players
    • After about 5s, he shoots blue missiles at the marked players
    • Deals 9300 Shadow to the marked players, and anyone else hit
    • Also causes players to take 500% increased damage from subsequent Volatile Ejections for 35s
  • Desolate
    • Simple AoE ability. Deals 12k Shadow to the raid
  • Overwhelm
    • Tank smash, deals 37k Physical to the active tank
    • This appears as a cast, so make sure you have Active Mitigation up
  • Hungering Strikes
    • Each melee swing, the boss leeches 3900 health from the target
    • This effect is increased in power by 8% with each subsequent melee, stacking
    • Resets on a tank swap
  • Consume
    • Cast when the boss hits 100 Energy
    • Big AoE suck ability. Sucks you towards the boss
    • Leeches 26k HP from all players every 2s for 6s
      • Power of this is reduced based on distance from the boss


Strategy

  • This boss is relatively straightforward honestly, as long as you handle Gluttonous Miasma properly and have good positioning
  • Have the boss slightly off-center, a bit towards the southern end of the room
    • Put 3 markers down between where you’ll hold the boss, and the southern wall
    • These markers will be for the Volatile Ejections
      • You only have about 5s from the time the marks go out, until the missiles fire. If a player can’t reach a marker, that’s OK, just call it out and make sure nobody extra gets hit
    • Everyone should be relatively close to the boss. There isn’t really a reason to spread out significantly for most of the encounter
      • This’ll also help make handling the Volatile Ejections easier
  • When Expunge goes out, everyone should spread about 8 yards from each other. Healers need to get everyone as close to full as possible, to minimize the size of the explosions
    • Move away from your orbs. If you are high health, you can run back over your orb to clear it, but certainly don’t have to
  • Gluttonous Miasma players should move a bit out of the group so they aren’t leeching from everyone
    • With the current tuning, one player can “feed” someone affected with Gluttonous Miasma by themselves
    • You should pre-assign 3 people as the “feeders,” and 2 backups in case a feeder gets the debuff
    • You can put markers down to have set locations for the Miasmas as well, so they don’t get overlapped
    • It is also possible to have 2 or more Miasma targets leeching off the same person. To do this, you’ll need to Venn Diagram the circles
      • Risky, but certainly doable
  • Tanks should taunt every 5-8 stacks of Hungering Strikes. It won’t really be dangerous by that point, but it’ll keep the Leech amount the boss is gaining fairly low
    • The current offtank should be running around the room clearing as many of the orbs from Expunge as possible
    • They only deal 9k damage each, so it shouldn’t be too terribly difficult for the offtank to clear most, if not all, of them
  • When the boss is at 90% energy, the tanks should move him closer to the wall
    • At 100%, he’ll cast Consume. Everyone should run to the opposite side of the room during this
    • Use movement cooldowns here to get as far away as possible
    • Remember, the further away you are, the less he’ll leech. As such, prioritize everyone in the raid being as far as possible
  • Once Consume ends, just go back to the boss. Rinse and repeat until there’s purples to loot!


Positioning

Standard

In general, keep the boss near-ish the edge of the room. In the picture below, X, Star, and Circle are for the Volatile Ejections. The raid is positioned on the other side of the boss. Triangle and Diamond are locations for Gluttonous Miasma. Those are just an example, you don’t need pre-set spots for Miasmas, just wanted to provide an example location. Nobody should be too far from the boss. DO NOT FORGET to spread out heavily for the Expunge

Consume

This one’s pretty straight forward. Boss does giant suck AoE then kills anyone within a circle. Run away.

Heroic Artificer Xy’mox Boss Guide

December 3rd, 2020

Written and produced by Crzypck

Special thanks to our consulting team: Tagzz, Xyronic, and Ftbubbler

Artificer Xy’mox

This is a 3 phase encounter, with remarkable visual effects. Honestly, it’s fantastic. The overarching theme of the fight is proper placement of literal wormholes.

Encounter-Wide Mechanics

  • Dimensional Tear
    • Debuffs 2 players for 8s
      • When the debuff ends, the afflicted players explode for 6200 Arcane within 6 yards
      • A wormhole also appears at the affected players’ locations
    • Running over a wormhole plops you out at the other
    • You’ll use this for various mechanics
      • Exact placement will vary by phase
  • Glyph of Destruction
    • 4s debuff on tank
    • When it expires, explodes for 35k Arcane to the whole raid
      • Damage is reduced based on distance. In testing, it was a 45 yard falloff distance. However, the debuff’s duration has been reduced, so the range for falloff has likely also been reduced
      • Also applies Arcane Vulnerability to the tank, increases Arcane damage taken by 50% for 45s
        • Forces tank swap
  • Rift Blast
    • White lines on ground, just don’t stand in them
    • Deal 15k Arcane damage if you get hit
  • Stasis Trap
    • Xy’mox creates a set of traps at the feet of several players
    • Traps arm after 4s, persist until triggered
    • When a player runs over the trap, that person gets stunned and the trap gets a healthpool. Stun breaks when the trap is killed
    • Stunned player also takes 6200 Arcane/2s
  • Hyperlight Spark
    • Spark that jumps from player to player
      • The player receiving the spark takes 9300 Arcane damage\
  • Sire Denathrius’ Private Collection
    • Collection of 3 artifacts. Each phase, 1 artifact will be active.
    • Active artifact creates multiple mechanics for the phase

P1 100-70%

  • Crystal of Phantasms
    • Fleeting Spirit
      • Several spirits spawn, each one fixating a random person. Last 12 seconds
      • If they reach you, you get MC’d
      • They get progressively faster later into their duration
      • To keep them from reaching you, you’ll need to use the wormholes
    • Soul Singe
      • Random AoE during the phase, deals 2300 Shadow damage to several players

P2 70-40%

  • Root of Extinction
    • 8 seeds spawn in set locations
    • After 20s, the seeds explode for 62k Nature damage to anyone within 50 yards
    • Extra action button to drop them
  • Withering Roots
    • Random DoT on 1 person
    • In testing, there was a slight overlap between one expiring and a new one
    • Deals 6700 Nature damage every 1.5s for 21s

P3 40-0

  • Edge of Annihilation
    • Puts a giant suck circle directly in the middle of the room, grows over time
    • Power of suck increases as it grows
    • When it reaches max size, it’ll explode, dealing 155k Shadow damage to all players within 25 yards of the center
  • Aura of Dread
    • Constant ticking damage throughout this phase
    • Deals 1900 Shadow damage to all players every 3s

Strategy

  • General Stuff
    • For starters, keep the boss near where he starts for Phase 1
    • The tank affected by Glyph of Destruction needs to yeet the hell outta the group. Go to a far side of the room so you don’t blow up the raid
      • As soon as the Glyph is applied, other tank should taunt
    • Don’t stand in Rift Blasts. They appear as these white lines on the floor. Really cool looking, but don’t let that fool you. They hurt.
    • Hyperlight Spark just needs to be healed through, not really anything you can do about it
    • You’ll want to have your RL call out when to trigger Statis Traps.
      • Ideally, do this in between whatever the phase-specific mechanic is.
      • This way, your DPS can focus on just blowing them up ASAP
  • Phase 1
    • You’ll need to place your wormholes from Dimensional Tears 50-60 yards away in this phase. Best option is far-east and far-west. See positioning graphic below.
      • Put markers down in each wormhole location
      • The raid should be positioned between the boss and the far-east wormhole
    • When the Fleeting Spirits spawn, the affected players need to use these wormholes to keep away from the SPirits
      • If you get targeted, run next to the wormhole you’re closest to
      • As the Spirit gets close, run over the wormhole
      • Wait for the Spirit to run across the room and get close to you again
      • As soon as the Spirit gets close to you again, run into the wormhole
      • Repeat until the Spirits despawn
    • You’ll want to trigger Stasis Traps no later than 10s before the Spirits spawn
  • Phase 2
    • You’ll want the wormholes in the same places, with the same general raid positioning as P1
    • When the seeds spawn, you’ll need to move ALL 8 of them to the same spot
      • They can be picked up by interacting with them
      • Have people pre-assigned for each individual seed
      • Pick up your assigned seed, run it near the far-east wormhole, drop the seed, take the wormhole to the other side
    • Anyone NOT assigned to get a seed should run to the far-east wormhole
    • In testing, this phase was by far the hardest to heal
      • The people with Withering Roots likely need to use a defensive. Help keep yourself alive
    • Like in P1, you’ll want to trigger Stasis Traps with at least 10s before the Seeds spawn
  • Phase 3
    • Lust as soon as you enter P3
    • You’ll need a wormhole near the center of the room, with the other as close to a wall as possible. Very far-east worked well, but you can do far-west if you want.
      • Tank the boss between the two wormhole locations
    • When the Edge of Annihilation spawns, it’ll start sucking you to the center. Let it.
      • You’ll see the big while circle, and a smaller blue circle. The blue circle grows larger, when it reaches the outer white circle that’s when it explodes
      • You can hang out inside the blue circle until the last second, then take your wormhole out
        • When you take the wormhole, make sure you turn and run TOWARDS the wall
      • This turns into almost a dance. You’ll learn the rhythm of the suck after a couple times, and figure out the timing of when exactly to run into the wormhole
    • Trigger Stasis Traps in between Edge spawns, again with at least 10s to nuke them down.
    • Survive a few Edge of Annihilations, and go collect your purples!

Positioning

Phase 1

Idea here is to have the Dimensional Tears on opposite ends of the room, and use them to stay away from the Fleeting Spirits. Keep the boss near the middle of the room

Phase 2

You’ll want the same positioning for the Dimensional Tears and the boss. The light blue circles represent where the Seeds spawn. They should all be moved to the ORANGE marker, and the whole raid should move to the YELLOW marker. Remember, you can use the Tears to bounce back and forth and get to the proper side!

Phase 3

You’ll want to shift the boss here towards the eastern wall. Place one wormhole right at the wall, the other in the middle of the room. This will allow you to use the wormhole to escape when you get sucked in by the Edge of Annihilation.

Heroic Kael’thas Boss Guide

December 3rd, 2020

Written and produced by Crzypck

Special thanks to our consulting team: Tagzz, Xyronic, and Ftbubbler

Sun King’s Salvation (Kael’thas)

This is a single-phase fight with a similar structure to Valithria Dreamwalker in ICC. Kael’thas starts at 10% HP, and the goal of the encounter is to heal him to full. Constant waves of a variety of adds will try and prevent you from achieving this.


  • You’ll begin the encounter by fighting against High Torturer Darithos, two Bleakwing Assassins, and four Vile Occultists.
  • High Torturer Darithos
    • Big dude who doesn’t really do much
    • Casts Greater Castigation periodically at several players
    • Deals 2600 Shadow every 0.5s to anyone within 6 yards of the targeted players
    • Other than that, he just kinda chills tbh
  • Shade of Kael’thas
    • When regular Kael reaches 45% and 90% HP, a Shade of Kael’thas spawns to fight you
      • The Shade always has whatever % HP Kael’thas is missing
      • First Shade spawns with 55% HP, second he’s at 10%
    • When the Shade is active, Kael cannot be healed.
      • HOWEVER, any damage dealt to the Shade heals Kael’thas
  • Smouldering Remnant
    • Fire pool on the ground, deals 7800 Fire/1s when standing in it. Dropped by several abilities during the Shade
    • These do not despawn on Heroic difficulty, and will persist the remainder of the encounter.
  • Fiery Strike
    • Deals 6200 Fire damage in a frontal cone
    • Also applies Burning Remnants, DoT that deals 1800 Fire/1s for 15s
  • Ember Blast
    • Meteor-style ability. Targets a random player, and blasts them for 78k Fire damage. This damage is split between anyone within 6 yards
    • Also applies a total of 6 stacks of Lingering Embers
      • 1500 Fire/1s for 15s DoT. Stacks.
    • Drops a Smouldering Remnant
  • Blazing Surge
    • At 100 energy, casts a massive cone blast
    • Deals 15k Fire to anyone hit
    • This is targeted towards a random player in the raid
    • Drops Smouldering Remnants
  • Reborn Phoenix
    • A cute little Phoenix spawns. He just wants to eat you, hungry little guy!
    • Fixates on a random player, and pulses every 2.5s
      • Anyone within 6 yards of a pulse takes 3900 Fire damage
      • Each pulse also drops a Smouldering Remnant.
    • When the Phoenix reaches 0HP, it turns into a pile of ash. The pile heals itself 5% per second. At 100% HP, the Phoenix pops back up and starts over
    • After the first Shade reaches 45%, it despawns. When the second Shade reaches 0%, you win the encounter.
  • Smaller Adds
    • There are 5 types of smaller adds you’ll need to deal with throughout the fight
    • Bleakwing Assassins
      • Cast Crimson Flurry
        • Teleport behind a random marked player, dealing 11k Physical to anyone within 8 yards
        • There’s a red targeting circle to indicate targets
        • Also applies a DoT, deals 2100 Physical/1second for 10s
      • Return to Stone
        • At full energy, these turn to stone for 8s, healing to full HP.
        • If they die before reaching full energy, they don’t do this. Just something to consider.
  • Vile Occultist
    • Vulgar Brand
      • Deals 1200 Shadow to the whole raid
      • Also debuffs all players, causing 35% increased damage taken
      • This can be interrupted, could be important
      • The debuff can also be dispelled
    • Scornful Blast
      • Simple cast, deals 3900 Shadow damage to the target. Cannot be interrupted
    • Door of Shadows
      • These buggers can teleport around the room trying to run away from you. Hope you’re good at tag!
    • Rockbound Vanquisher
      • Vanquishing Strike
        • Deals 12k Physical to the tank, and applies a DoT
          • DoT deals 2500 Physical/1s for 20s. Stacks.
      • Concussive Smash
        • AoE smash, deals 7800 Physical to the whole raid
        • Also increases the Vanquisher’s damage dealt by 25%. Stacks.
    • Soul Infuser
      • These buggers run straight to Kael’thas to cast Soul Infusion and ignore the raid
        • Soul Infusion deals 1% of Kael’s max HP every 2s
        • If the Shade of Kael’thas is active, they instead heal the Shade 1% every 2s.
    • Pestering Fiend
      • Shattering Ruby
        • Throws a ruby at a random player, dealing 2k Physical within a 3 yard range of the target.
      • Fragmentation
        • Explodes upon death, dealing 3900 Physical within 7 yards
  • Throughout the encounter, there are a few mechanics which aid you in healing Kael’thas
    • Infuser’s Orb
      • Small orb on the ground, dropped by a Soul Infuser when it dies.
      • Interacting with it gives you 50% increased healing done for 14s, stacks.
    • Essence Font
      • Dropped by Occultists when they die. These can be directly healed by your raid.
      • When a Font is healed to full, it’ll heal Kael’thas for 1% of his max HP
      • These “leak” overtime, decaying in health. If not healed to full, they’ll “die” and despawn
      • In testing, these had about 0.5% the healthpool as Kael’thas, making these twice as efficient as just direct-healing Kael
    • Soul Pedestal
      • There are 4 Pedestals near the front of the room. Clicking it starts a channel, transferring your health to Kael’thas.
      • Your damage taken increases each tick
      • After your channel ends, or you cancel it, you’ll get a debuff preventing you from using a Pedestal for 2 minutes
    • These three mechanics are more efficient at healing Kael than directly casting heals on him

Strategy

  • The whole idea of this encounter is to heal Kael’thas to full as quickly as possible
  • At the beginning of the encounter, you’ll want to group up all the adds on top of Darithos and AoE everything down. 
    • While fighting Darithos, the raid should be loosely spread to not overlap Greater Castigation on too many people.
    • If you don’t spread, this’ll just blow up your raid nearly instantly, resulting in either good laughs or angry yells
    • Also remember there are two Assassins at the start, and these guys teleport and deal AoE damage within 8 yards
      • 100% want to annihilate these guys before they reach full energy, or you’re gonna have a bad time
    • Make sure to interrupt the Occultists’ Vulgar Brand casts
    • Ideally you want to blow all of the little adds and Darithos up as quickly as possible
      • The faster you nuke them, the more downtime you’ll have before the next adds spawn
      • This is important because you can use the downtime to have players channel all 4 Pedestals and pump some health into KT
      • Once the Occultists are dead, healers should bomb healing into the Essence Fonts
  • Your DPS should be prioritizing channeling the Pedestals any time there aren’t adds to hit, and even when there are only 2-3 adds left alive
    • These are very efficient at healing KT, so channeling whenever possible helps dramatically
  • Once adds spawn again, just deal with each wave as they come
    • Tanks will want to stay below 3 stacks of Vanquishing Strike from the Vanquishers
    • Make sure you move away from the Fiends when they’re about to die. The explosion is quite dangerous
      • If you’re a Blood DK or VDH, you can troll someone by AoE Gripping the Fiends on top of someone when they’re low HP. Time it correctly, and the explosions will kill your intended target. Feel free to tag me on twitter with videos of this!! (@crzypck)
    • When Soul Infusers spawn, they are absolutely #1 target priority. All DPS should hard-focus the Infusers as quickly as possible
      • These guys aren’t really dangerous to you, but the fact they drain KT’s HP is really bad. They can set you back very quickly
    • Keep dealing with the Occultists and Assassins as you did when Darithos was up
  • When KT reaches 45%, you get the first Shade
    • Adds do not spawn when the Shade was active
    • Because of this, you’ll want to try pushing KT to 45% in between add spawns, or about 10 seconds after a new set of adds just spawned
    • Dealing with the Shade is relatively straightforward. 
      • Tanks should immediately move the Shade to the Eastern side of the room
        • Remember, the fire puddles do not despawn, so you need to carefully manage them and ensure you have space to work with
      • The people fixated by the Phoenixes need to obviously run away from them
        • Do NOT go near the middle of the room if fixated.
        • Try to drag them around the room towards the eastern edge. Due to their pulsing AoE, dragging them through the raid means you’re gonna have a bad time
      • Blow up the Phoenixes. This’ll further help to minimize the number of puddles, giving you more room
      • You’ll want 4-6 people helping soak the Ember Blast. 
      • If you’re near the person targeted by Blazing Surge, try to move out of it. 
        • The damage from this isn’t lethal, but give your healers a break. They’re carrying this shit. 
      • Tanks should swap at 3-4 stacks of Fiery Strike
      • Don’t stand in the fire puddles. It’s fire. It’s hot. It hurts. 
    • Keep pumping into the Shade, when he reaches 45% HP he’ll despawn and you’ll go back to fighting the adds
  • From here, it’s basically rinse and repeat. Manage the packs of adds, heal KT, keep your raid alive. 
  • When Kael’thas reaches 90% HP, the final Shade will spawn.
    • Works just like the first shade. However, you can just tank in the middle of the room
    • Use the entire area for the Phoenixes, don’t worry about consolidating space. Just survive the mechanics coming at you.
    • When the 2nd Shade dies, you win. GG, collect your epic lewtz

Heroic Huntsman Boss Guide

December 3rd, 2020

Written and produced by Crzypck

Special thanks to our consulting team: Tagzz, Xyronic, and Ftbubbler

Huntsman Altimor

This is a 2 target encounter, except the last 10%. You’ll fight Huntsman Altimor and a series of his 3 pet bears. Any damage done to either Altimor, or any of the bears, is also dealt to the other target. You’ll fight Bear 1 till 70%, Bear 2 until 40%, and bear 3 until 10%. Each bear has its own abilities.

Huntsman

  • Sinseeker
    • 3 big arrows shoot at people, there’s lines pointing from the boss to the target + a hunter’s mark over the targets head
    • Deals 15.5k Physical damage to anyone hit
      • Also applies a massive DoT that lasts 30s. Was dealing 15k Shadow / 2s on release night on heroic
      • Really, really painful, especially at lower gear levels. Healers need to be very aware of people with the DoT
    • Make sure nobody but targets get hit
    • You CAN immune this. Turtle, Ice Block, Divine Shield, etc. Doing so not only avoids the initial damage, it also prevents the DoT.
  • Spreadshot
    • Randomly targeted AoE, in about a 30 degree angle
    • Need to be sufficiently spread around part of the boss so not too many people are hit at any time
    • Deals 10k Physical to anyone hit

Phase 1 – Margore (100% – 70%)

  • Margore is standing next to the boss when you begin the encounter
  • Jagged Claws
    • Tank smack + DoT, swap at 2-3
      • Deals 25k Physical, plus 6200 Physical/3s for 30s
  • Vicious Lunge
    • Red targeting circle around a random person
    • After 6s, Margore lunges at the targeted person
    • Deals 54k Physical damage split between everyone hit
    • Also applies a DoT to everyone who got hit
      • Deals 7800 Physical/3s for 6s
    • During testing, you COULD immune + BoP this. Unknown if that’ll be the case on live.
  • When Margore dies (boss will be at about 70% HP), Bargast spawns.

Phase 2 – Bargast (70% – 40%)**

  • Rip Soul
    • Deals 31k Shadow to the active tank on Bargast
    • Summons a Soul from that player that walks from Bargast to the boss
    • Starts with the same HP% as the tank had when they were hit
    • The Soul needs to be healed by players to full, at which point it despawns
    • If it reaches boss, he gains Devour Soul, a 200% damage increase
    • The Soul also pulses for 2500 Shadow damage every 2s as long as it persists
  • Shades of Bargast
    • 2 adds spawn that chain cast Deathly Roar
      • Deals 10k Shadow damage to everyone in the raid, also applies a 3700 Shadow/2s DoT. DoT stacks.
      • Cannot be interrupted
    • However, the adds themselves CAN be  hard CC’d
    • While CC’d, they gain 1 stack of Destabilize per second
      • Each stack increases damage taken by 100%
      • Leave them both CC’d until 60-70 energy, they’ll be high stacks, then blow them up
    • They become immune to CC at 100 energy

Phase 3 – Hecutis (40% – 10%)

  • Crushing Stone
    • Gains a stack every melee
    • Each stack increases physical damage dealt by 50%, but slows Hecutis’s movement speed
    • While moving, Hecutis loses stacks and deals raidwide AoE
      • 3700 Nature damage per stack
    • When Hecutis has NO stacks, he charges at his current tank
  • Petrifying Howl
    • Puts circle around 3 people
      • Deals a small amount of damage and reduces movement speed by 5%
      • These effects increase in power every second
    • After a few seconds, the afflicted players explode, dealing 4600 Nature damage to everyone within 10 yards
    • Also leaves a puddle of Stone Shards
      • Typical floor goop. Deals 2500 nature every 1.5s, and slows you while standing in it.
      • Obviously, standing & /dancing in the Stone Shards is bad.
        • However, this DOES help your healers parse…

Strategy

  • Phase 1
    • Tank Altimor near the middle of the room, with Margore on top of him for cleave
      • Tanks will need to swap at 2-3 stacks of Jagged Claws on the Margore tank

    • The raid should be loosely spread around the room
    • When Sinseeker is cast, the targeted players SHOULD NOT MOVE
      • The rest of the raid should adjust around the Sinseeker targets. Do NOT get yourself hit if you are not the target
      • If you could not immune the Sinseeker debuff, move into melee range to make it easier on the healers
      • See below, the arrows are the Sinseeker targets. Move away from people with arrows.

    • When Margore casts Vicious Lunge, you’ll want 3-4 people total being hit. The targeted player can simply stand in melee range to split the damage.

    • That’s pretty much it for this phase. Cleave down the two of them until Margore dies.
  • Phase 2
    • Keep Altimor where you had him for Phase 1
    • About 5 seconds before Rip Soul is cast, move Barghast to the north-east corner of the room
      • Healers should do what they can to keep the Barghast tank close to full HP. As soon as the Rip Soul spawns, bomb heals into it and get it to full.
    • About 5 seconds after Rip Soul is cast, the first set of Shades of Barghast spawn.
      • These spawn about 10 yards away from Barghast, so they’ll be near the north-eastern edge of the room
      • Have assigned people to CC. Polymorph, Ice Trap, etc. Make sure you do not break CC. Starfall and Halo are major offenders of accidentally breaking the CC
      • Do NOT touch these things until called by the raid leader. You want them to build up stacks.
    • In the image below, you can see Barghast being moved to the north-east corner. The green circles represent the Shades. Once the Shades spawn, move Barghast back on top of Altimor.

    • For timing on killing the adds, wait until the 2nd Rip Soul is cast
      • The tank should move Barghast to the north-west corner this time for Rip Soul
      • While the Barghast tank does that, move Altimor on top of the Shades in the north-east
      • You can knock back and grip the Shades, so try to get the 2 of them plus Altimor close to each other, and nuke down the Shades
        • Assign 2-3 dps to use CD’s here and blow the Shades up ASAP
        • We found this timing lined up perfectly for MM hunters to use Trueshot + Wild Spirits (if Night Fae), and this melted the Shades.
      • Last note here – you still don’t want a cast from the Shades to go off. You can interrupt their cast with stuns and CC. We found having a Mage cast Polymorph continually was a reliable way to prevent a cast from ever completing
      • Positioning should look something like this:

    • A new set of Shades will spawn likely while you’re finishing killing the first set. Just CC them. You’ll blow them up when they reach 50-60 energy, as you did the first set.
      • Just like the first set, have 2-3 DPS assigned to CD them, and get them stacked.

    • While you’re dealing with the Shades and Rip Souls, you’ll still have Sinseeker and Spreadshot going out.
      • Continue handling these like you have been. Immunity Sinseeker if you can. If not, run into melee range to make it easier on the healers
      • Remain loosely spread for Spreadshot.
      • These abilities are relatively dangerous in this phase. If you aren’t spread out and too many people are hit by Spreadshot, or a Sinseeker goes through the raid, you could end up accidentally forcing your healers to orange parse (or wipe the raid, which honestly is more likely)
        • You never want your healers to orange parse. That’s for the padding DPS to do.
      • You should aim to push the boss before a third set of Shades of Barghast spawn
      • No tank swap in this phase
  • Phase 3
    • Same positioning as you’ve been in. Altimor near the middle of the room, raid spread out around him
      • Continue dealing with Sinseeker and Spreadshot as you have been
    • The tank holding Hecutis should allow Crushing Stone to stack up to 5-6, or higher if you can survive it
      • Once at 5-6 stacks, the tank should just run away from Hecutis. This’ll deal raid-wide AoE, so make sure you coordinate with your healers so their ready
      • Helpful to pop a healer CD when Hecutis is doing the AoE, even though each tick isn’t too huge, it does add up

    • Players affected by Petrifying Howl need to move towards the edges of the room, keep the gunk out of the middle
      • See below. Try to place the puddles along the edges, like where the Orange circles are.

    • When Hecutis dies, Altimor gets very sad and starts taking double damage
      • He will now cast Sinseeker MUCH more frequently. Kill the boss before the DoT kills your raid.

Heroic Shriekwing Boss Guide

December 3rd, 2020

Written and produced by Crzypck

Special thanks to our consulting team: Tagzz, Xyronic, and Ftbubbler

Shriekwing

Giant bat, big room, 4 pillars in the middle of room. 2 phase fight, has a Main phase and an Intermission phase

Main Phase

  • Sanguine Ichor
    • Small pool of blood on the floor. Standing in the pool deals 4600 Shadow every 1s
    • Caused by several mechanics during the fight
    • During testing, these disappeared at the beginning of every Intermission Phase
  • Exsanguinating Bite
    • Tank smack. Deals 37k physical damage & applies 10 stacks of Exsanguinated
      • Permanent DoT, deals light damage per stack. Also increases Physical damage taken by 5% per stack, reduces healing taken by 10% per stack
      • 1 stack falls off every 1.5s
  • Blind Swipe
    • Frontal cleave by the boss, deals 15k physical to anyone hit
    • Cast at a random player, so watch where you’re standing
  • Wave of Blood
    • Deals 7800 shadow damage to everyone in the raid, plus applies a DoT
    • DoT deals 2300 shadow / 2 seconds for 12s
  • Echolocation
    • Puts circle around a player, then casts Descent at the player after 8s
    • Descent
      • Deals 11k Shadow damage to anyone hit, 5 yard radius
      • Drops a puddle of Sanguine Ichor at the spot she lands
  • Earsplitting Shriek
    • Big aoe, deals 15,500 Sonic damage to anyone hit
      • Also applies a DoT dealing 3100 Sonic damage every 2s / 12s
    • CAN be LoS’d to avoid damage
    • Any player who does NOT LoS also drops a Sanguine Ichor
  • Echoing Screech
    • Sends out little circles, getting hit deals 11k Sonic damage, horrifying you for 3s, and causes the boss to cast Descent at the location you got hit after 6s
      • Just like with Echolocation, this deals 11k shadow within a 5 yard radius and leaves a pool of Sanguine Ichor
    • In testing, the Descent happened during the duration of the horrify, meaning there was no way to avoid the Descent. This seems to have changed, and should now be possible to dodge the Descent.
  • At 100 energy, she enters the Intermission Phase


Intermission Phase

  • Boss goes to the middle of the room at the start of the Intermission
  • Casts Blood Shroud, becomes blind and just walks around the room
    • If you come within 12 yards of her, she kills you instantly
    • Need to move around the room & run from her
  • Earsplitting Shriek
    • She casts this periodically in the Intermission Phase as well. Need to LoS this, as you did in the Main Phase
  • Echoing Sonar
    • Works just like Echoing Screech from the Main Phase
    • Cast once at the beginning of the intermission, the orbs persist until intermission ends
    • Deals 11k damage, Horrifies you for 3s, Descent cast at your location after 6s, anyone within LoS when boss completes this cast is jumped on
  • Boss takes 0 damage during the Intermission Phase


Strategy

Main Phase

  • Lust on pull
  • Tank the boss in the very front of the room
    • The tank not holding threat should stand behind her, with the melee DPS

  • Tanks should swap after every cast of Exsanguinating Bite
    • Remember to move behind the boss when you aren’t tanking
  • The player targeted by Echolocation needs to move to an edge of the room. 2 options, based on where you’re currently standing. Refer to the large red ovals in the image below – they’re the safe drop points.

  • Have a marker down behind the corner of the staircase. Refer to the STAR in the image above.
    • This marker will be the stack point for Earsplitting Shriek
    • Everyone in the raid should move and stack on this point during the Shriek. If you properly LoS, this means no puddles will be created and this spot can continue being used

  • When the boss casts Echoing Screech, everyone should move a bit away from the boss, and focus on dodging these.
    • She will turn and cast this in a direction at people. Seems to favor melee, which is why the graphics show melee on the side of the boss. Ideally, bait them down the edge of the room

  • Wave of Blood just needs to be healed through
  • Puddles persist the entire encounter, so proper management of them is important.
  • We were able to re-use the positioning at the front of the room for a total of 2 occurrences of Phase 1. After that, we were forced to move.
    • We chose to move the boss to the southern end of the room after the 2nd Intermission, where the room was clean


Intermission Phase

  • Boss is immune to damage during the intermission.
  • The absolutely most important thing about the Intermission Phase is to NOT GET NEAR HER
    • That 12 yard range comes up quick. If she gets that close, you die.
    • You’ll see the visual red circle around her.
  • Duck behind a pillar to avoid damage from Earsplitting Shriek
    • Outside of Earsplitting Shriek casts, you do not need to be LoS, giving you a lot of freedom to move around and be safe. You’ll need this to dodge the circles.
  • Do not get hit by the circles from Echoing Sonar. These can get out of hand extremely quickly in this phase
    • She can also get within 12 yards of you during your 3s Horrify, which’ll kill you
    • Again, DO NOT GET HIT
  • This intermission is all about avoiding the mechanics. Everything in this phase that can kill you is avoidable, so move out of the bad stuff
    • See images below. Move away from boss, hide during Shriek, do what’s necessary to dodge orbs otherwise.