Maut is an encounter which alternates between two phases. During Phase 1, he gathers mana, during Phase 2 he begins a cast using all his mana. This cast ends when his mana reaches 0, and you re-enter Phase 1.
Dark offering = 2% Maut mana
Adds lose 2% mana per 2 seconds within the circles, so 100 seconds in circle = ded
Adds spawn every 35-40 seconds
Maut naturally gains about .66% mana per second, or 1.5 seconds per 1% mana.
Maut gains 1% mana per person hit by devour magic
Boss has exactly 2x HP vs mana
Adds have 10% boss’s mana
Killing add is 5% of boss HP
Phase 1
Shadow Claws
Deals 268k Physical damage to the current tank, and applies the Shadow Wound Debuff
Deals 36k Shadow damage every 2 seconds for 24 seconds. Stacks.
Devour Magic
Marks 4 players with a purple targeting circle
After 6s, the circle explodes dealing 53k Shadow damage to everyone hit
Each person hit also generates 1% mana for Maut
Leaves a Devoured Abyss wherever the explosions happened
9 yard radius purple circle of bad
Standing inside silences you, prevents incoming healing, deals 42k Shadow damage every 2 seconds, and drains your mana
While inside, you’re also immune to all other forms of magic damage
These explode when P2 starts, dealing 268k damage to anyone standing in them
Stygian Annihilation
AoE, deals 1.7 million Shadow damage to the entire raid
Consuming Shadows
Periodically puts a 3 second DoT on the raid that deals Shadow damage every 3s. This DoT deals more damage as Maut’s mana increases
Black Wings
Frontal cone ability, deals 142k Physical damage and knocks back anyone hit
Targeted at a random melee
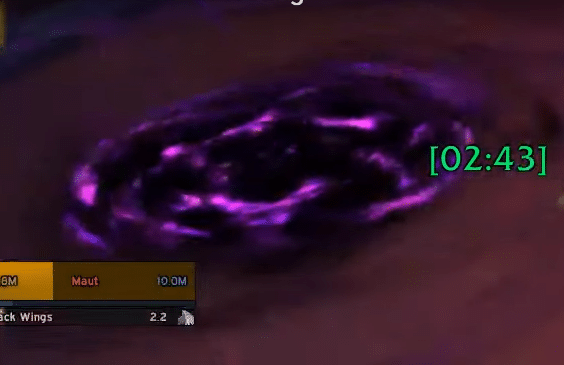
Dark Manifestation
Large purple swirly pool of bad spawns, lasts 6 seconds. After 6s, it explodes dealing 267k Shadow damage to anyone inside
Has a relatively weak sucking effect, dragging players towards the bad circle
After the explosion, a Dark Manifestation add spawns where the explosion occurred.
Adds take damage to their mana instead of HP. At 0 mana they die.
Periodically cast Dark Offering. If the cast completes, the add loses 20% mana and the boss gains 2% of his max mana.
If the add gets within 20 yards of Maut, he’ll eat it, consuming all the adds mana and adding it to his own. The max amount of mana an add can give Maut is 10% of Maut’s mana pool.
Phase 2
When Maut reaches 100% mana, he casts Obsidian Skin, followed by Obsidian Shatter. He also destroys all of the Devoured Abyss circles on the ground, dealing 268k Shadow Damageto anyone inside them.
Obsidian Skin
All damage dealt to Maut is instead dealt to his mana pool
You take 100% of the damage you deal to Maut as Arcane damage
Making Maut reach 0 mana immediately ends Phase 2 and stops his cast of Obsidian Shatter
Obsidian Shatter
60 second cast. Upon completion, deals 1 million Shadow damage to the raid. You wipe. Don’t let this happen.
Consumed Magic
Every 6 seconds during Phase 2, Maut consumed 10% of his mana pool, and gains 1% increased magic damage dealt. Stacks.
Forbidden Ritual
Mana orbs spawn one at a time from the altars at the edge of the room.
When an orb spawns, it drains Maut of 10% mana
If they reach Maut, they restore 20% of his mana
These can be soaked by players. Soaking deals AoE damage to the raid. The further the orb has traveled, the more damage it deals. Soaking an orb gives you the Forbidden Mana debuff
After 6 seconds, you explode with mana. All players within a 20 yard range of the explosion gain 150% increased mana regen and 50% increased healing done for 8 seconds
Drain Essence
Purple swirly on 2 players, deals 35k Shadow damage and burns 4k mana per second for 8 second. While the debuff persists, Maut gains 1% mana per second
DIspellable
When dispelled, deals 71k Shadow damage and burns 10k mana from players within 8 yards
Strategy
During testing, two strategies worked well to defeat this boss on Heroic. Option 1 makes Phase 2 longer in exchange for longer Phase 1s. This increased the strain on healers in Phase 2, and also allows the boss to accumulate more stacks of Consumed Magic, increasing the overall damage of the fight. Option 2 is basically a zerg strat, and required a higher DPS output. Both will be explained below. We’ll first talk about the fight as a whole, then break out the differences, as it all boils down to how you handle the adds.
Phase 1
Lust on pull
Tanks should start the boss either where he is, or just off to the left. Raid should stand behind the boss, loosely spread
Tanks swap every 2 stacks, preferably when there’s only 1 add alive
Tanks should slowly move the boss around the room to make sure the raid doesn’t run out of room from puddles
The rest of the raid should be loosely spread behind the boss, leaving space to the right-hand side (closest to the outer edge)
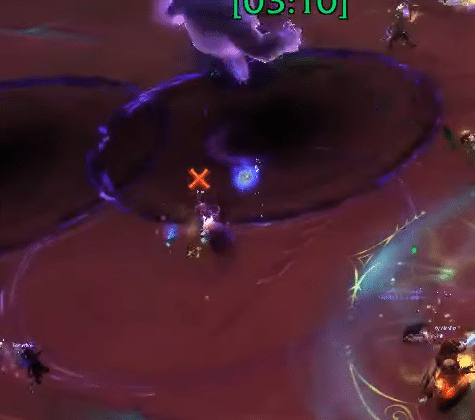
Players affected by Devour Magic will move to this open area on the right side to drop their puddles
When Stygian Annihilation goes out, everyone needs to step into a purple puddle, as it makes you immune to the damage
Melee need to move to the side of the boss right before Black Wings occurs to bait it
You want this going harmlessly to one side or the other, not through the raid
As soon as Maut starts casting, melee need to quickly move and get back with the rest of the raid
Consuming Shadows just needs to be healed through, no big deal
Phase 2 – Boss hits 100% Mana
Boss runs to the middle of the room, and simultaneously makes all the purple circles explode and begins casting Obsidian Shatter
Whole raid should stack together in melee range of the boss to help the healers be more efficient
Tanks should focus on soaking the Mana Orbs. After soaking, yeet yourself back on top of the raid stack point to apply the mana buff to your healers
Players affected by Drain Essence need to move 8 yards away to be dispelled, then move back after being dispelled
You’ll want to use 2 healing cooldowns each time you’re in this phase. Spread them out however works best for your raid, but this is a high intensity healing phase so CDs will be necessary to keep the raid stable
Once the boss’s mana hits 0, you go back to Phase 1. If you don’t do this before his cast ends, you lose gg
Add strategy Option 1 – slow and steady
Have the tank not currently on the boss pick up the add when it spawns, and drag it near a purple circle
When it begins casting Dark Offering, drag it into the purple circle. After the cast ends, bring it back out. This prevents the cast from actually finishing, and stops the mana from going into the boss
DoT up the adds, but don’t prioritize damage
Tanks swap whenever a new add spawns. When taunting the boss, bring your add with you and let him suck it. Do this for add #1 and add #2. Don’t let add #3 get sucked.
By doing this, you’ll have Phase 1 last around 2 minutes,give or take, assuming you did well with Devour Magic.
Once you enter P2, just kill the last add from cleave damage, focus DPS on boss
Add strategy Option 2 – Zerg
Have the tank not currently on the boss pick up the add when it spawns. Immediately drag it under the boss he can eat it.
All DPS just keep nuking the boss
Repeat for Add 2
Repeat for Add 3, although he’ll spawn when the boss is close to 100% mana, so make sure you get it eaten
Idea here is to maximize effective DPS on the boss with minimal downtime. By doing this, your Phase 1s will last between 1:35 and 1:45, so quite a bit less time than doing it slow and steady. It’s simpler overall, but not by much, and adds a little more risk of not killing the boss during the 2nd Phase 1
During PTR testing, the Zerg strategy seemed easier than the “Slow and Steady” strategy. However, we recommend using the “Slow and Steady” strategy, as it’s more forgiving and still pretty simple. It’s also much more likely the way Blizzard envisioned the fight, and more like what you’ll be doing for Mythic.
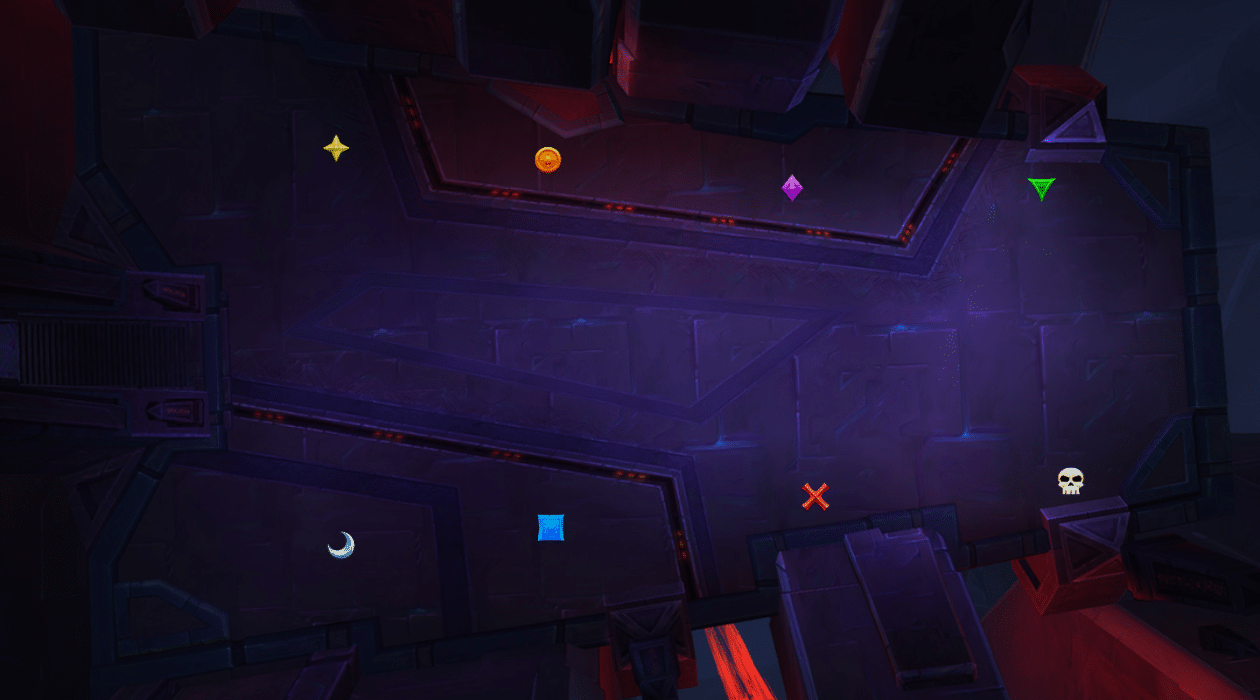
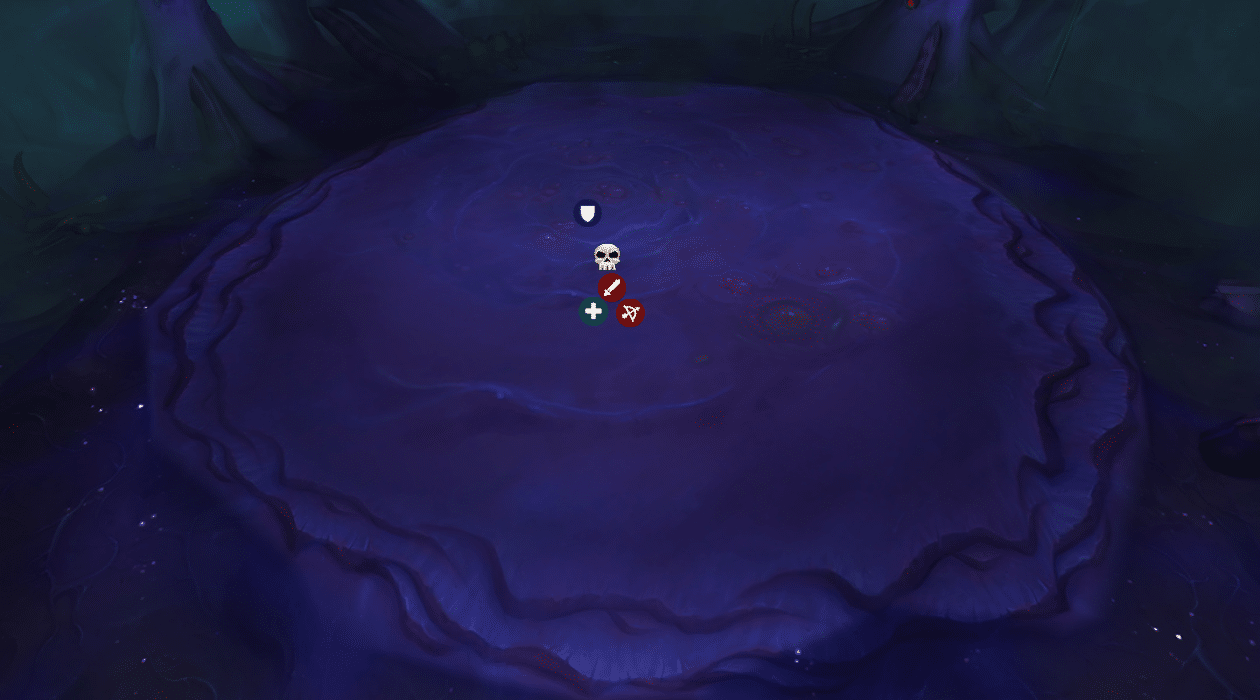
Positioning
Basic positioning during Phase 1. You’ll need to move the boss slowly as the Devour Magic puddles block too much space.
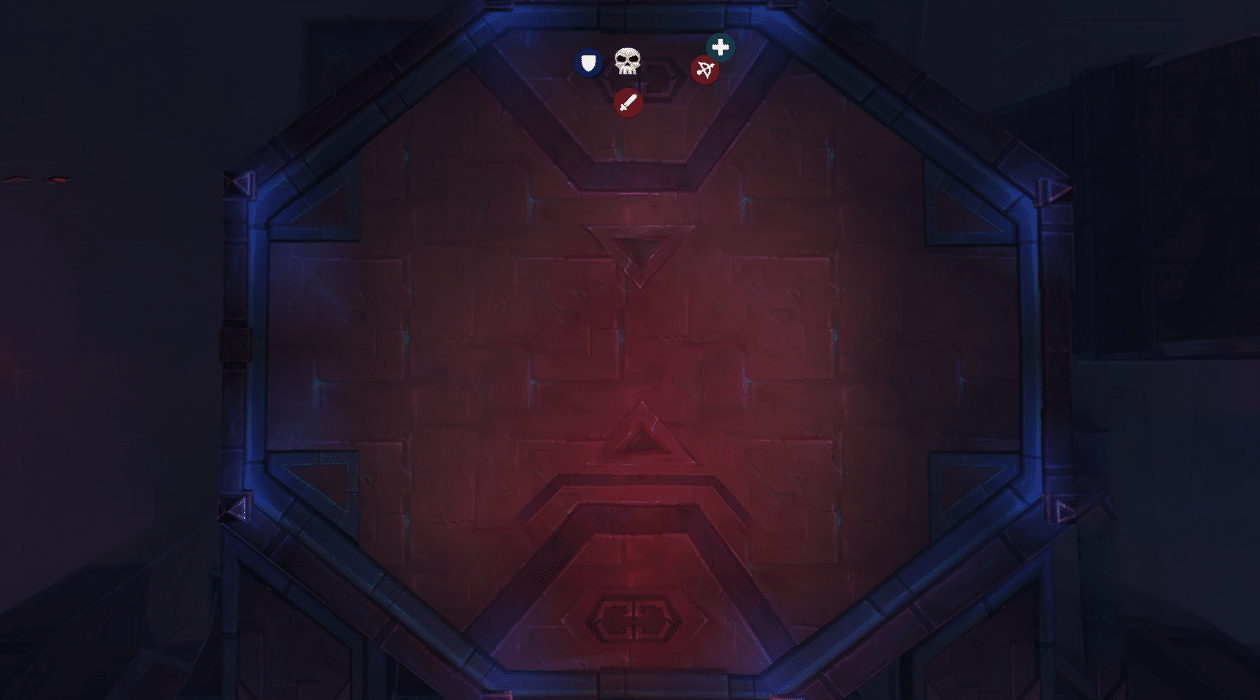
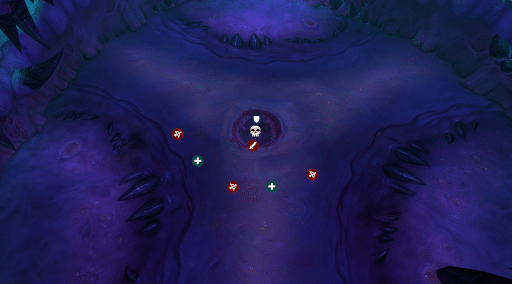
Phase 2 positioning. If you have Drain Essence, move away from the raid, somewhere like to X.
Skitra is an encounter that alternates between a primary phase and intermission phase based on boss HP. Phase 1 is where the encounter primarily happens. Phase 2 occurs at 80%, 60%, 40%, and 20% HP on Skitra. Phase 2 ends as soon as you defeat the add.
Primary Phase
Shadow Shock
Cast every 2 seconds, deals 71k Shadow damage to the active tank plus 2 random players
Also applies a debuff causing affected players to take 15% increased Shadow damage for 5 seconds
Stacks
Shred Psyche
Occurs 0:12 into each Phase 1, then every 34 seconds
Debuff on a random player that lasts 5 seconds
An add spawns at the location the player was at when the debuff falls off
Add has a 5 second cast when it spawns, deals 430k Shadow damage to everyone
Damage falls off based on distance. You only need to be 8-10 yards away from the add to be fine
After the initial AoE, the add will pulse for 14k Shadow damage every 1.5 seconds until it dies
Images of Absolution
Occurs 30 seconds into each Phase 1, then 1:25 later (if still in a Phase 1)
Same mechanic as Coven of Shivarra had in Antorus
Line of adds spawns at the side of the room, and slowly walk across the entire encounter area.
Deals 142k Shadow damage per second if they touch you
Immune to all damage for 30 seconds
CAN be CC’d, must be CC’d.
Intermission Phase – 80%, 60%, 40%, 20%
Skitra assigns half of the raid the Clouded Mind debuff, other half with Twisted Mind
Each half of the raid can see 4 Illusions of Prophet Skitra in random locations across the room
Only one is the real boss. The boss will be the only illusion which is located in the same place for both halves of the raid
Need to coordinate this on Discord
Mindquake
If an incorrect Illusion of Skitra is killed, the raid takes 375k Shadow damage. Don’t do this.
Dark Ritual
Stacking debuff on the whole raid. Increases Shadow damage taken by 2%
New stack every 5 seconds while in Phase 2
This does NOT reset after an intermission ends, but instead carries through all fight
Illusionary Bolt
Every raider takes 35k Shadow damage every 2 seconds while in Phase 2 (Increased by the stacking debuff)
Strategy
As a note, testing for this boss on heroic was super wonky with the AoE damages. They’ve made drastic changes in tuning for the Shred Psyche add, as it was overtuned on PTR. As such, the primary healing difficulty for the fight has been moved (according to the Dungeon Journal at least) and this strategy reflects this.
Also, the boss’s health pool was simply stupid on PTR. 19 man scaling was 274 million HP, not including transitions and adds. For reference, Wrathion had 151M with 21 people. Hopefully this has been scaled down quite a bit.
Primary Phase
Place your 8 raid markers around the room before you pull the boss, 4 on each side
You’ll use these to coordinate Phase 2
Tank the boss near the middle of the room, facing away from the raid
Tanks swap at 7-8 stacks of Shadow Shock
Rest of raid should be stacked directly behind the boss in melee range
We recommend lusting either on pull, or when the first add spawns 30s into the fight.
Players affected by Shred Psyche need to move to the side of the boss, 8 yards away from the cluster of everyone else
Don’t move too far past 8 yards
When add spawns, wait for its 5s cast to finish
Once it finishes, tank should move the boss onto the add
Nuke the add
When Images of Absolution spawn, have an assigned player CC one specific Image. Banish is the best, but Freezing Trap, Blind, Entangling Roots, etc, anything works
Raid stands in that spot from the CC’d add
After 30 seconds, the Images are no longer immune to damage and need to be tickled for 1 HP to die
Intermission
Coordinate over Discord (or whatever other voice chat you use) to determine which Illusion is the real Skitra. Have one assigned person from one debuff group call out the colors their 4 adds are at
Have one person from the opposite debuff group say YES or NO to whether that group has an add in the same place.
Example: Raid Leader in Clouded Mind says: “SKULL”
Person in Twisted Mind replies YES or NO
Keep going until you get a yes
Then kill that add
OR use the Weakaura posted above
If you elect to use the Weakaura, have one person from each debuff put a DoT effect on all 4 Illusions you see. The Weakaura will put a green circle on the correct Skitra
It’s possible Blizzard can implement a hotfix to this to prevent it from working. As of the most recent testing, it worked just fine on PTR. Recommend trying it first.
Raid should stack near the correct Illusion as you kill it to help the healers increase efficiency, as this is a heavy damage phase
You’ll want to use healing CDs here
Kill the correct Illusion as fast as possible, and you go back to Phase 1
Rinse and repeat, GGs
Positioning
Put up raid markers before you pull the boss, like below.
Tank the boss near the middle of the room
The person affected by Shred Psyche needs to move to the side of the group, somewhere around X below:
AFTER the add finishes its initial cast, the tank pulls the boss on top of it and everyone follows:
This is a single-phase encounter with several standard fight mechanics. Oh, and soccer. Yes I said soccer, I’m American. You need to play soccer to defeat this boss. You’ll also see the Sea Witch you killed last raid being tortured in the middle of the room, so that’s kind of cool after 200-300 wipes to her. We’ll break out the soccer mechanic by itself, as there’s a lot of pieces to it.
Xanesh Abilities
Abyssal Strike
Big smack on the tank, deals 285k Shadow damage. Also applies a 1 minute debuff causing you to take 25% increased damage from subsequent Abyssal Stikes, stacks
Soul Flay
Creates a red glowing Soul copy of several players, denoted with a red targeting circle underneath. After 10s, the Souls explode and deal 578k Shadow damage to the affected players. You can only see YOUR Soul, and only take damage from YOUR Soul. Move outside the targeting circle to avoid insta-death
Ritual Obelisk
Xanesh creates several Obelisks at random locations around the room. Standing in the swirlie around an Obelisk deals 71k SHadow damage every 1.5s and slows you by 50%
6-8 Obelisks spawn each time this ability occurs, with the previous ones despawning
Azshara Being Tortured
Torment
AoE ability, deals 286k Shadow damage if you stand in it
Covers most of the room, radiating out from Azshara, with multiple safe zone cones
Cast 3 times in a row, can get dicey trying to dodge all 3. Speed buffs are helpful
Anguish
The raid takes a static 21k Shadow damage every 2s for the entire fight. That’s it, that’s the mechanic. Blizzard thought healers would get bored.
Soccer!
Void Ritual
Begins at 0:52, 2:12, 3:32, 4:52, 6:13, give or take about 2 seconds
Xanesh creates 3 orange soak circles simultaneously in a triangle around herself. Each must be soaked by 1 person
If all 3 circles do not get soaked, the whole raid takes 1 million damage. RIP
After soaking, you get a 40s debuff called Voidwoken
You deal 99% less damage, get to play soccer
After you finish soccer, you gain a debuff called Void-Touched, take 13k Shadow damage every 1s and cannot participate in soccer again for 3 minutes (Duration from PTR, not listed in Journal)
Here’s a screenshot showing Obelisks and the soak circles for Void Ritual
Void Orb
After Void Ritual completes, two void portals spawn on opposite ends of the room. One will have a very visible extra glowing effect
The glowing portal is where the Void Orb (soccer ball) spawns
Anyone without Voidwoken who hits the orb takes 143k Shadow damage and are knocked back
If the ball hits an Obelisk, Azshara, or an outer wall of the platform, it explodes and triggers Dark Collapse
214k Shadow damage to the whole raid
Buffs boss with Dark Ascension, increases damage taken by subsequent Dark Collapses by 500% for the rest of the fight
Also causes Xanesh to attack 50% faster for 30 seconds
Strategy
Lust on pull
Tanks taunt every 1-2 stacks of Abyssal Strike
Move away from your Soul Flay when affected by it. Try to get 8 yards outside the red targeting circle
You may want to use raid CDs for these. On PTR, roughly 40% of the raid was targeted each time, so this is a large burst of damage on a large chunk of the raid
Don’t stand under Obelisks
Watch your feet during Torment. The 3 casts happen relatively quickly in succession and can be tight to dodge, so use movement abilities as needed
Voidwoken Players Job
The only players who can interact with the Void Orb without being knocked back are the 3 Voidwoken players
When you come in contact with the Orb while Voidwoken, it bounces off you in the direction YOUR CHARACTER is facing
Your job is to kick the ball into the opposite portal, without letting it hit an Obelisk, Azshara, or a wall
While come in contact with the ball, you gain 1 stack of Imminent Doom, lasts 6 seconds
If you reach 5 stacks, you die, so don’t do that
So basically, ball spawns on one end of the room, the other portal (goal) spawns on the other side
Your job is to play soccer with your 2 best friends, avoid the defenders (Obelisks, Azshara), keep the ball in bounds (don’t touch wall), and score a goal (portal)
When the ball hits the portal, it disappears harmlessly and you win. Now start nuking the boss again
Dark Ascension basically allows for 1 mistake in soccer during the fight, but a 2nd one causes a wipe
Most of this fight just comes down to soccer. It’ll take multiple pulls for people to get used to it, and some people will be better at it than others
Let everyone try during your first few pulls. Once you’ve identified your stronger soccer players, assign them to do this
We recommend putting area markers in the corners of the room, and having your soccer players communicate where they’re kicking the ball using the markers. This’ll help reduce confusion and keep your team on the same page
On PTR, it seemed like the portals, while always on exact opposite sides of the room, spawned in corners in a random order
We found it easiest to try and only ever kick the ball at right angles, parallel to the edges of the room, and staying near the edges of the room. This reduced the chances of hitting an Obelisk or a non-Voidwoken player, and all but eliminated any change of hitting Azshara
Score goals, don’t stand in bad things, nuke boss, ggs
Positioning
You’ll want to tank the boss near where the circle around Azshara is. See the below screenshot.
Single-phase encounter with two bosses that you fight simultaneously. They do not share a health pool. They alternate control over “The Hivemind,” changing how some mechanics need to be handled. Oh, there’s also a lot of bugs in this fight, a massive amount of bugs. We’ll discuss the Hivemind mechanics separately. All mechanics listed specifically under the individual bosses occur regardless of who’s controlling the Hivemind.
The Hivemind
Tek’ris control 0:00-1:11, 2:24-3:30, 4:44-5:51, 7:04-8:10
When the bosses are more than 20 yards away, they and all adds take 99% reduced damage
All adds gain 1% damage dealt and 1% movement speed every second they’re alive, stacking
Ka’zir control – 1:11-2:24, 3:30-4:44, 5:51-7:04, 8:10-9:24
When the bosses are closer than 20 yards, they and all adds take 99% reduced damage
When adds are below 20% HP, they heal for 3% health per second
When control of the Hivemind swaps, Devouring Frenzy occurs
Deals 10k Nature damage to the raid every 0.5 seconds for 12 seconds
Damage dealt increased by 15% each swap
Tek’ris
Nullification Blast
Frontal cone ability with a targeting reticle on the ground. Dodgeable
Deals 117k Shadow damage to anyone hit, and applies Nullification debuff
53k Shadow damage every 2s for 6s, and reduces healing received by 100%
Roll in a straight line in whatever direction they start in
Being hit deals 178k Nature damage and applies Corrosion
Corrosion deals 21k Nature every 2s and increases damage taken by 25% for 8s
Mind-Numbing Nova
Applies Mind-Numbing Toxin to the raid for 8s
Deals 36k nature damage every 2s and reduces Haste by 50%
This is interruptible.
Dark Reconstitution
When either boss reaches 1% HP, they become immune to damage and cast Dark Reconstitution, 12 second cast
If the cast completes, heals 50% of their max HP
If the second boss reaches 1% HP while the other is casting, they both die
Bug adds
Aqir Drone
Spawn at 0:35, 1:51, 3:40, 5:15, 6:32
Fixates on random targets
Leave puddles of acid when they die called Acidic Blood
Puddles deal 78k Nature damage every 1.5s when standing in it
Puddles despawn when the next set of Drones spawns
Aqir Darter
Spawn at 2:04, 2:42, 4:17, 6:45
Psionic Resonance
Deals 28k Shadow damage to the raid, then flies to a new spot in the room
Both types of adds spawn in groups.
Drones can be slowed and gripped
Strategy
On heroic, this boss is pretty straightforward. Dodge bad, kill priority adds.
Lust on pull
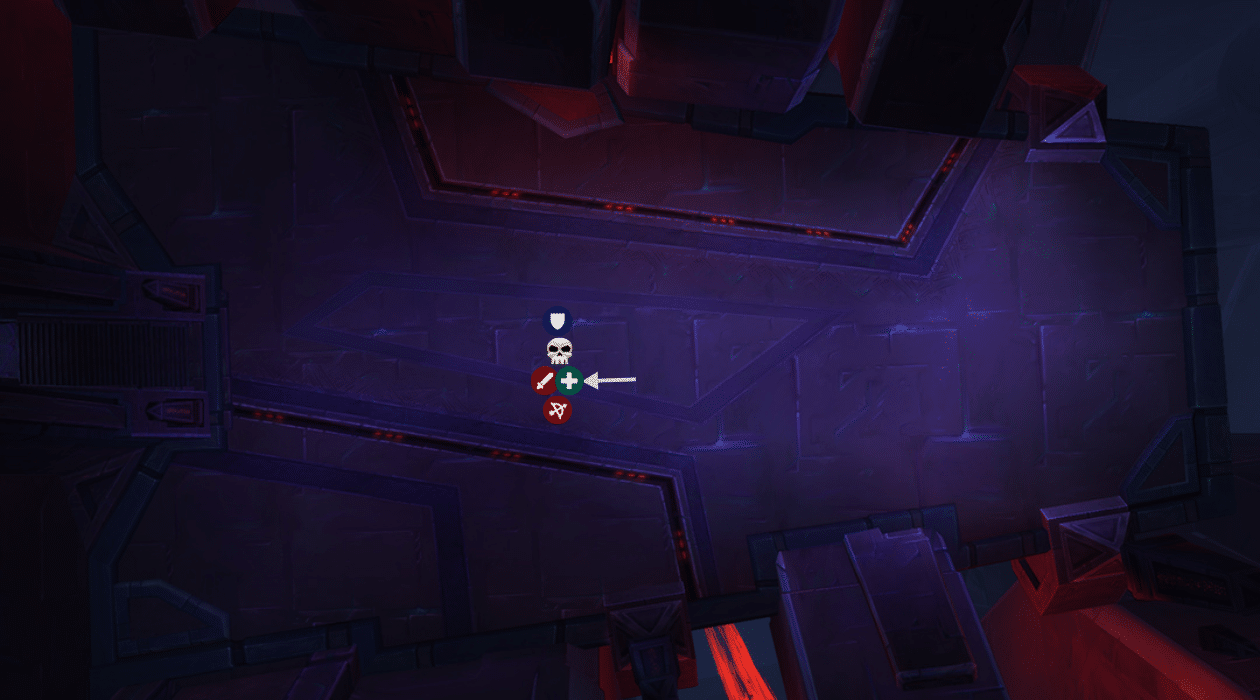
During Tek’ris’s Hivemind, tank the bosses together. During Ka’zir’s, tank them 22-25 yards apart
There is no tank swap mechanic on this fight
You start on Tek’ris’s Hivemind
Dodge the bowling ball bugs, don’t stand in the little green Acidic Blood puddles, and don’t get hit by Nullification Blast.
It’s dodgeable even by the tank it’s targeted at
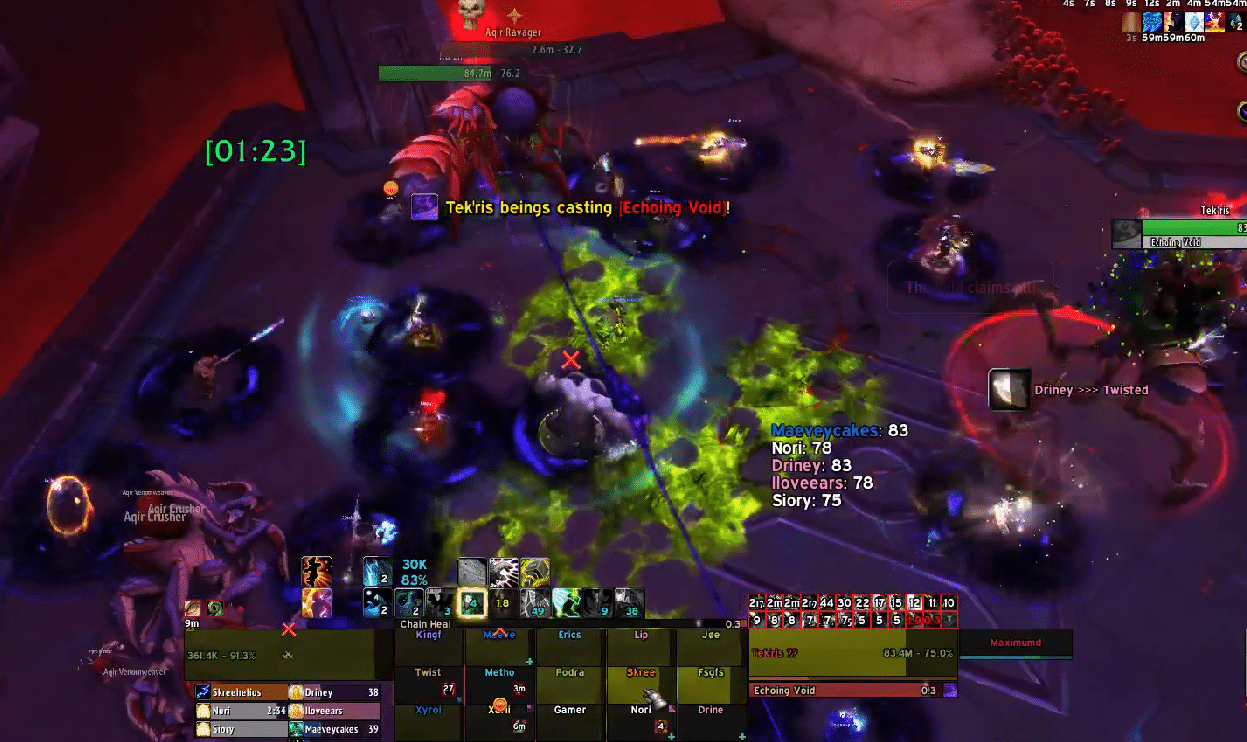
Make sure to be spread 4-6 yards from everyone else during Echoing Void, so you don’t take the extra portion of damage
Use grips, knockbacks, etc to keep the Drones stacked on a boss to make cleave more effective
Hardswap the Ravager add, as they can get out of hand with damage on the tank fairly quickly. This is especially important during Tek’ris control
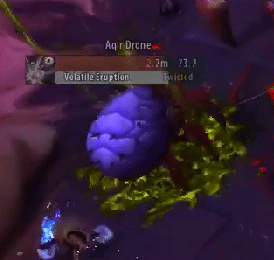
Also hardswap the Drone casting Volatile Eruption. It grows to about 3x the normal size and sticks out like a sore thumb. Killing it gives your healers a nice break
Interrupt the Mind-Numbing Nova
Use a raid healing CD for as many of the Echoing Voids as you can
Prioritize the ones at 1:20 and 6:00. These have overlaps with the Acidic Aqir bowling ball adds AND the Hivemind swap AoE effect. The combination of the raid-wide damage plus people getting hit by the bowling ball adds can be lethal
At 2:45 and 7:25, you have overlaps of Echoing Voids and the Bowling Ball adds, but without the Hivemind swap AoE. You will probably want CDs here too, but not as critical.
This fight isn’t really strategy-difficult. Rather, it’s personal responsibility difficult. It’s very easy to kill yourself on this fight during the bowling ball bugs, especially when paired with anything else going on.
Most of your wipes will simply be people learning and understanding how to effectively deal with the bowling ball bug mechanic. Once people figure it out, the boss falls fairly easily
Positioning
When Tak’ris is controlling the Hivemind, stack the bosses:
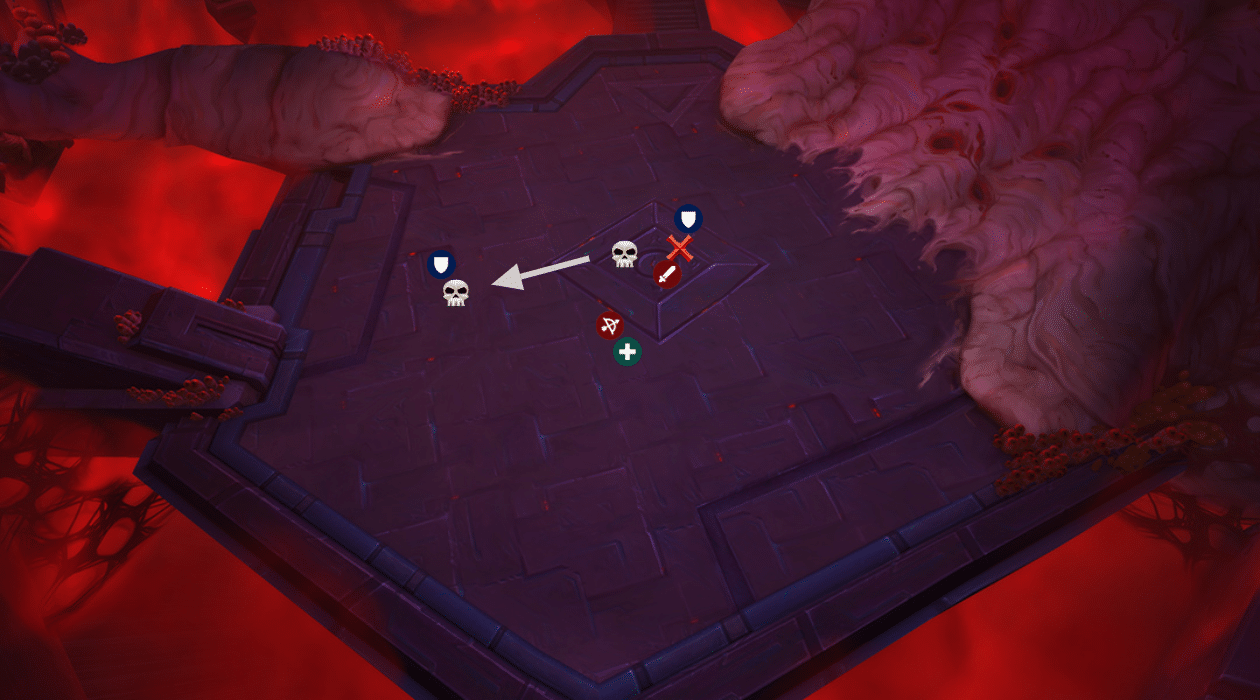
When Ka’zir controls the Hivemind, spread them 20 yards away:
Shad’har is a very not good boy doggo fight with 3 phases. He has several abilities which remain the same through each phase, and two abilities that morph based on the current phase
Shad’har All-Phase Abilities
Crush & Dissolve
Each ability has a 3 second cast, and Shad’har casts 3 total abilities per combo
Random order
Crush
Deals 625k Physical to the tank, increases Physical damage taken by 50%, and increases damage taken from DIssolve by 400%. Lasts 20 seconds. Stacks
Dissolve
Deals 35k Nature damage, plus applies a DoT dealing 53k Nature damage per second for 15s. Stacks
Debilitating Spit
Applies a stacked debuff to a random target. Starts at 4 stacks. Deals 21.4k Nature damage per second for 5 seconds, per stack. After 5s, jumps to 2 targets, each gets 2 stacks, still lasts 5s on them. After it expires from the 2 targets, jumps for 4 targets for 1 stack each, lasts 5s on the 4 targets. Then disappears. So,, first target takes 82k/s for 5s. Second 2 targets take 43k/s for 5s. Last 4 targets take 21k/s for 5s.
Living Miasma
Spawns 2 little slime adds that fixate on random players
When they reach their targets, they explode for 268k Shadow damage to the raid, reduced by distance
Phase 1 – 100%-66%
Umbral Mantle
Every 20s, Shad’har explodes. Deals 53k Shadow damage every 2.5s to the raid. Lasts 5s
Separately, every few seconds swirlies appear around the room
After a few seconds, the swirlies get hit by Umbral Eruption. Deals 178k Shadow damage to anyone that gets hit in a swirlie
Happens more frequently as the phase progresses
Umbral Breath
Frontal cone breath, deals 214k Shadow + fears anyone hit for 10s
Occurs more frequently as the phase progresses
Dodgeable
Phase 2 – 66%-33%
Everything Umbral morphs into Entropic
Entropic Mantle
Deals 10k Shadow damage to the raid as the phase begins
Then deals 3,500 Shadow to the raid every 2s for 25s. Stacks.
Entropic Buildup
Several void orbs spawn around the room. After 15s, they explode and deal 45k Shadow to the raid, each
These can be soaked to reduce the size of their explosion
Soaking deals 7k Shadow per 2 seconds
The longer you’re in this phase, the more void orbs spawn
Entropic Breath
Frontal cone, deals 143k Shadow to anyone hit, and reduces their healing taken by 50% for 6s
Cast more frequently the lower Shad’har’s HP gets
Dodgeable
Phase 3 – 33%-GGS
Everything Entropic morphs to Noxious
Noxious Mantle
Deals 53k Nature to everyone every 3s the rest of the fight
Bubbling Overflow
Creates pool on the ground which grows bigger over time
Standing in the pools deals 10% of your max HP per second
Damage doubles every second you stay in the puddle
See the start of Bubbling Overflow in the screenshot below:
Here’s what the room looks later in the phase, almost completely covered in green goop:
Bubbling Breath
Frontal cone, deals 214k nature to anyone hit
Also applies a DoT, deals 35k Nature every second for 10s
Occurs more frequently as Shad’har’s HP is reduced
Dodgeable
Frenzy
At 30%, boss enrages and deals 25% increased damage from all abilities
Strategy
Tank the boss near the middle of the room
That’ll make it easier to dodge the various frontal cone abilities
See section below for Tanking info
If you’re targeted by the initial application of Debilitating Spit with 4 stacks, use a defensive CD/healthstone/health pot
If targeted by Living Miasma, just move away from the raid to reduce the AoE damage
Always dodge the frontal cone breath abilities. Umbral Breath, Entropic Breath, Bubbling Breath are all dodgeable. Don’t let yourself get hit
In Phase 1, dodge the purple swirlies on the ground
In Phase 2, all ranged DPS should help soak the Entropic Buildup void orbs. More soaking is not a bad thing
As the phase progresses, more and more soaking will be required. Please help soak so your raid doesn’t explode
Phase 3 is a hard burn phase. Healers will want to save their raid CDs for sub 30%, and rotate them from there
Bloodlust when the boss dips below 30%
Healers may want to time using CDs for Living Miasma explosions. With the reduced space in P3 as the fight goes on, it’ll be harder to properly drag the slime away before it explodes, so expect the damage actually taken per explosion to go up
When you enter Phase 3, the Bubbling Overflow puddle will spawn at the center of the room and slowly grow larger. Eventually it CAN grow large enough to cover the entire room. This is a soft enrage. Do not stand in the puddle
As the puddle grows, tanks will need to inch the boss closer to the edges of the room. Try to have the boss close to the edge of the puddle
The puddle makes dodging Bubbling Breath much more difficult over time. Ranged/healers should move closer to the boss, making dodging the Breath require less movement
You’ll also periodically have green swirlies spawning throwing more Bubbling Overflow. These are targeted at random player locations. Try to bait these either in the existing puddle, or towards the opposite direction of where the raid is planning on moving to as the puddles grow
Don’t trap yourself and kill the raid
Nuke hard, use all CDs, don’t get hit by breath, and hope you beat the soft enrage of running out of room
If you get the first application of Debilitating Split in Phase 3, pop any/all defensives you have to keep yourself alive. That DoT plus the standard P3 DoT will cause 466k total damage over a 5 second time period, assuming 2 ticks of the basic P3 DoT.
If you don’t have any personals left, call for a healer external.
Tank Info
Crush and Dissolve are cast in a random order sequence, with 3 abilities total per combo
Each tank should be assigned one ability they’re responsible for taking. Tank 1 is assigned to all Crushes, Tank 2 is assigned to all Dissolves
Taunt swap as needed to make sure you stick to this assignment
NEVER take a Dissolve if you have the Crush debuff
If the boss uses Crush twice during the combo, Tank 1 needs to make sure they use a personal CD to survive
Positioning
Normal positioning for P1 and P2:
If you get Living Miasma, move away from the raid:
In Phase 3, you’ll need to move the boss towards the edge as the green goop grows:
Big tentacle gal trying to win over N’zoth’s heart. Technically a one-phase encounter, but alternating between killing off smaller tentacles and burn phases on the boss.
Drest’agath
Aberrant Regeneration
Heals self for 11.2 million health every 5 seconds
Cannot heal damage which was inflicted by players with Void Infused Ichor
Throes of Agony
When boss hits 100 Agony (energy), flails and deals 39k Nature damage to the raid every 2s for 10s
Void Grip
Grabs a target, pulls them to the boss, stuns them for 5s
Only occurs when nobody is within melee range of the boss
Volatile Seed
Occurs at 0:05, then every roughly 17 seconds
Puts a 10s DoT on the current tank
Deals 107k Shadow every 2s for the 10s
When it ends, explodes in a Volatile Detonation
Deals 143k Shadow damage to all players AND tentacle adds within 13 yards
Players hit take 60% increased damage for 15s
Tentacles hit (other than the actual boss) take 60% increased damage for 15s
Entropic Crash
Occurs at 0:15, then every 45 seconds
Large AoE, deals 533k Shadow to the whole raid, reduced based on distance
Also causes all tentacle adds to cast the same ability
Mutterings of Insanity
Occurs at 0:30, then every 50 seconds
Denoted by a large void swirlie
Slows a random target until they’re immobile over 5 seconds
Targets 1 additional player for each Maw of Drest’agath add alive
After 5s, explodes for 160k Shadow damage to everyone within 12 yards
Also stuns anyone hit
Void Glare
Occurs at 0:45, then every 45 seconds
Giant void beam from the boss’s face, deals 71k Shadow damage every 0.5 seconds to anyone hit
Also cast by all active Eye of Drest’agath adds
Adds
Dismemberment
Whenever an add dies, Drest’agath gains 5 Agony every second for 5 seconds
Void Infused Ichor
When tentacle adds die, they leave behind small void puddles
These puddles last for 25 seconds before disappearing
Touching a puddle makes it disappear and debuffs you for 30 seconds
While you have this debuff, the damage you deal to the boss cannot be healed back by her passive healing
When you pick up Ichor, you get Umbral Aversion, a 1 minute debuff preventing you from picking up Ichor again
Eye of Drest’agath
Mind Flay
Deals 28k Shadow damage every 1 second and slows the target for 5 seconds
Errant Blast
Cast when the boss hits 100 Agony
Causes gunk to fall from the ceiling every 3s for 9s
If hit by the gunk, deals 143k Shadow damage
Gunk spots are denoted by red swirlies
Tentacle of Drest’agath
Crushing Slam
Slams the ground and deals 143k Shadow damage in a circle around it
Cast non-stop by this mob, except if Reality Tear occurs
Void Miasma
Creates a cloud around itself. Standing in the cloud deals 53k Shadow damage every 3s
Creates a small moving void zone on the ground every 3s for 9s
Deals 143k Shadow damage to anyone it touches
Maw of Drest’agath
Mutterings of Betrayal
Applies a 71k healing absorb debuff to all players within 10 yards
Stacks
If you reach 4 stacks, you become Hostile to the raid
Acid Splash
Spits acid at a random player, dealing 107k Nature damage to the player and anyone within 4 yards
Spine Eruption
Cast when the boss hits 100 Agony
Releases random sized rings of spines, deals 160k Physical damage every 3s for 9s
Positioning
Since Drest’agath is stationary, your tank should just face her away, and everyone should be spread around the room. Move to the adds you need to kill as they spawn.
Strategy
You start out fighting Drest’agath and two Eyes of Drest’agath
Tanks need to be on Drest’agath the entire fight. The adds don’t require a tank
Tanks will swap when Volatile Seed is applied
When you get seed, move to the adds, preferably a Tentacle if possible
Players afflicted with Mutterings of Insanity need to move towards the edge of the room
Everyone else needs to make sure they aren’t in the giant swirlie
Damage should be focused on the adds, as anything you do to the boss will just be healed up
Healers should use a raid CD every time the boss casts Throes of Agony
Make sure to get out of the purple graphic for Entropic Crash
Make sure to dodge Void Glare, both from the boss AND any Eye adds which are alive
The tank afflicted with Volatile Seed should try and have it explode on as many of the adds as possible
In general, you want melee DPS to nuke the Tentacle, and ranged DPS to nuke the Maw
You’ll need 1-2 healers to be within the cloud for the Tentacle to keep the melee DPS alive
Once the Tentacle or Maw dies, those DPS players then move to any remaining Eyes
About 25 seconds into the fight, you’ll have 3 adds spawn. One Eye, one Tentacle, one Maw
Try to hold off killing the initial 2 Eyes you start with. You want to kill the 2 Eyes and 1-2 of the newly spawned adds around the same time
Each add you kill drops 5 puddles of Ichor, and they last 25 seconds
Once you kill enough adds that every DPS player can get an Ichor , everyone should run over a puddle to get their Ichor debuff
Follow this up with Bloodlust, and a hard nuke phase on the boss
Ignore any remaining adds until the Ichor debuffs drop, then swap and kill them
From that point on, kill adds as they spawn. Make sure all Ichor puddles get soaked.
Prioritize letting DPS who have their cooldowns available to soak puddles
Soaking puddles, and then letting people with Ichor nuke the boss, is priority
Whenever you don’t have Ichor, work on killing off add
Il’gynoth is a two phase encounter. Phase one you fight Il’gynoth’s body, phase 2 you destroy organs. You will need to cycle through 3 times total to defeat his 3 organs and complete the encounter.
Phase 1
Eye of N’zoth
Beam shoots out from Il’gynoth’s chest, dealing 446k Shadow directly in front of him, and increases damage taken by subsequent Eye of N’zoth by 75%
Debuff lasts 43 seconds
Cast at 0:06 into each Phase 1, then every 18 seconds
Touch of the Corruptor
MC’s random players, and causes them to run around
If an MC’d player gets too close to another player, they will also become MC’d
Broken when the MC’d player reaches 30% HP
Corruptor’s Gaze
Standard Eye Beam type ability, cast at several random players
Starts as a swirlie, then turns into a beam
Beam chases the selected players for 5 seconds
The Beam leaves pools anywhere it went over, called Morass of Corruption
Standing in the pools deals 89k Shadow damage every second, and pacifies and silences you
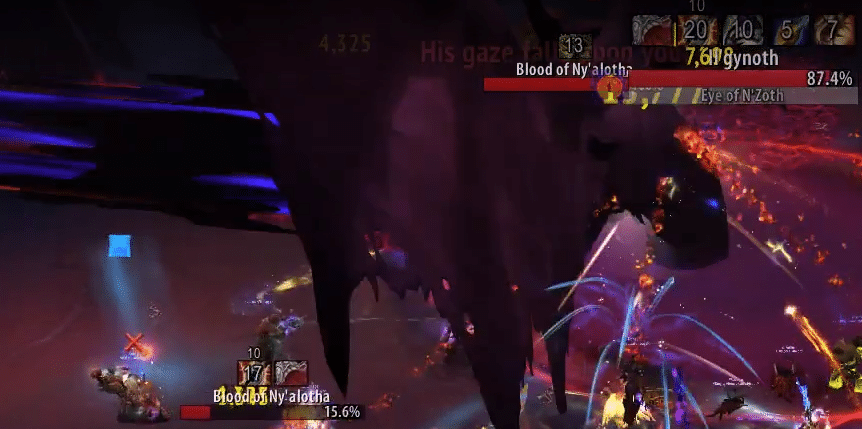
Blood of Ny’alotha
During your second and third Phase 1, blood goop adds will spawn
These fixate on random targets and chase them
Each time you’re melee’d by one of these blood adds, you’ll gain a stack of Recurring Nightmare
Deals 18k Shadow damage every 2s for 40s
Stacks
Dispellable
When a blood add dies, it explodes and deals 86k Shadow to the entire raid
Spawn every 30s in your 2nd and 3rd Phase 1s
These are slowable, rootable, etc
When Il’gynoth’s HP reaches 0, you enter Phase 2
Phase 2
Cursed Blood
Infects 8 random players with a debuff, dealing 18k Shadow every 2s for 8s
When it ends, players explode for 143k Shadow to everyone within 11 yards
Organ of Corruption
3 Organs spawn around the room
Killing any Organ ends Phase 2, and moves you back to Phase 1
That Organ stays dead the rest of the fight
Blood of Ny’alotha
Created by living Organs in this phase, as a cast
Cast is interruptible
If one spawns, it has all the same abilities as listed above
Strategy
Phase 1
Tanks need to swap every 2 stacks of Eye of N’zoth
Nobody else should be standing near the tanks, and the tanks should be slightly spread so they don’t both get hit by the same Eye of N’zoth beam
You may find it helpful to have markers on your tanks, or a world marker down at the location tanks will be, to help people avoid being hit
Everyone else should be spread throughout the room
When Touch of the Corruptor goes out, hard swap to the MC’d people and break them ASAP
You do not want them reaching other players and spreading this, do everything you can to prevent it
If targeted by Corruptor’s Gaze, move away from the beam. Try to drop your puddles in a neat little circle near where you are. This’ll help reduce the area covered by puddles, and help prevent the puddles from blocking parts of the room. Here’s an example of a good goop drop:
In your 2nd and 3rd Phase 1s, the Blood adds become priority, behind only the MC’s.
These come from the location of the Organ/Organs you’ve killed up until that point
Slow them, root them, stun them, whatever
If you’re targeted, make sure you’re running away and don’t let the Blood reach you
If you do get melee’d by the Blood, call for a healer to dispel you
Once Il’gynoth’s HP reaches 0, you enter Phase 2
Phase 2
This phase lasts until you kill off an Organ. You may only kill off 1 per phase, so you’ll repeat this phase 3 times to defeat the encounter
Once you kill an Organ, Il’gynoth respawns with full HP and you enter a Phase 1 again
Have a set order to kill the Organs each time, so the raid moves together to the proper Organ
Organs cast Pumping Blood frequently to spawn Blood adds. Interrupt as many casts as possible
The first cast of Pumping Blood happens as soon as the adds become targetable
Subsequent casts occur every roughly 7 seconds
Assign ranged DPS to each Organ not being focused down to interrupt
Just get as many interrupts as you can. The more Bloods that spawn, the more dangerous this phase is
Players affected by Cursed Blood need to move away from the raid to prevent exploding on people
Priority for DPS in this phase is Slowing/CCing adds, then nuking Organs. You want to kill off your targeted Organ as fast as possible
When you re-enter Phase 1, clean up any Blood adds
After cycling through killing the 3 Organs, you’ll go into a 4th and final Phase 1
There’ll be a large amount of Blood adds, so we recommend using Bloodlust and raid healing CDs here
Positioning
Before you pull, put markers along the 3 passageways where the organs spawn:
During Phase 1, you should have the raid loosely spread around the room, except where the tanks are assigned to stand:
During Phase 2, just move towards whatever Organ you’re assigned to be killing.
Vexiona is a three phase encounter, and is accompanied by multiple adds throughout the fight.
Phase 1
Encroaching Shadows
Debuff cast on 3 random players that deals 71k Shadow damage immediately to the affected players, and anyone within 9 yards
Visible purple circle around affected people
After 8s, the debuff expires and deals 71k Shadow again to the affected players, and anyone within 9 yards
Leaves behind a puddle of shadow goop wherever the debuff expires at
Puddle deals 71k Shadow every 1s to anyone standing in it
Twilight Breath
Frontal cone ability, cast at the active tank
Dodgeable by everyone but the active tank
Deals 43k Shadow every 0.4s for 1.6s
Also applies 1 stack of Void Corruption for each tick of damage taken
Void Corruption
Permanent DoT, deals 4,400 Shadow damage every 3s
Despair
Cast at 0:10, 0:47 each time in Phase 1
Debuff placed on the tank
Deals 53k Shadow every 1s for 6s
After 6s, explodes on the raid
Deals 36k Shadow damage, PLUS 90% of the target tank’s missing health to the entire raid
So, if the tank has 600k HP and is at 50%, this explosion will deal 306k to the entire raid ((300k * 0.9)+36k)
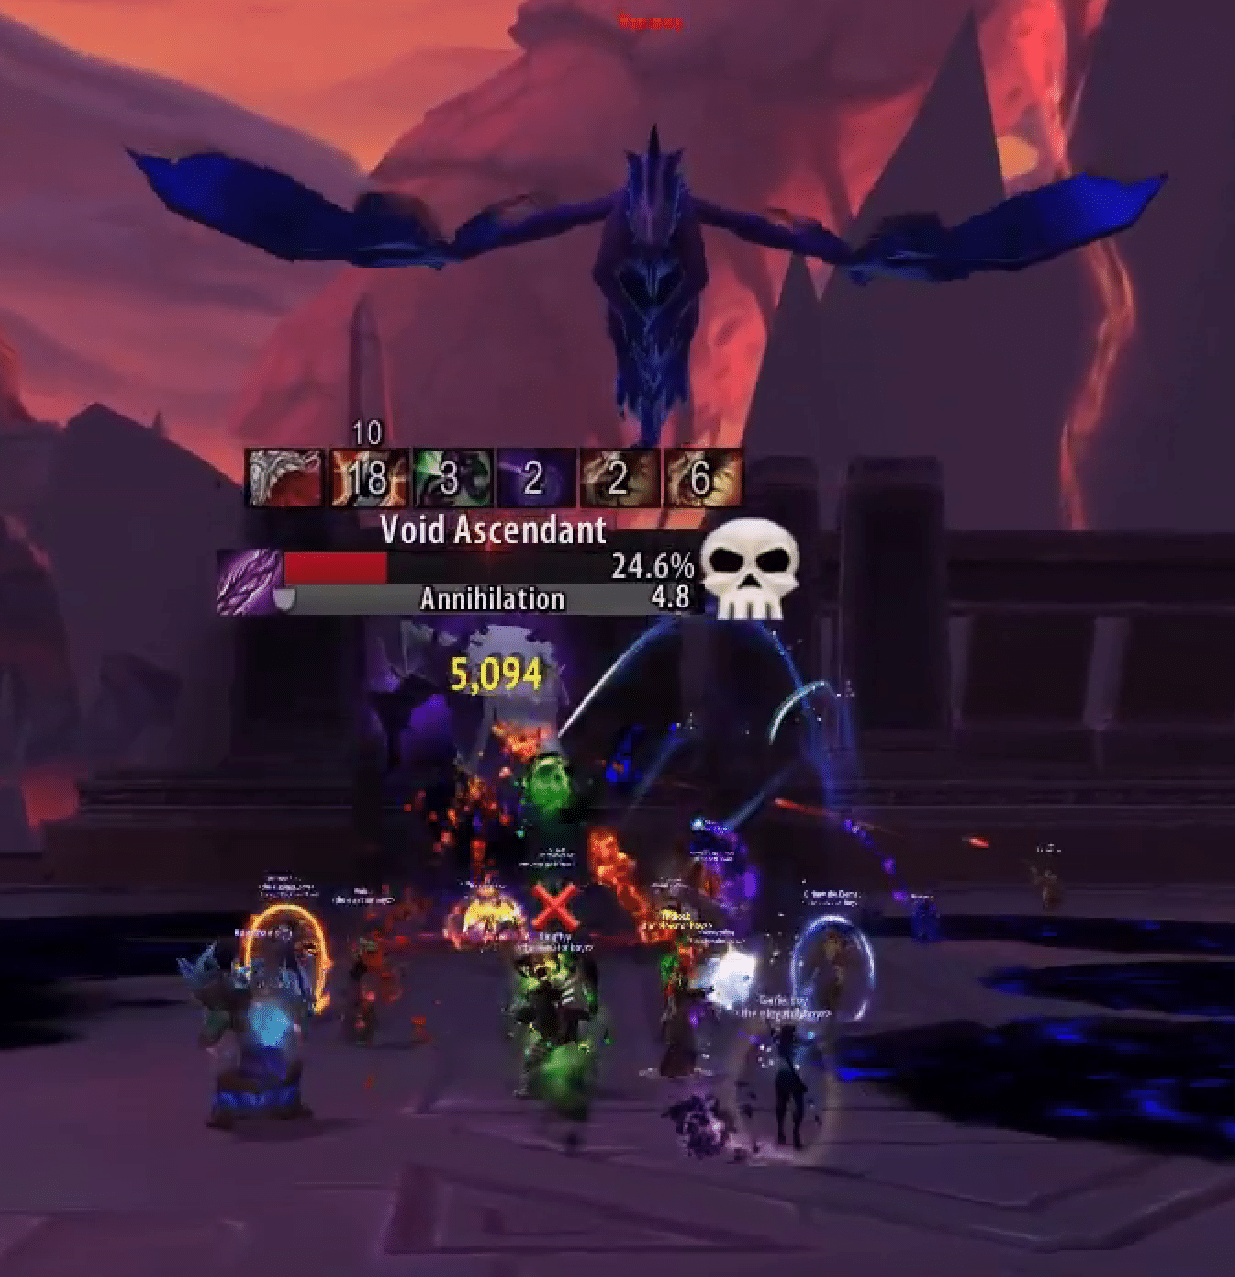
Void Ascendant
Powerful Void add that begins the fight alongside Vexiona
Annihilation
Frontal ability, deals 18k Shadow damage every 0.25s for 5 seconds
Each tick that deals damage to you applies a debuff, increasing damage taken from Annihilation by 25% for 6s. Stacks up to 20 stacks
This ability can damage players AND the Cultist adds present in the encounter
It’s targeted at the tank with threat, and followed that tank if they move
Gift of the Void
When the Void Ascendant dies, leaves behind a void orb that can be picked up
The player who picks up the ball as all of their Void Corruption stacks removed
Dark gateway
Vexiona creates a gateway, dealing 125k Shadow damage to the raid, and spawning multiple Cultist adds
Fanatical Cultist
Deals weak melee damage, needs to be tanked
Upon reaching 100 energy, becomes immune to CC and starts transforming into a new Void Ascendant
Spellbound Ritualist
Basically a warlock add
Casts Void Bolt, which deals 160k Shadow damage to the target
Interruptible
Sinister Soulcarver
Rogue type add
Spiteful Assault
Teleports to a random location up to 15 yards away
Then deals 50k Shadow damage to the nearest player every 0.4s for 4s
Casting Spiteful Assault removes Root and Slow effects from the Soulcarver
Phase 2 – 1:25, 3:32
When Vexiona reaches 100 energy, she flies up and becomes unattackable for about 50 seconds. This begins Phase 2
As she flies up, Vexiona empowers one Cultist to become a Void Ascendant
Void Ascendant works just like the P1 one. Same abilities.
Twilight Decimator
Vexiona breathes twilight flames in a line from overhead
Deals 893k Shadow damage if you’re hit by the initial impact
The flames themselves deal 43k Shadow damage every 0.5 seconds from standing in them after they land
Encroaching Shadows
Continues occurring just like Phase 1
After she casts Twilight Decimator 3 times, she’ll land back on the platform, and you re-enter Phase 1
You’ll continue doing Phase 1 and Phase 2 until Vexiona reaches 40% HP
Phase 3 – 40% HP
No more adds spawn once Phase 3 starts
Empowered Void Corruption
All abilities now cause a stack of Void Corruption to any player when they take damage
Encroaching Shadows
Continues exactly as it did in P1 and P2
Twilight Breath
Works same as P1, frontal cone
Terrifying Presence
All players have their haste reduced by 100% unless they’re within 6 yards of another player
Heart of Darkness
Casted ability, deals 714k Shadow to all players
Damage taken reduced by distance
Big obvious glowing red circle under the boss. Get far enough away that you’re out of the circle
If you have Terrifying Presence debuff when the Heart of Darkness damage goes out, you’re feared for 8s and gain 1 extra stack of Void Corruption
Desolation
Vexiona debuffs the tank with Desolation, reducing their movement speed by 50%][
Also creates a large purple soak circle under the tank
Soak circle deals 803k Shadow damage after 5s
Also applies 30 Void Corruption stacks, split evenly among all players that soak
If less than 3 players soak this, Vexiona gains a 100% increased damage buff and immediately re-casts Desolation
Strategy
Phase 1
Tank the boss where she starts, but facing the right-hand side (looking towards the boss from where you come into the room)
The other tank needs to pick up the add (obviously)
Tank the add under the boss, but facing a different direction than the other tank
This is to prevent Annihilation from hitting anyone other than the add tank
The rest of the raid should be to the side of the boss
Lust on pull, nuke down the add, but don’t let it die until after the 2nd Twilight Breath from the boss happens at 0:25
The tank on Vexiona should grab the Void orb after the 3rd Breath at 0:45
When the adds spawn, the tank who’d been holding the Ascendant add needs to pick them up and bring them under the boss for cleave
You’ll need ranged DPS to interrupt the Ritualist, or a Death Grip
Players afflicted with Encroaching Shadow need to move to the back of the room to drop their puddles
You can, and should try to, drop these on older puddles
When the tank is afflicted with the Despair debuff, healers will want to bomb heals into that tank. The more healing you pump into the tank here, the less raid healing you’ll need to do after it explodes
When the little adds are up, DPS should be focusing DPS on Vexiona with cleave blowing up the adds. You don’t want everyone to hardswap to AoE and pad meters.
Phase 2
A new group of small adds spawns a couple seconds before P2 begins, then one Cultist becomes an Ascendant
Focus damage on the Ascendant, with cleave melting the rest of the adds
When the Ascendant dies, your tank with Void Corruption should grab the orb and reset stacks
Encroaching Shadows continues being cast, so you’ll need to keep handling that like in P1 and drop it at the edge of the room
Twilight Decimator is the standard flyover breath attack. Vexiona will fly to the side of the room, picking either Front, Middle, or Back. After a couple second delay, she’ll fly in a straight line from one side of the room to the other, breathing void evil fire on whichever zone she picked
After she makes a pass, there’s a few seconds of downtime, then she’ll pick a new zone and repeat the process
It’ll then happen a 3rd time
As a note, the flame from the previous pass dissipates once a new pass begins. This means if she does Middle first, as soon as she starts flying down her next zone the flames will dissipate and you can stand in the Middle as a safe spot
After 3 passes, she’ll drop back down and you’ll re-enter Phase 1
You’ll repeat between Phase 1 and Phase 2 until Vexiona reaches 40% HP
Phase 3
Encroaching Shadows continues like it did the rest of the fight. Keep dropping it off to the sides
Make sure you have a friend in your raid, and hold hands. Don’t let yourself be alone, being lonely makes you lose all your haste =(
When Vexiona casts Heart of Darkness (big glowing red circles under the boss) GTFO away from the boss
Make sure you’re still holding hands with someone, you don’t want to be lonely and scared!
When Desolation goes out on the tank, you’ll want at least 5 people total to soak it. More is better.
As this phase goes on, the raid damage can get intense. Healers will want to have all raid CDs available for when the boss is below 20%, and use them as needed from that point on to keep the raid stable
Nuke boss, healers blow your loads on the raid, boss falls over. Ggs.
Positioning
Keep the boss near where she starts. Tank the add (X) right under her, with the tank facing away from the boss tank. Melee stand on the other side, with heals/ranged loosely spread. Drop Encroaching Shadows near the back, and close to each other, denoted by the circles below.
Dude yeeted out of ToT and decided to submit to the one true God, N’zoth.
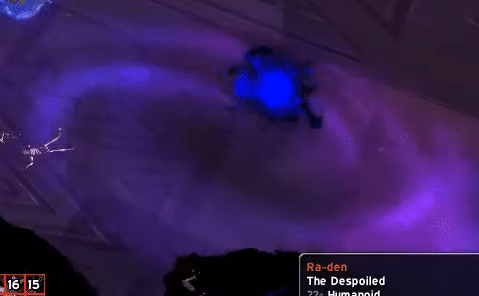
Ra-den is a two phase fight. You start in Phase 1, and transition into Phase 2 at 40% hp.
Phase 1
Nullifying Strike
At 100 energy, boss does a big tank smack for 214k Shadow damage, and reduces that tank’s HP by 20% for 25s
Vita & Void Essences
At 0:10, then every 45 seconds during Phase 1, the boss spawns orbs on opposite sides of the room, one Vita (lightning) one Void
These orbs move from their spawn point directly to the boss
Each orb has a health pool and is attackable
When you kill one orb, the other becomes non-targetable
When an orb reaches the boss, he gains an empowerment from it and gives him new abilities
If he soaks the same type of orb twice in a row, he gains a 300% damage dealt buff
Each Empowerment lasts 40 seconds
Vita (lightning) Empowered
When the lightning orb hits the boss, he immediately blasts the raid with a lightning AoE ability, dealing 214k Nature to everyone
Unstable Vita
Debuff placed on a random target, person1. After 7s, this jumps to the furthest person possible, person 2, dealing 178k Nature damage to person 2 and anyone standing between person 1 and person 2.
Jumps 3 times total
Anyone who takes damage from this gains Instability Exposure, increasing damage taken by any “Unstable” ability by 300% for 30s
Crackling Stalker
Add that spawns, casts Chain Lightning every 6s while it’s alive
Void Empowered
When the void orb hits the boss, he puts a healing absorb shield on every player which absorbs 214k healing. While this shield is active, everyone also takes 18k Shadow damage every 3s
Unstable Void
Soak circle appears on the ground, with a void missile launched at the location
After a few seconds, the missile lands, dealing 196k Shadow to anyone hit and applying Instability Exposure to those people
If this is not soaked, it’ll deal 157k to the entire raid, apply Instability Exposure to everyone, and Silence the raid for 8s
After impact, the Missile will bounce to a new soak circle
Impacts 5 times total
Void Hunter
Shadow add that spawns. Casts Void Collapse
Group soak circle. Deals 1.4 million Shadow damage split evenly among everyone within 8 yards
Everyone hit is also debuffed with Void Defilement, reduces healing taken by 50%
Phase 2 – 40%
Ruin
Ra-den deals 53k Plague damage to the raid every 2s for the rest of the fight
Decaying Strike
Replaces Nullifying Strike
At 100 Energy, smacks the tank for 89k Physical, and applies the Decaying Wound debuff
Deals damage every 2s for 10s
Damage is equal to 75% of the affected tank’s HP when this effect is applied. The higher health you were when you got hit by Decaying Strike, the heavier this DoT is
Void Eruption
Ra-den creates several large purple swirlies
After 4s they explode, dealing 196k Shadow to anyone hit
Charged Bonds
Tethers multiple players together
Deals 25k Nature every second
Increases by 20% every second
Breaks when you move 40 yards away from who you’re tethered to
Gorge Energy
Cast every 30s in Phase 2
Applies a stack of Lingering Energies each cast, increasing damage dealt by 10%
Strategy
Phase 1
Tank the boss where he stands, with everyone stacked behind the boss in melee range
Pre-assign a 6 person Unstable soak group. These people will handle all of the Unstable abilities
Unstable void is pretty straightforward, assigned group takes turns soaking
Set up two world markers behind the group, one to the left one to the right. These should be 10 yards away from the stack point, in different directions
These will be used as drop points for Unstable Vita
The first person affected is random, but you can have the rest handled by your pre-assigned group
If one person in your order is the random person picked, just remove them from your set rotation
It should be handled as follows:
Player X gets Unstable Vita. They run to the Left marker.
Player Y is assigned first in the rotation. They run to the Right marker
Unstable Vita jumps from Player X to Player Y
After that jump, Player Z is the next assigned person. They move to the Left marker, and wait for the jump from Y
Keep repeating that through your assigned player rotation until the debuff ends
Void and Vita Orbs
Make sure you alternate which Orb you let hit the boss, or you’ll wipe
While the order you do these in is irrelevant to the difficulty of the encounter, we STRONGLY suggest you always do these in the same order every pull, just for simplicity sake as you progress this boss
When the orbs spawn, Ranged dps swap immediately to the assigned Orb target
Melee swap as the orb gets closer to reduce downtime
Once the assigned orb dies, everyone should get back to the raid stack point
You may want to use a healing raid CD for every time an Orb reaches the boss
Tanks will want to swap every stack of Nullification Strike
The adds that spawn after an orb hits should be taunted by the tank who’s not currently holding Ra-den, and all DPS should hardswap and nuke the add
Tank the add right under the boss for cleave
When the Void Add casts Void Collapse, the affected player should just stay at the raid stack point to split the damage
Phase 2
Once the boss reaches 40%, you reach Phase 2, which is a hard burn phase
You’ll want to use Bloodlust either when you enter this phase, or at 30% if you have a lot of classes with Execute-style effects
Don’t stand in Void Eruption swirlies
Healers should keep the tank holding Ra-den at around 50-60% hp. Any higher than that, and it’s likely they’ll die from the Decaying Would DoT
Remember, this ticks for 75% of the affected player’s HP at the time of application. At 50% HP, this’ll tick for 37.5% of the tank’s HP every 2s, versus 75% of the tank’s HP if they’re at full.
Players affected by Charged Bond need to spread out ASAP to break the chains. Use movement abilities here
There’s already a LOT of damage going out this phase, so breaking these ASAP is important to your survival
Healers will want to coordinate and rotate raid CDs during this phase. Ruin ticks for 53k every 2s, but that’s increased by 10% per stack of Lingering Energies the boss has
The longer you’re in P1, the more stacks you’ll start with
He also gains a stack every 30s in this phase
It’s likely that by the time the boss dies, you’ll have 8 or more stacks, meaning the raid will be taking close to 100k damage every 2s. Without raid CDs, that won’t be healable
Start rotating CDs after Bloodlust ends
Nuke the living hell out of this old Titan Keeper fella, thank your healers once he dies, and get ready to fight an Old God
Sk’tek agth nuq N’Zoth yyqzz.
Positioning
This graphic shows your general positioning throughout the first. Put raid markers at Star and Circle to handle Unstable Vita. The X markers represent roughly where the Orbs spawn.
Welcome to the center of Nyalotha. This is a 3 phase encounter, with you moving progressively deeper into the being known as N’zoth. Between each phase is a transition where you move through tunnels further into the madness. Ywaq mh’naus wgah zaix zygtahg.
Encounter-Wide Ability
Sanity
When you pull, you get a Sanity bar. Several mechanics throughout the fight reduce your Sanity. If you ever reach 0 Sanity, you get blessed with the Gift of N’zoth
Increases your damage and healing by 100% for 20 seconds
When this expires, you get MC’d and try to destroy your raid. MC cannot be broken and you must be killed
While MC’d, you cast Mental Decay, draining 15 Sanity from your target and dealing 35k Shadow damage every second for 12s, interruptible
In Phases 1 and 2, you get an extra action button which uses your Legendary Cloak
Pressing this will fly your character to the back of the room, where our boy Wrathion is hanging out
It also heals you to 100% HP and prevents you from losing Sanity while active
The little circle around Wrathion periodically restores your Sanity back to 100
When you leave the circle, you get Grace of the Black Prince, increases your movement speed by 40% for 10 seconds
Extra action button has a 2 minute CD
Phase 1
Fury of N’zoth
Large mob, functions as the boss for the encounter
Mandible Slam
Big slam on the tank, deals 286k Physical damage and 142k Shadow damage. Shadow damage is called Black Scar
Also causes subsequent Black Scars to deal 100% increased damage for 40s
Madness Bomb
12 second debuff applied to several players. Actual number of people affected can be slightly different each time
After 12s, explodes for 143k Shadow damage and fears everyone within 10 yards of the affected player
Denoted by a purple circle under you
Players hit by the explosion who were NOT affected by the debuff lose 15 Sanity
Mental Decay
Applied to about 30% of the raid
Immediately drains 15 Sanity, then deals 36k Shadow damage every second for 12
Adaptive Membrane
Shields either an add or the boss for 12 seconds
While shielded, the target is immune to CC and interrupts, and cannot be slowed
If you break the shield, all damage dealt to the shield is then actually taken by the affected mob
Also creates multiple Fragment of Sanity orbs
Touching an orb gives you 10 Sanity back. Each orb may only affect 1 player
Adds
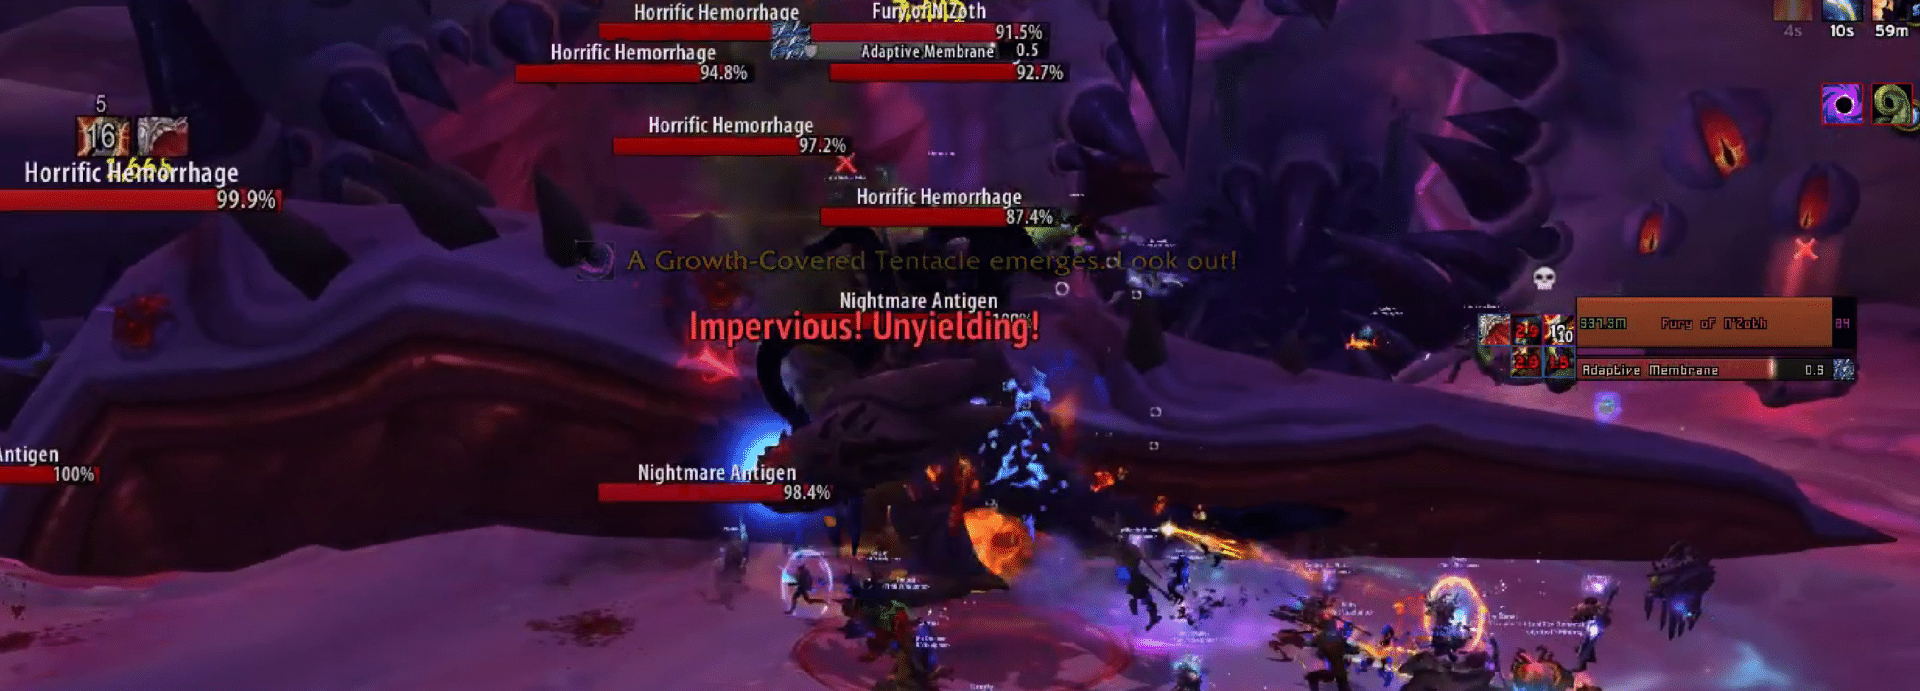
Growth-Covered Tentacle
Giant tentacle. Puts a shadow on the ground in the shape of the tentacle, then slams down on that spot after about 5 seconds
Deals 1 million Nature damage to anyone hit
After it slams down, two types of adds spawn from the giant tentacle
Horrific Hemorrhage
Spawn on the tentacle itself
Periodically throws goop on the ground. Deals 143k Shadow damage to anyone hit, and spawns a Nightmare Antigen
Hemorrhages don’t need to be tanked, just killed
Nightmare Antigen
Smaller adds with a threat pool that need to be tanked
Each of the adds melee attacks inflicts 36k Shadow damage, and debuffs the target
Reduces Haste and movement speed by 3% for 4s. Stacks
Periodically gain a stack of Adaptive Antigen, increasing damage done by 10% and prevents them from being slowed past 10% of their normal speed
Stacks
In summary, Horrific Hemorrhages spawn Nightmare Antigens regularly. Horrific Hemorrhages live attached to the big tentacle
When all 6 Horrific Hemorrhages die, the big tentacle goes away and the Fury of N’zoth takes 7.5% of its max HP in damage
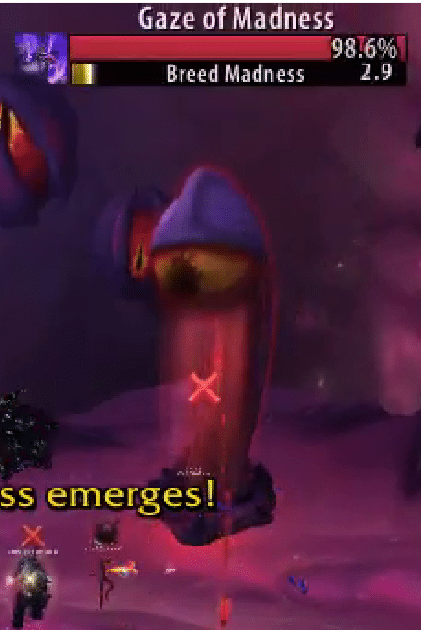
Gaze of Madness
Eyestalk tentacle add dude
Chain casts Breed Madness
3 second cast, which turns into a 9 second channel
Channel deals 143k Shadow damage per second for 9s to several targets
When the channel either completes, OR gets interrupted, it triggers Maddening Eruption
Deals 107k Shadow damage to the entire raid and drains 5 Sanity
Also causes a stack of Deepening Madness on the add
Increases damage by Breed Madness and Maddening Eruption by 5%, stacks
When a Gaze dies, Fury of N’zoth loses 3% of his max HP
Once the boss reaches 50%, he’ll run to the very front of the room, through the wall, and run away
Wrathion will turn into Dragonboi and burn a hole in the room, leading to a hallway you run through, beginning Phase 2
Phase 2
After you follow the tunnel Wrathion creates, you’ll get to the new room for P2
Wrathion follows you down to the tunnel. Wait for him to reach you in the new room, and he’ll restore your Sanity to 100
Fury of N’zoth is immune to damage when you enter the room
Off to each side of this new room is a gauntlet of little goop adds on the floor called Mycelial Cysts, and bigger goop adds on the wall called Synthesis Growth
You must kill off all the Synthesis Growth adds before you can engage Fury of N’zoth
Mycelial Cyst
These things are on the floor on the right-hand side
Similar to the cysts on the sides during the G’huun fight, these things create a pool around them which slows you 75% and deals 14k Nature damage per second while standing in the pool
The size of the pool is reduced as you damage the Cysts
Cysts regen 1% HP every 0.5 seconds
Synthesis Growth
Each Synthesis Growth heals Fury of N’zoth for 35k HP every 2s, and makes him immune to damage and healing reduction effects
7of these will be on the Left side, 9 will be on the Right
While you’re fighting the Synthesis Growths, Fury of N’zoth casts several of his abilities at you, most of which are from Phase 1
Madness Bomb, Mental Decay, and Adaptive Membrane are cast in this phase like they were in P1
Madness Bomb can be cast on the Mycelial Cyst adds, so be careful of the purple circles
Unknown if that’s intended or a bug, but did occur on PTR
Eternal Darkness
Deals 143k Shadow to the raid, and drains 10 Sanity from everyone
Once you’ve killed all 16 Synthesis Growths, the boss becomes fully active again, needs to be tanked, and can be attacked
When Fury of N’zoth becomes active, he continues casting Madness Bomb, Adaptive Membrane, Mental Decay, and Eternal Darkness as before
Also gains 1 new cast, and begins using Mandible Slam again from Phase 1 on the tank
Occipital Blast
Frontal cone ability, targeted at a random player
If hit, deals 268k Shadow damage and drains 40 Sanity
As a note, once Fury of N’zoth is re-engaged here, the back end of the room gets covered in the goop from Mycelial Cysts, which will be between the fight area and where Wrathion is. This means to get to Wrathion and back when you need to reset your Sanity, you’ll be slowed and take damage
Using the Cloak extra action button will port you to Wrathion, but you’ll still need to run back into the fight through the goop
Once Fury of N’zoth reaches 40% HP, he’ll run away down another tunnel, and you’ll enter Phase 3
Phase 3
Follow Fury of N’zoth through the tunnel to the final platform, and begin Phase 3
He casts Mental Decay at you while you’re running
Adaptive Membrane, Mandible Slam, and Mental Decay continue in this phase exactly like they were the rest of the fight
Mental Decay is cast every 27 seconds
In Phase 3, it seems like every Mental Decay cast affects everyone in the raid, slightly staggered
According to logs, you’ll get affected by Mental Decay in Phase 3 every 20-ish seconds. This will occur more frequently per person if you have people dead.
Adaptive Membrane is cast every 45s
Mandible Slam doesn’t seem to have set timings
Madness Bomb is replaced with Insanity Bomb. It functions exactly the same as before, but now spawns 1 Nightmare Antigen near the location of every bomb when they explode
Nightmare Antigens work just like they did in P1
Insanity Bomb is placed on everyone except tanks
Infinite Darkness replaces Eternal Darkness
Cast every 45 seconds in Phase 3
Similar ability. Now deals 214k Shadow damage to everyone, still drains 10 Sanity
Now also creates an Infinite Void, sphere of bad
Touching the sphere of bad deals 35k Shadow damage per second, stacking
The Infinite Void sphere didn’t seem to spawn on PTR, so we don’t know what it looks like or how large it is
Thrashing Tentacle
A series of 4 shadows appear on the ground. After 5s, giant Tentacles slam down on each shadow, one by one
Getting hit by a tentacle deals 1 million Nature damage
You do not have your Legendary cloak extra action button in Phase 3
Strategy
Phase 1
Start with the boss up near where he starts, pulled just a bit off to the right-hand side as you face him
If you get a Madness Bomb, make sure you move away from other players so your circle isn’t on top of anyone
Going a little extra distance for this is not a bad thing, other people being hit in your circle is a bad thing
0:15 into the fight, a Gaze of Madness add spawns
Drag boss on top of it
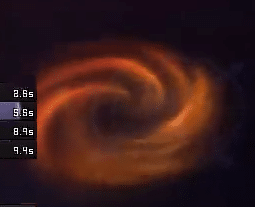
Do NOT interrupt the Gaze’s cast of Breed Madness
Allow it to start channeling, and interrupt near the end of the channel, with between 1 and 1.5 seconds remaining
All DPS should swap and kill the Gaze as quickly as possible
0:40 into the fight, the first shadow for a Growth-Covered Tentacle appears. The tentacle slams down at 0:45
Do not get hit by the tentacle, it’s a 1 shot
Ranged DPS need to focus down the Hemorrhages, melee should focus on the Antigens
Tanks need to pick up the Nightmare Antigen quickly so they don’t wreck your healers
Careful here, as the tentacle itself serves as an obstacle. The little adds cannot run through the tentacle and must run around
All healers should make sure they’re on the same side of the tentacle as the tanks, that way if you get healing aggro soon after the little adds spawn, the tanks can pick them up
Once the 6 Hemorrhages are dead, all DPS swap to the little Antigen adds and blow them up, then move back to nuking the boss
Tanks should taunt swap at 2 stacks of Black Scar
Adaptive Membrane doesn’t really cause you to change what you do in this phase. If you’re nuking the Hemorrhages and it goes out, just keep nuking until the Membrane explodes.
Don’t waste GCD’s padding on extra targets unless the target will actually have it’s shield drop
As an example, when fighting a Gaze of Madness, if Adaptive Membrane goes off don’t waste time applying DoT’s or going out of your way to cleave on the boss. Wait until the Membrane ends, then DoT up and cleave back onto the boss.
At 1:15 a new Gaze of Madness spawns. Handle this like the first one
At about 1:40, a second shadow for a Growth-Covered Tentacle appears. The tentacle slams down at 1:45
Handle this the same as the last one.
If you ever get below 30 Sanity in Phase 1, click your extra action button to port back to Wrathion and fill your Sanity bar
New Gaze of Madness spawns at 2:20. Handle the same way as previously
3rd Growth-Covered Tentacle shadow spawns at 2:42. Slams down at 2:47
Handle exactly the same way
By the time the 3rd Tentacle and set of Hemorrhages die, the boss should be at, or close to, 50% HP. Everyone in the raid should reset their Sanity no later than this point
If you have a Warlock, set up a gateway from the center of the room to the back, as close to Wrathion as you can
Ideally, nobody will have used their Legendary cloak before this point, and everyone can press the extra action button to port back. You may have to sit in Wrathion’s circle for 3-4 seconds.
Once your Sanity bar is back full, run back to the front of the room. Click the Gateway on your way back if you have one
You do not want to push the boss to 50% until everyone has had a chance to reset here.
You do NOT want to go into the beginning of Phase 2 low on Sanity
A new Gaze of Madness spawns at 3:20. The DPS goal is to have the boss pushed to 50% before this Gaze spawns. If that doesn’t happen, hard focus the Gaze with no cleave, then finish off getting the boss to 50%
As an FYI, the Sanity orbs that spawn after breaking Adaptive Membrane should go to the tanks as first priority, as it’s much more difficult for tanks to reset Sanity by running to Wrathion
Phase 2
At the start of Phase 2, after Wrathion has blown the hole in the wall for your path, he’ll go ahead of you in his humanoid phase and put down his Sanity cleaning circle
Make sure you run over this on your way into the Phase 2 room
You’ll want your raid split into 2 groups for the beginning of Phase 2. Group 1 goes left, group 2 goes right. The Right side group should have 1-2 more DPS, since there’s more Synthesis Growths on that side
DoT up and lightly attack the Cysts to clear a small path with no goop
We recommend starting with the furthest back Synthesis Growths first. This requires you to run the length of the gauntlet. DoT up the Growths you’ll pass on your way to the back
Once you reach the back, go HAM on the Growths. Keep DoTs rolling on the Cysts to keep open a small safe spot with no goop
After your side kills the growths in the back part of the gauntlet, everyone on that side should use their Legendary cloak extra action button
This’ll bring you back to the start of the gauntlet and in Wrathion’s Sanity circle
Get back to 100 Sanity, then run back up through your gauntlet to kill the remaining Synthesis growths. These ones that are left should be the ones near the beginning of the gauntlet.
Again, keep yourself a safe spot from the goop by DoTing the Cysts
Once all of the Synthesis Growths on your side have been killed, go reset your Sanity one more time by running down to Wrathion
It’s helpful to have a Warlock gateway from Wrathion towards the center of the Phase 2 room
As soon as the boss is re-engaged, the same type of goop from the Cysts will cover an area between the center of the room and where Wrathion is, forcing you to run over goop to get back and forth. The Gateway helps you get past most of this easily, quickly, and safely
Once you begin fighting the boss, he’ll quickly cast Occipital Blast. This is cast at a random player, so it’s very possible it can be cast directly at Wrathion. Be very careful here not to get hit
Everyone should stand within 15 yards of the boss. This makes it easier to avoid subsequent Occipital Blast casts, but keeps the ranged and healers far enough away to make spreading for Madness Bomb easier
All Sanity Orbs that spawn during this part of Phase 2 should go to the tanks first. If they are both at 100%, other players who are lower on Sanity may grab them
Phase 3
Follow the boss as closely as possible as he runs down the hallway between phases. Wind Rush Totem, Stampeding Roar, and personal movement speed buffs should all be used.
Your Sanity is reset while you run down this hallway
He does cast Mind Decay while you run, so spend as little time in that tunnel as you possibly can
Once everyone makes it through the tunnel, move the boss towards the center of the room
We don’t know why, but the purpleish circle in the actual center of the room will insta-kill you if you get too close. See positioning graphic below for recommended spot.
Lust at the start of this phase once you begin fighting the boss
Insanity Bomb affects every single player, and almost always overlaps with Thrashing Tentacles in this phase. Make sure everyone spreads out when Bombs are cast. It’s absolutely worth losing DPS to ensure you don’t get hit by someone else’s circle or the Tentacles
Remember, there’s 4 tentacles per cast in this phase. Make sure you aren’t standing in the shadows, and still are spread out far enough from each other to not be in someone else’s Bomb
The second set of Insanity Bombs overlaps directly with the tentacles. You’ll be exploding as the tentacles are slamming down
After the Bombs explode, everyone should collapse behind the boss in melee range so all the Antigen adds get brought together for AoE
You want to blow up the first set of Antigen adds ASAP
The second set, you want to hold. 15 seconds after they spawn, the boss casts Adaptive Membrane
If you get this Membrane applied to the adds, you’ll get several extra Sanity orbs when they die
We couldn’t test this directly on PTR due to some mechanics previously working differently, but could confirm from P1 that the Antigen adds can get the Membrane and do spawn Sanity orbs if you break the Membrane
You’ll want to also hold the 3rd set until Adaptive Membrane, which is cast 10 seconds after the 3rd set of adds spawns
Same with 4th set, Membrane is cast 5s after the 4th set spawns
During the 2nd, 3rd, and 4th sets of adds, you want to generate as many Sanity orbs as possible, and split them as evenly between the raid as possible. Prioritize people below 30 Sanity to get an orb first to prevent people from getting MCd. after everyone below 30 gets an orb, it’s a free for all. Just make sure they all get used, as they only last 15 seconds
This phase basically becomes a dance. Spread for Bombs and tentacles, collapse to group up adds, wait for membrane, blow up adds, nuke boss. Spread for bombs and tentacles again, collapse for adds again, wait for membrane, blow up adds. Keep going through this until the boss is dead and you get to move on to big daddy N’zoth.
Positioning
Start with the boss slightly to the right-hand side, as that’s where the first Gaze add spawns. Star denotes roughly where Wrathion is:
When the big Tentacle spawns, everyone should adjust and move to it. Melee should run on top of it:
In Phase 2, start with the Growths in the back of the side areas:
Once they die, you’ll come back down, preferably using your Cloak extra action button:
You’ll then fight the boss. Putting him near the middle of the room makes it easier to dodge the beam, and keeps you closer to Wrathion:
Phase 3, everyone just needs to be spread around the boss. Collapse after the adds spawn to help tanks pick them up.